How to Install Brush Cutter Blades

It seems like I've talked all summer about brush hog blades, but I get TONS of questions about them that this video series will help answer. Today the topic is how to install brush hog blades.
You might be wondering why a video like that is needed and be surprised at how many questions I get on this channel, and how many calls come in to an equipment dealership from customers who have installed the blades wrong on their brush cutter. It's not that hard to do.
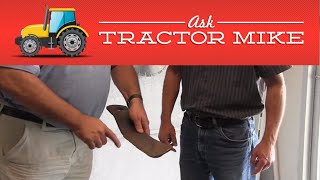
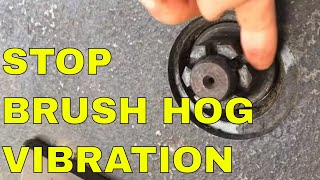
First, if there's not much uplift on the blades, in other words, they're fairly flat, it's possible to install them upside down. I had a recent inquiry by a viewer who was experiencing one side of the brush hog cutting higher than the other. Turns out he had installed one set of blades on one stump jumper upside down. It made about a 3" difference in the cutting height from left to right.
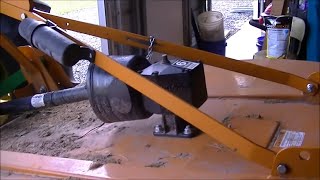
Second, it's possible to install the blades so they're going backwards, and they won't cut very good with the dull side leading the way. We checked the blade rotation on this cutter before installing. Most cutters have decals on the deck that show you which way the blades travel and you want the sharp side going with the arrow, but I don't trust that. If the flunkie at the factory was a little disgruntled, he could switch the decals and cause much mayhem later on. So I prefer to check them with the owner's manual, where there'll be a diagram showing blade direction.
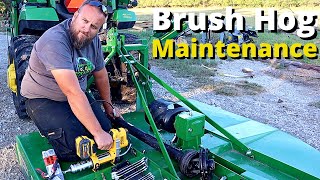
The only other tricky thing is getting the little key on the blade bolts into the slot while pushing up and holding a heavy blade. It's not that hard, but it does require a little effort, and, as I mention in the video, having a big piece of clean cardboard on the floor makes it a lot more pleasant. Also, ALWAYS PUT JACK STANDS UNDER THE EQUIPMENT...DO NOT RELY ON TRACTOR HYDRAULICS TO KEEP THE CUTTER IN THE AIR!!! I've known a couple of people that were crushed working on equipment (or cars) and that's not a good way to go.
A couple of final thoughts that we covered in the video. It will help your dealer out greatly if you shoot a picture of your serial number plate with your cell phone when you're getting ready to go get parts. There were two different blade designs offered on this model cutter and having the serial number insured I received the right set. If you bought the machine from the dealer you're buying parts from they'll likely have that number in their computer, but it speeds everything up when you can just show it to them. Secondly, while you have the big sockets out to tighten the blades, go ahead and check the torque on the gearboxes. That's something a lot of people forget to do because they're big bolts and you'd think they'd never work loose, but there is so much vibration on a cutter that it can happen. In the video, there was one bolt that had worked out enough I put at least a half turn on it. Once those bolts get loose you have a recipe for an ugly and costly failure.
Last thing to do is to tighten the bolts, which on this machine, require 600 ft. lbs of torque. There's no way I have anything able to do that, we got in the ballpark by Chris tightening them as much as he could with his 1/2" impact. To those of you who want everything exact, feel free to yell at me. In a situation like this where it's going to cost me a lot of money to get a torque multiplier to get the exact torque numbers I'm going to say Chris's impact wrench is going to be, "good enough for who it's for."
SUPPORT THE TRACTOR MIKE CHANNEL: / tractormike
Visit the Tractor Mike website: http://asktractormike.com/
Subscribe to YouTube Channel: http://www.youtube.com/user/tractormi...
Visit Facebook Page: / asktractormike312112962245304
Buy Stuff I Use: https://www.amazon.com/shop/tractormike
Copyright 2018 Tractor Mike LLC