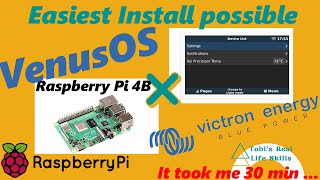
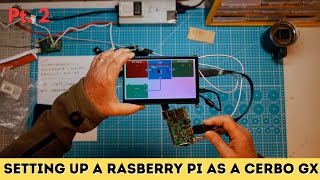
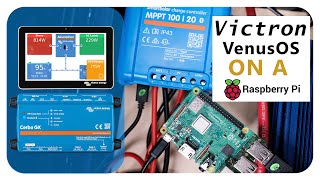
VictronOS Raspberry PI with Touchscreen | VenusOS with Touchscreen like Cerbo GX

Victron VenusOS can be working like a CerboGX with Touchscreen. This is a great alternative to the CerboGX in case you like to get your hands on the Raspberry Pi and VenusOS solution.
Helpful for copy & paste: Enable SSH Video
1. Activate Touchscreen
cd /uboot/overlays
wget https://github.com/kolargol/raspberry...
2. Install Backlight Overlay
wget https://github.com/PiNet/PiNetBoot/r...
3. Edit Config.txt
nano /uboot/config.txt
a. Rotate display 180 degree. Add the following row:
lcd_rotate=2
b. Adjust display resolution. Add the following row:
framebuffer_width=800
framebuffer_height=480
4. Dimm and Standby display (After commands send you can go into the console Settings – Display & Language
NOTE: HERE ARE USED ANGLE BRACKETS, REPLACE THE WORD ANGLEBRACKET POINTING TO THE RIGHT:
echo '/sys/class/backlight/rpi_backlight' ANGLEBRACKET/etc/venus/backlight_device
echo '/sys/class/backlight/rpi_backlight/bl_power' ANGLEBRACKET/etc/venus/blank_display_device
5. Update Packages
opkg update
6. Activate touchscreen
opkg install qt4embeddedpluginmousedrivertslib
7. Install Touchscreen libraries
opkg install tslibcalibrate
opkg install tslibconf
opkg install tslibtests
opkg install kernelmodulerpibacklight
8. Calibrate Touchscreen Part I
TSLIB_FBDEVICE=/dev/fb0
TSLIB_TSDEVICE=/dev/input/touchscreen0
TSLIB_CALIBFILE=/etc/pointercal
TSLIB_CONFFILE=/etc/ts.conf
TSLIB_PLUGINDIR=/usr/lib/ts
9. Reboot:
reboot
10. Calibrate touchscreen Part II
ts_calibrate
11. Activate GUI
nano /opt/victronenergy/gui/startgui.sh
a. Add in the row after „# when headfull“:
export TSLIB_TSEVENTTYPE=INPUT
export TSLIB_CONSOLEDEVICE=none
export TSLIB_FBDEVICE=/dev/fb0
export TSLIB_TSDEVICE=/dev/input/touchscreen0
export TSLIB_CALIBFILE=/etc/pointercal
export TSLIB_CONFFILE=/etc/ts.conf
export TSLIB_PLUGINDIR=/usr/lib/ts
export QWS_MOUSE_PROTO=tslib:/dev/input/touchscreen0
12. Turn On GUI:
mv /etc/venus/headless /etc/venus/headless.off
13. Reboot:
Reboot
14. To turn off:
mv /etc/venus/headless.off /etc/venus/headless
Affiliate links:
Touchscreen Display
https://amzn.to/3yupJse
Raspberry Pi 3 B+
https://amzn.to/3hdAXai
Victron Energy VE.Direct to USB Interface
https://amzn.to/2TbCEx4
Power Supply Raspberry DCDC 12V to 5V 3A Micro USB Converter Voltage Step Down
https://amzn.to/2UE3Ftf
Raspberry Pi 3 B+ Case
https://amzn.to/3qt1Mf3
SanDisk Ultra 32GB microSDHC UHSI Card with Adapter
https://amzn.to/3hArEBJ
Renogy Deep Cycle AGM Battery 12 Volt 100Ah
https://amzn.to/3dgngWO
Victron Energy Smart Battery Sense
https://amzn.to/3wXIdOp
Victron Energy SmartShunt
https://amzn.to/35Ufo9C
Victron Energy SmartSolar MPPT
https://amzn.to/3vVpWzF
Victron Energy Smart Battery Protect
https://amzn.to/3gV6E9q
Victron Energy VE.Direct to USB Interface
https://amzn.to/3jnvEaS
8mm 5/16“ Copper Core NickelPlated Terminal
https://amzn.to/3h5wBSx
Cable Lug Crimping Tool
https://amzn.to/3jjCJcC
Timecodes
0:00 Intro
2:03 – Let’s Start (CMDs)
9:09 – Calibrate Part II
14:49 Outro