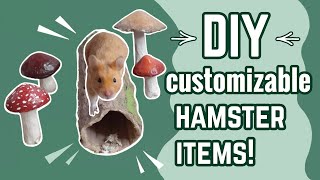
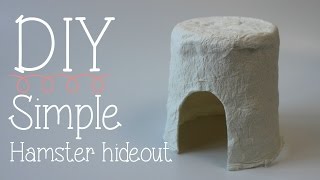
Making 2 Natural Hamster Hideouts | DIY
Watch me make 2 diy natural hamster hideouts that can be used in natural cage setups. I made these for my dwarf hamster. Remember to make a bigger entrance for a syrian. All of the materials are safe for hamsters.
0:00 Hideout 1
2:38 Hideout 2
Transcript
Today I'm making two easy hideouts for a natural setup. First I drew a circle on a thick piece of cardboard and I cut it out.
Next I cut out a long piece and rolled it up to make it easy to bend. This is very helpful for the next step. I've put this piece around the circle to measure how long it needs to be.
I marked a line and I cut it.
I checked again if everything fit perfectly.
I drew a circle approximately in the middle of the cardboard and I cut it out.
I generously applied glue to the edges of the circle. I wrapped the long piece along the edges of the circle and I flipped the whole thing over to check if everything was where it should be.
I used some painters tape to hold everything together.
I took some soft hay and started cutting it.
it's very important to cut the hay into very small pieces.
I put a lot of glue on the sides of the hide and I used a brush to spread it all around. I started to slowly sprinkle hay on top of the glue.
It's normal for most of the hay to fall off so that only a thin layer of hay remains on the hide.
After the glue dries, you can gently tap the hide on a table a few times to shed all the extra hay. This is to prevent shedding later. You can cut off any pointy parts with scissors and remove the pieces of hay that you don't like.
I finished the first hide and let Nosey try it out.
If you don't feel like doing a lot of work, you can use a cardboard box and do the same thing. Or you can use a jar. It doesn't even need to be hay, you can also use bedding like spruce. The second hide is also easy to make but it takes a bit more time. I took a large piece of cardboard and started drawing the base of the house. I drew four squares 10 centimeters tall and wide. I drew a four centimeter tall triangle on two of the squares. I drew a flap on one side. I cut along the outer lines with a box cutter to cut out the base of the house. for me a box cutter works much better than scissors.
Next, I made a shallow cut along the lines where the house needs to bend. Be careful not to cut all the way through. I checked if everything fits perfectly before I started gluing.
At this stage I actually made a mistake. I put glue on the wrong side of the flap. Glue should be on the outer side not the inner. It was a bit irritating but I wiped the glue off and put it on the correct side.
I used a small clothespin to hold the base together and I secured it with two pieces of painters tape. I drew an entrance on one side of the house and cut it out. The reason I'm doing this after gluing the house is that I wanted to choose the sides that turned out better for the front side of the house. After the glue dried I removed the clothes pin and the painters tape.
For the base of the house I am using hay in the same way I used it for the first hide but I have other plans for the roof. To make support for the roof I cut a thin piece of cardboard and folded it in half. I applied a lot of glue to the top of the front and back. I carefully lowered the cardboard and made sure everything was in place. This is the hardest part to do because the ends lift up if you don't press them down. I held it with my hands for a minute or two and then I put a small photo album on top to hold it in place. This kind of glue dries really slowly so I recommend leaving it to dry overnight. The next step was to pluck out pieces of pine cones. I did this while the glue dried. Pine cones are safe for hamsters but the seeds are not so I removed the ones I found. The pieces naturally look like little roof tiles so I will be using them to make the roof. This part of the DIY lasts the longest.
After I finished both sides of the roof I used the narrow pieces to do the top.
If there are any gaps in the tiles you can use sphagnum moss to fill them up. This would prevent your hamster's foot from getting stuck in the gaps. The roof was starting to look like what I'd imagined so I was pretty pleased.
After I finished the roof I started gluing some pieces around the entrance.
Because I don't know when to stop I put a small decoration above the door too.