How To Make Epoxy Resin Cutting Boards - DIY River Resin Charcuterie Boards + Big Time Saving Molds

Shop Our Molds @ https://CraftedElements.com
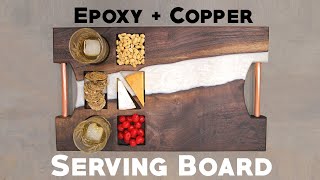
A comprehensive video showing how to create your own epoxy resin cutting board, from raw live edge wood, to finished product.
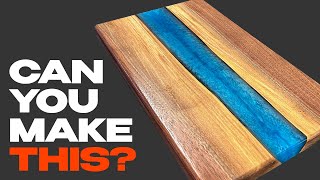
Looking to get started in woodworking and epoxy resin? Follow along while we complete 19 steps to create a beautiful 24x12" charcuterie board using wormy maple and blue epoxy resin. These 'river table' like serving boards are awesome, satisfying projects and are currently in demand as high end gifts, especially during the holidays. Creating something so beautiful has never been more fun!
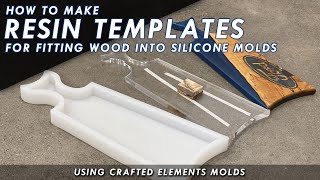
Plus, we reveal time saving techniques using premade silicone or HDPE forms that greatly reduce the production time and stress involved in making these wood and resin boards.
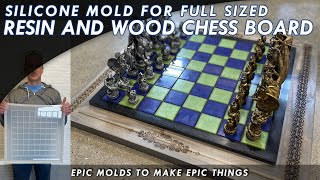
Our silicone molds are the last epoxy resin charcuterie board molds you will ever need. Created just for makers, resin artists and wood workers, these time saving flexible yet durable silicone molds significantly cut down on the setup and demolding time usually involved with other board molds. These molds are superior to wood and tuck tape, and HDPE molds because:
They never need assembled, or disassembled. Saving huge amounts of time.
The strength and flexibility of the molds allows you to insert and remove pieces of wood easily.
The corners and edges never need sealed.
The wood stays in place, tight in the mold, if you cut it 1/16" larger than the width of the mold. Preventing the need for clamps or weights.
The mold is heat resistant (within reason!), and wont damage when you are popping epoxy bubbles with a torch or heat gun.
The molds are reusable. How many times we are currently unsure of, but many of our molds have made 40+ boards and still look new.
Like HDPE, epoxy does not stick to silicone. However in some cases where the epoxy hasn't fully set (and is still mildly tacky) it can be harder to remove, and potentially create pits or small tears inside the mold when your piece is pulled out. Thus, we recommend the use of mold release spray before each pour to increase the life of your mold. This spray is readily available from Amazon.
Recommended Product Links & Resources
*********************************************************
Molds: Crafted Elements https://craftedelements.com
Router Templates: Crafted Elements https://craftedelements.com/collectio...
Router Sled: Crafted Elements https://craftedelements.com/routersled
Epoxy Resin: @TotalBoat https://craftedelements.com/a/totalboat
Makerpoxy (For Pours Under 1/2") https://craftedelements.com/a/totalbo...
Thickset (For Pours Under 1.25") https://craftedelements.com/a/totalbo...
Thickset Fathom (For Pours Up To 3" & River Tables) https://craftedelements.com/a/totalbo...
Pigments: Black Diamond https://craftedelements.com/a/blackdi...
Mold Release Option 1: MG Chemicals 8329 https://craftedelements.com/a/mg8329
Mold Release Option 2: Mann Ease Release 200 https://craftedelements.com/a/mann200
Bark Removal Knife: Beavercraft Draw Knife https://craftedelements.com/a/drawknife
1/4" Flush Trim Bit: Amana 46297 https://craftedelements.com/a/amana46297
1/4" Plunge Template Bit: Amana 47224S https://craftedelements.com/a/amana47...
3/8" Plunge Template Bit: Amana 45475S https://craftedelements.com/a/amana45...
1/2" Plunge Template Bit: Amana 45460S https://craftedelements.com/a/amana45...
2.5" Slab Flattening Bit: Spe Tool 2.5" https://craftedelements.com/a/spetool...