etrailer | Blue Ox Tow Bar Wiring Kit Installation - 2020 Jeep Gladiator

Click for more info and reviews of this Blue Ox Tow Bar Wiring:
https://www.etrailer.com/TowBarWiri...
Check out some similar Tow Bar Wiring options:
https://www.etrailer.com/deptpgTow_...
Search for other popular Jeep Gladiator parts and accessories:
https://www.etrailer.com/vehicle/2020...
https://www.etrailer.com
Don’t forget to subscribe!
/ etrailertv
Full transcript: https://www.etrailer.com/tvinstallb...
Hi there Jeep owners. Taking your 2020 Jeep Gladiator, we're going to be taking a look at and showing you how to install Blue Ox Diode wiring. A diode wiring kit is going to take all the lighting signals from your motor home and transfer them to the lights at the back of your vehicle. This way, when you're flat towing, people behind you will know your intentions when going down the road. This includes your left turn signal, right turn signal, tail lamps, and brake lamps, keeping you DOT compliant in all states as well. There's five main components you'll need when flat towing your vehicle behind your motor home.
You'll need your tow bar, which is the connection between your motor home and your vehicle. Your safety cables, which is a supplemental connection in addition to your tow bar in the event of a catastrophic disconnect. You'll also need your base plate which provides a connection point on your vehicle for your tow bar and safety cables to attach to, as well as, often places for your wiring as well. You'll also need your diode wiring which will take all the lighting signals from your motor home and transfer it to your vehicle, so people behind you will know your intentions when going down the road. And your supplemental braking system, which will apply the brakes in your vehicle when you hit them in your motor home to help you come to a smooth and safe stop.
Some other options beside diode wiring is bulb and socket kit, which would install an additional bulb inside your assembly that you have to drill a hole to add it. But that's really not an option on most modern vehicles with LED lights because there's not room inside for them. Another option would be magnetic lighting, where you can just stick those to a magnetic surface on the vehicle and then run a cable up to the front so you can plug it into your motor home. The only problem with these is that you have to set it up every single time you want a flat tow, you got to get those out put them on, and plug it in around that wire and on some vehicles you may have issues finding a good magnetic surface. The main reason that I prefer diode wiring over any other system is because it uses the factory lights on our vehicle, so it's one of the cleanest looks, it's ready to use every time you want to use it.
You just simply plug it in once you've done the install. And the diodes also protect your vehicle from any of the current that's coming from your motor home. It directs it to your lights and it acts as a oneway check file for electricity, so it can't come from your motor home and then back feed down to your computer systems and damage your vehicle. I also like this type of system because if you're going to install a braking system, many different systems out there require tapping into the diode or the lighting systems to get your brake signal. So this will help you out in that as well.
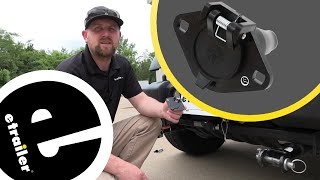
Now, this diode wiring kit does not come with a connection solution here at the front, it just comes with the bare wires. The most common is a 6pole that you'll see here, which you can purchase separately here at etrailer. And if you pay attention to your tow bar, some tow bars do come included with the 6pole connector, so you may not even need to purchase another one. Another option is adding a 4pole connector here at the front. That's not as traditional, as it's only going to give you your lighting signals. So I do highly recommend going with the 6pole instead, so you've got options for additional accessories that you can place in there, such as a charge line kit. Now that we've gone over some of the features why don't you follow along with me and we'll show you how to get it installed. We'll begin our installation underneath the vehicle here at the back. We can actually access our tail light wiring without removing the tail lights because they're right here down below. And we're just underneath the vehicle here at the back corner on the driver's side. And as you can see here, this is the wiring that goes up to the tail light, so we can actually tap into it right here. I just took my razor knife and I cut back some of the sheathing here and I just peeled it off to reveal all the wires. Once we've got it exposed we can get the wires that we need. We want the yellow wire, that's going to be our stop turn circuit for the driver's side here. And we also want the white wire with the gray stripe, B