etrailer | Blue Ox Blue Ox 6-Pole Round Pin Trailer Wiring Socket Review

Click for more info and reviews of this Blue Ox Trailer Wiring:
https://www.etrailer.com/TrailerWiri...
Check out some similar Trailer Wiring options:
https://www.etrailer.com/deptpgTrai...
https://www.etrailer.com
Don’t forget to subscribe!
/ etrailertv
Full transcript: https://www.etrailer.com/tvreviewbl...
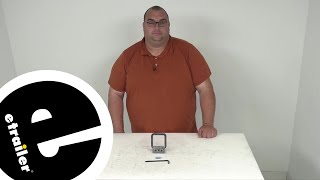
Hey everybody, Ryan here at etrailer. Today, we're gonna be checking out the Blue Ox sixway round, vehicle end, connector plug. With that said, this is gonna make a great replacement connector plug. 'Cause a lot of times, what can happen is with these being plastic, they're pretty heavyduty but, I mean, it is what it is. So, here we have a very similar connector plug. This is the Roadmaster one, that was originally installed.
Nothing wrong with it but they hit something that, it's sitting a little bit low and it cracked. So, it's only a matter of time, once you get a crack in there before, it starts to really come apart, especially the way that our neighbor uses theirs today. They do a lot of flat towing, so it seems a lot of use. So, that's what we're gonna be doing today. We're gonna be replacing it with our Blue Ox one here.
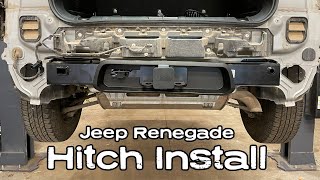
But before we get to that, why don't we just kinda check this out a little bit. So, generally speaking, these are gonna be used on a lot of flat tow applications. It's not to say that they can't be used for other things but this is where you see a lot of them, just like our setup here today on our Jeep. And when it comes to the connector plug, I mean, it's right on par with a lot of the other similar ones. It feels good in your hands, relatively thick plastic.
The lid is actually really tight and springloaded, so it will stay closed when you're not using it to keep all the debris and stuff from getting in there. There are metal ones like this available as well. So, if that's something that piques your interest, you can always check those out. There's a little finger catch there, so you got something to grab to open it up and a catch inside on the lid too. That way, when you put your wiring connector in there, it'll catch it and prevent it from getting accidentally pulled out, which I do think is pretty important on a flat tow setup.
I could see that happening without that there, honestly. The terminals inside look nice. I mean, it's a pretty nice piece, actually. Everything's pretty well put together. It feels good in your hand. And if we flip it around to the back, here's all of our terminals where wires are gonna get plugged into. And there's gonna be several. So, you have your ground, your left turn, your right turn, an auxiliary, your taillight signal, and then another auxiliary, I guess you'd call it, right there in the middle. And so, generally speaking, that's all you're really gonna need. All your taillight and all your light signals. And then a lot of times, you use the middle one for a charge line, if that's the setup you have on your vehicle. And then you'll usually have an additional pin here that you can use for whatever it calls for. A lot of times, you won't use it. Sometimes, people that have the InvisiBrake braking system use this for their indicator light on their motorhome. So, there's some instances where you use the last one but not many. But hey, my thought is I'd rather have it and not need it than the other way around. The plug's also gonna come with this rubber dust boot, too, that slides on it, just to help keep stuff protected and sealed up. And they give you a couple of selftapping screws, too, to mount this up to your base plate. So, I mean, pretty straightforward and not a whole lot to it. And at the end of the day, this is gonna be a good option for those of you looking to just replace your busted sixway connector plug. Or I do know some diode wiring kits don't come with the connector plug, so this is an option too, if you're gonna be installing everything new. Aside from that, that's really about it. Since we are replacing our old one today anyway, I figured why not just kinda show you how to do that. And if you're interested in learning, feel free to hang around, we'll go ahead and do that together now. So, I went ahead and got five out of the six wires hooked up already, 'cause I mean, it's all the same, right Before you hook any of them up though, take your rubber dust cover and put it over your wiring. That way, when we have them done, you can slide that over. So, what you're gonna do, take the bare end of your wire here and just strip the insulation back. About like that should work. Twist those wires up. And then you're just gonna put the wire in the appropriate terminal. And they are labeled. We'll go over those in a second. The white wire's the ground, so that'll be the terminal labeled, GD. You just simply back the set screw out quite a bit. Try not to take it all the way out '