UV Marble Installation || UV मार्बल शीट कैसे लगती है || खर्चा

In this video I Ankur Choudhary describe and provide information about UV Marble Sheet installation
Things in this video
1) How to fix UV Marble Sheet
2) UV Marble sheet accessory
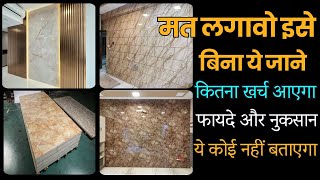
3) Costing of uv marble sheet with installation
Tools and Materials Needed:
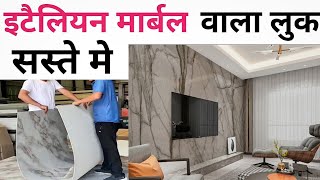
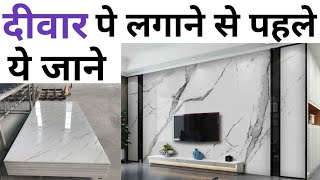
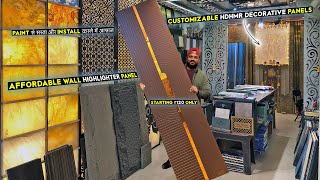
UV marble sheets
Beading glue or adhesive suitable for UV marble
Screws
Screwdriver or drill with appropriate drill bit
Measuring tape
Utility knife
Level
Clean cloth or sponge
Step 1: Preparation
Ensure that the wall surface is clean, dry, and free from any dust, grease, or debris. Remove any existing wallpaper or loose paint and repair any imperfections on the wall surface.
Step 2: Measurement and Cutting
Measure the dimensions of the wall where you plan to install the UV marble sheets using a measuring tape. Measure both the height and width of the area to determine the size of the sheets you need.
Mark the dimensions on the backside of the UV marble sheets using a pencil or marker.
Carefully cut the sheets along the marked lines using a utility knife. Make sure to achieve clean and precise cuts.
Step 3: Applying Beading Glue
Apply beading glue or adhesive suitable for UV marble onto the backside of the UV marble sheet. Spread the adhesive evenly, ensuring complete coverage.
Step 4: Installing the UV Marble Sheets
Starting from one corner of the wall, position the UV marble sheet against the wall surface. Align it properly according to your measurements and desired placement.
Gently press the sheet against the wall, ensuring it adheres well. Use a clean cloth or sponge to remove any excess glue that may squeeze out from the edges.
Step 5: Securing with Screws
Along the edges of the UV marble sheet, determine suitable locations to insert screws for additional support. These locations should be concealed by beading or trim for a neat appearance.
Using a screwdriver or drill with an appropriate drill bit, create pilot holes at the predetermined locations.
Insert screws through the pilot holes and into the wall, securing the UV marble sheet in place. Be careful not to overtighten the screws to avoid damaging the sheet.
Step 6: Repeat and Level
Repeat the process for additional UV marble sheets, aligning them with each other and ensuring a seamless appearance.
Use a level to check the alignment and straightness of the sheets. Make any necessary adjustments by gently repositioning the sheets before securing them with screws.
Step 7: Finishing Touches
Once all the UV marble sheets are installed, clean up any excess adhesive or debris from the surface using a clean cloth or sponge.
If desired, install beading or trim along the edges of the UV marble sheets to provide a finished look and cover the screws.
Thanks for watching perfect floor videos
like share and subscribe