The DIY Curb Appeal ANTIDOTE: $30000 in home value added (How to Build a Gable Porch Roof Overhang)

Get my FREE "How to Build a Gable Porch" Ebook: https://atimprovements.myflodesk.com/...
Check out Rapid Set's Concrete Lineup: https://b.link/ATGablePorchHDRSPage
Building this gable porch roof addition on my fixerupper home completely transformed the CURB APPEAL of my House! Although it did get me in a little bit of trouble with my City / HOA, it will all be OK soon... fingers crossed.
When I bought this fixer upper home a few years ago, the curb appeal was TERRIBLE. So I did the obvious improvements like power washing the exterior, painting the house, replacing the windows and front door, etc. I even poured a new concrete stair landing and entry sidewalk! However, the house still was very unimpressive from a curb appeal standpoint.
As a result, I decided to tackle the ultimate curb appeal project: The Gable Porch Roof Overhang addition!
Adding a gable porch roof to your existing house is a MAJOR home improvement project. I spent days just planning the whole project and modeling the porch roof in Sketchup. But after getting it designed, I ordered all of the materials and it was GO TIME.
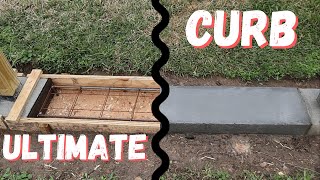
First, I built a new stair landing using Rapid Set's 24/6 Concrete mix which is going to serve as the foundation for my gable porch roof support columns. After that, I removed portions of my home's existing gutters, asphalt shingles, and roof decking so that I could access the front wall of my home.
Next, I attached the post anchors to the concrete foundation and cut my 6"x6" vertical support columns to size. After attaching them to the post anchors, I installed the gable porch joists (which were 2"x6" boards) and anchored them to my existing home using hurricane ties.
Next, we mounted our ridge board for the gable and cut our 2"x6" common rafters to size. I have super detailed information on all of the gable porch roof framing within my EBOOK linked above!
After attaching the common rafters using a framing nailer, I installed the valley plate (also know as a "sleeper") on my existing house. The Valley plate will serve as a solid base for the jack rafters that we will cut and install next.
To cut the jack rafters, you will first need to match the pitch of your gable where the jack rafter meets the ridge. For the bottom of the jack rafter, however, you will need to cut it at mitered angle on your circular saw so that it rests flush with the valley plate. In other words, you need to adjust the miter angle on your miter saw so that it matches the pitch of your homes roof. Again, refer to the EBOOK for more info on cutting the jack rafters.
Once all of the jack rafters were attached to the valley plate and ridge board using a framing nailer, I decked the gable porch roof with 4'x8' sheets of plywood.
Once the gable porch was framed and decked, I installed PVC fascia boards on the sides and the front of the gable.
Although I was tempted to install asphalt shingles on the gable porch roof addition myself, my entire roof needed to be replaced. For that reason, I decided to just hire a contractor to install new shingles and gutters on my entire house. It was expensive, but it saved me a whole lot of time.
At this point, I turned my attention to the underside of the gable and I installed tongue and groove boards (as a soffit) to give the entire project a more professional look. I stained the lumber a "light walnut" color using Defy Wood Stain. Use code ATIMPROVEMENTS at this link to get 10% off: https://defywoodstain.com/?dt_id=1268710
Finally, I installed a stone veneer post wrap around the vertical support columns.
And at this point, the Gable Porch Roof Overhang project is complete!
If you are considering tackling a Gable Porch Roof project, I definitely recommend that you check out my EBOOK:https://atimprovements.myflodesk.com/...
Be sure to subscribe and hit the notification bell so you don't miss any future videos!
Here's where you can find Rapid Set's 24/6 Concrete Mix: https://b.link/ATGablePorchHD246CMPage?
▬▬
Follow me the Gram: / atimprovements
Subscribe to my YouTube Channel ⬇ https://www.youtube.com/c/AndrewThron...
▬▬
TOOLS THAT I USED for this project
Drill: https://amzn.to/3JICKkk'>https://amzn.to/3JICKkk
Tape Measure: https://amzn.to/3HaTWgE
Circular Saw: https://amzn.to/3BFotC4'>https://amzn.to/3BFotC4
Masonry Drill: https://amzn.to/36yP1JW
Level: https://amzn.to/3HowUDn
Hammer: https://amzn.to/35fIpiT
Chalk Line: https://amzn.to/3MwSDg8
Clamps: https://amzn.to/3HLqwpK
Drill: https://amzn.to/3JICKkk'>https://amzn.to/3JICKkk
Circular Saw: https://amzn.to/3BFotC4'>https://amzn.to/3BFotC4
Air Compressor: https://amzn.to/34TatJf
Framing Nailer: https://amzn.to/3JGpBYU
Orbital Sander: https://amzn.to/34UwlUD
Bar Clamps: https://amzn.to/3JjFrJe
▬
*All content on the Andrew Thron Improvements YouTube channel reflects my own opinions. Please seek out guidance of professionally trained and licensed individuals before making any decisions. Links in the description may be affiliate links.