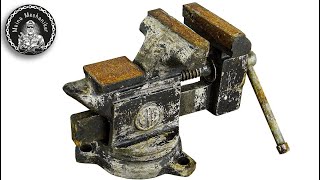
Restoring a 1950's 'Littco' Littlestown Swivel Base Vise to Better Than Factory New

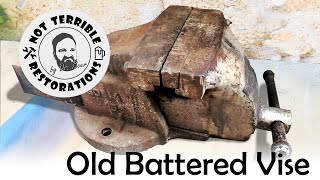
The “Littco” no. 112 vise – the everyday handyman’s vise for the garage or basement workshop. One of many massproduced vises in the 1950’s for general garage and household use, vise enthusiasts run across dozens (if not hundreds) of Littlestown no. 112’s over their years of collecting.
Littlestown Hardware and Foundry Company, Inc. was started in 1916 as a grey iron foundry with sixteen employees. During WWII, they produced hand grenades, rifles, bomb plugs, and antipersonnel mines for the war effort. PostWWII they expanded into aluminum castings, but their bread and butter was always the “Littco” vise line.
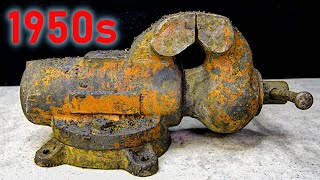
This vise wasn’t in terrible shape when it was gifted to me by my girlfriend’s grandmother – mostly dings, dents, and errant paint over the years. The raw, massproduction quality of the original castings seemed to be the most detrimental thing about it! The castings were easy to smooth out a bit but still leave some imperfections to retain some of the original charm it acquired over the years. The most difficult part of the restoration was fixing a crack that ran through the swivel base at an area of stress concentration due to the geometry of the rotating base. I wanted to try something new and attempted to braze the crack. I don’t own welding equipment and my trusty MAP torch is the hottest flame I have. But it simply can't dump enough heat into it fast enough to melt the bronze brazing rod. I knew this was going to be the case going into it, but I’m stubborn! I left the brazing failure in the video as a teaching moment. I ended up regrinding the crack and repairing it with JB Weld steel epoxy. A special note when you grind cracks for welding or brazing prep: avoid using cutoff wheels or basic sandpaper abrasives if possible, as you can leave behind oxide particles that after welding can act as stress concentrators and form new cracks. For painting I chose a metallic blue color, partly because the original dark green was boring and partly because most other Littlestown vise restorations are also done in green and I wanted this one to stand out. I normally don’t like highlighted letters, but I went outside my comfort zone and tried it and I think it went well – slow and steady is the name of the game. The pen gives you ultraprecise control compared to a brush or toothpick.
Timestamps
0:00 – 1:13 Overview
1:14 – 3:41 Disassembly
3:43 – 5:17 Rust removal on small hardware
5:18 – 9:33 Sanding and bluing small hardware
9:34 – 10:31 Rust removal and sanding screw/handle
10:32 – 10:58 Cold bluing/painting screw/handle
10:59 – 12:53 Electrolysis and wire wheeling of castings
12:54 – 16:19 – Sanding and filling castings
16:20 – 17:15 Brazing fail
17:16 – 17:35 Plan B crack fix
17:36 – 18:04 Priming
18:05 – 18:30 Painting
18:31 – 18:49 Installing bushing
18:50 – 19:58 That peeling feeling
19:59 – 20:53 Highlighting letters
20:54 – 22:56 Reassembly
22:57 – 23:23 Final reveal
23:24 – 24:17 Testing
24:18 – 24:38 Thanks for watching! Please like, comment, and subscribe!
Tips for restoring your own Littco no. 112 vise
Cleaning and rust removal can be done a number of ways. I prefer EvapoRust or electrolysis, but a cheaper solution is plain old vinegar. I usually soak the smaller parts in EvapoRust and use electrolysis on the larger parts to be more economical. A good electrolysis tutorial: • Infinite Rust Removal? DIY Electrolys... . With EvapoRust or vinegar, soak for at least a day, then scrub with a steel wire brush or wire wheel on a drill or bench grinder and your parts will be easily cleaned to bare metal. You can use a small Dremel wire wheel for any nooks and crannies.
For paint prep, be sure to wipe all the parts with a degreasing solution or acetone and mask off any areas with mechanical motion or that you want to leave bare metal. In my case, I wanted to leave parts of the jaws in a “brushed” metal look so I masked them off after sanding to around 320 grit. For painting, I prefer using Rustoleum’s metal etching primer and/or filler primer followed by a Rustoleum color of your choice. I used etching primer for this project because filler primer would make the letters hard to read. Allow enough time for the paint to harden (a few days, ideally at least a week) before reassembly. For the nuts and bolts and handles, you can leave them bare metal, polish, or blacken them with cold or hot bluing (blackening). I used a combination of black enamel paint, cold bluing, and hot bluing with a quench in linseed oil. For hot bluing, make sure you keep an eye on the linseed oil – quenching too many parts in a row too fast can dangerously heat up your oil. And any rags/towels that come in contact with linseed oil must be carefully laid out to dry in an open space. If you ball them up the heat during drying can cause them to spontaneously combust.
Catalyst Restorations Social Media
Instagram: @catalyst_restorations
#vise #restoration #antique

![I Restored and Enhanced this $1 Antique Wood Level with Brass! [feat. How to Brass Plate Steel]](https://i.ytimg.com/vi/iCwDMyTs4-s/mqdefault.jpg)