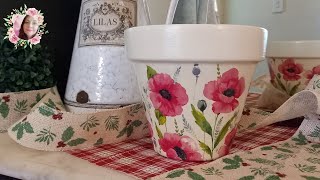
How To Transform 3 Flower Pots Into THE Eye-Catcher!

Flower Pot Windmills – Charming DIY Garden Deco That Will Transform Your Backyard Windmills evoke strong images of a quaint countryside village in Holland and a relaxed pace of life. The charm of a windmill is undeniable, and it is a beautiful attraction, no matter the size. Now you too can create such an atmosphere in your own garden or backyard with just three simple flower pots. So roll up your sleeves and get to work!
Bookmark Article: http://www.cleverly.me/flowerpotwin...
Save on Pinterest: https://bit.ly/2NYCcup
➡ Thanks for watching and don't forget to subscribe for more DIY crafts & projects, genius life hacks, clever tips & tricks, valuable health hacks, and fun facts: https://www.youtube.com/cleverly_diy?...
******************************************************
You'll Need:
3 flower pots in different sizes
red, white, and black acrylic paint
4 sets of: 5 wooden skewers and 2 popsicle sticks
2 corks
toothpick
paint brush, hot glue gun, knife
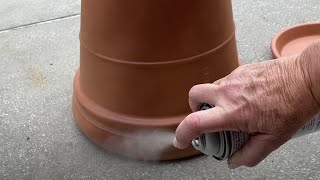
waterproof spray
Here's How:
1. Paint the rim of the flower pot white. After the paint has dried, tape off the white section and paint the rest of the pot red. Repeat with the other flower pots.
2. Lay the pots upside down and glue them stacked on top of one another with a hot glue gun — this works best if the pots are just one size apart. Paint a black door and white window frame on the bottom pot.
3. To create the windmill blades, first prepare the wooden skewers and popsicle sticks as shown in the video: 1 long skewer, 3 medium skewers, 6 skewer pieces, and 2 popsicle sticks. Take the the long skewer and place it between two medium skewers. Evenly align the three skewers and glue a popsicle stick to the bottom with the rounded edge facing out. Glue the other popsicle stick above that, also with the rounded edge facing out, so that it looks like one long popsicle stick is glued to the one side. Turn the blade over and glue the six skewer pieces to the back, making sure to evenly space out the pieces. Finally, glue the third medium skewer to the edge of the skewer pieces, as shown in the video, and paint the entire thing white. Tada — now you have your completed windmill blade! Repeat this three more times with the rest of your supplies to create the other windmill blades.
4. To create the hub of the propeller, connect two corks with a toothpick or an extra skewer piece. Sharpen the bottom of one cork and paint the entire contraption white.
5. Evenly space the completed blades around the propeller hub and push the protruding stick parts into the unsharpened cork. Push the sharpened cork into the hole on the top flower pot and your windmill is ready to go. Spray the entire thing down with waterproof spray to make sure it lasts for many seasons to come.
******************************************************
Do you want to see more content like this? Cleverly brings you clever tips, tricks & life hacks to simplify everyday life, so be sure to subscribe, like, and follow us for a firsthand look at new videos that you can share with your family & friends!
YouTube: / cleverly_diy
Facebook: / cleverly.me
Instagram: / cleverly.me
Pinterest: / cleverly_diy
Website: https://www.cleverly.me
******************************************************