How to Replace a Globe Liner | Litter-Robot Customer Support
LitterRobot 3 is equipped with a flexible black TPE (thermoplastic elastomer)globe liner. It has a raised fill line to indicate how much litter to add to LitterRobot. If you are experiencing any issues with the globe liner not functioning properly or simply wish to replace it with a new, cleaner liner, follow this easy stepbystep instruction video to replace the Globe Liner.
Tools needed:
Phillips head screwdriver
Flathead screwdriver
In this stepbystep tutorial, we'll guide you through the process of replacing the Drawer Full Indicator (DFI) and pinch terminals and repair LitterRobot. Let's keep your LitterRobot in purrfect shape!
Use this DFI Kit Replacement guide if you are experiencing any of the following:
Red light flashing
LitterRobot not cycling
LitterRobot stuck midcycle
LitterRobot stuck upside down
LitterRobot not sensing cat
Globe liner damage
Excessive odor
Replacement parts:
LitterRobot 3 Globe Liner Kit https://www.litterrobot.com/litterr...
Timestamps:
00:00 Introduction
00:11 Powering down LitterRobot
00:25 Removing the globe
00:38 Disassembling and removing the globe liner
2:16 Installing the new globe liner
3:08 Reassemble LitterRobot
4:27 Final checks
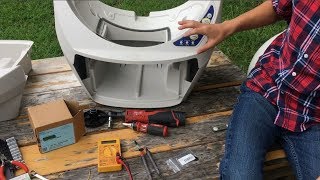
Powering Down and Disassembly:
First, empty the litter from the LitterRobot globe and power down your unit by clicking on the power button and unplugging it.
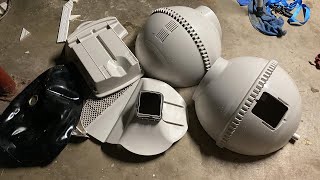
Remove the bonnet by pressing on the latches on the side.
Remove the globe and set aside.
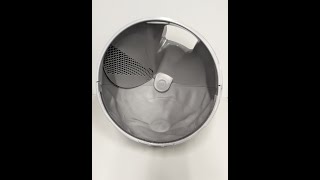
Removing the globe liner:
Using the Phillips screwdriver, remove 2 screw caps from the globe then remove the 8 screws from around the equator of the LitterRobot globe. Split the halves.
Remove the foam strings and discard.
Remove the back bolt and nut at the top of the LitterRobot’s opening..
Remove the old globe liner.
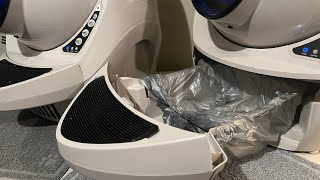
Installing the new globe liner:
Center the liner inside LitterRobot’s globe and slide the Tmount into the Tslot.
Wrap the globe line around the entryway edge.
Push the liner ridge into the globe channel.
Replace the black screw and nut at the top of the opening.
Place new foam pieces into position and replace the top half of the globe.
Replace the top half of the globe and finish by replacing the 8 screws along with the screw caps.
Final Checks:
Plug your LitterRobot 3 back in and ensure the shield is on the track if applicable. Adjust if necessary. Let it complete an initialization cycle.
If you have any questions, contact our customer experience staff at [email protected].
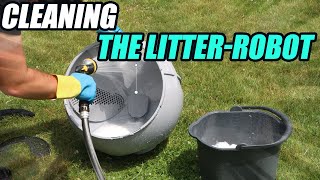
To avoid replacing the globe liner too frequently, we recommend cleaning LitterRobot 3 using the following guide:
https://www.litterrobot.com/support/'>https://www.litterrobot.com/support/...
Consult our related support articles or contact our team.
Support Articles:
Installing the globe liner https://www.litterrobot.com/support/'>https://www.litterrobot.com/support/...
Globe not moving and solid yellow light https://www.litterrobot.com/support/'>https://www.litterrobot.com/support/...
What happens if the globe jams https://www.litterrobot.com/support/'>https://www.litterrobot.com/support/...
Troubleshooting globe magnets https://www.litterrobot.com/support/'>https://www.litterrobot.com/support/...
Visit our support center for more helpful articles or contact our team via chat, phone or email: https://www.litterrobot.com/support/'>https://www.litterrobot.com/support/
Warranty information: https://www.litterrobot.com/explore/...
Subscribe for more tips and troubleshooting guides to keep your LitterRobot running smoothly! ✨ #LitterRobot #CatCare #TroubleshootingTips
/ @litterrobot
https://www.litterrobot.com/