etrailer | Trailer Brake Controller Installation - 1994 Chevrolet C/K Series Pickup

Click for more info and reviews of this CURT Trailer Brake Controller:
https://www.etrailer.com/TrailerBrak...
https://www.etrailer.com
Don’t forget to subscribe!
/ etrailertv
Full transcript: https://www.etrailer.com/tvinstallc...
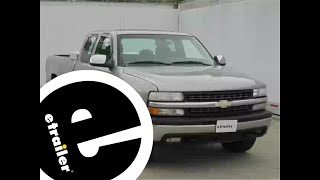
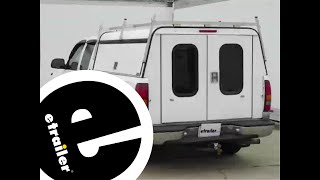
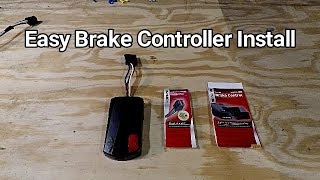
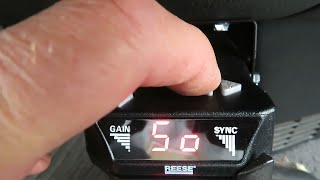
Today on our 1994 Chevy Pickup, we'll be installing the Curt Triflex Brake Controller, part number C51140. This will be in conjunction with the etrailer Brake Controller Install Kit, part number ETBC7. We'll plug in our trailer and we'll have a CC showing that our trailer wiring is connected, then we can press on the brake pedal and watch the numbers increase. We can also use the hand sweep to energize our trailer braking. Once we remove our trailer wiring from the 7Pole connector, we'll get a DC for disconnected. To start, we'll first go ahead and assemble the 7Pole adapter bracket.
With the hardware provided, we'll use it to attach the bracket to the 7Pole adapter. We'll go ahead and take the bracket, feed it over the wires, and up to the back of the mounting surface for the 7Pole adapter. Then we'll take the screws, feed them through the front side of the 7Pole, and secure it with the nuts on the back side. Once we have all 4 in place, we'll go ahead and tighten them down. I'm going to go ahead and take some black electrical tape and wrap up 8 to 10" of our wire. This will assist in bundling our wires together and help protect it from the elements.
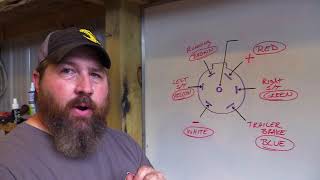
Now we can go ahead and take the 7Pole bracket and attach to the hitch bracket. Once we've secured the 7Pole to the hitch bracket, we'll now go ahead and take the 4Pole connector coming out of the back of the 7Pole connector and attach it to the 4Pole connector already installed on the vehicle. Note it's recommended to use some of the Edelman dielectric grease, part number 11755, between these 2 connection points to help keep them free from dirt, dust, debris, and especially moisture and preventing corrosion. Then we'll take the gray duplex cable from our install kit, strip it back, and attach it to the 2 butt connectors coming out of the back of our 7Pole connector. We'll connect black to black and white to blue. The black wire will be the 12volt hot supply to our 7Pole connector and the blue wire is for trailer braking.
We'll go ahead and wrap it up with some black electrical tape to bundle up our wires, clean up our install, and keep it free from dirt, dust, debris, or moisture. We'll go ahead and run the wire along the top of the hitch and over to the frame. Once we secure the wire, we'll then take the white wire with the preattached ring terminal and the self tapping screw provided with our install kit and secure it to the frame, providing a ground for our 4 and 7Pole connector. Then we'll go ahead and take the gray duplex cable and follow the frame up into the engine compartment and ultimately to the battery. Keep in mind when routing your wires, stay away from any moving components such as steering or suspension, or excessive heat such as exhaust. We'll use the black zip ties provided with our install kit to secure it as we go.
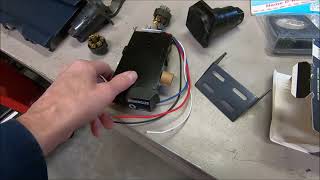
We'll need to find a grommet bushing or make and install a bushing to route our wire into the cabin of the vehicle through the firewall. Because we don't have any manufacturer's accessible grommet or bushing to go through, we'll go ahead and install the Spectro Snap Bushing, part number SWC8057. First, we'll go ahead and drill a pilot hole and verify that we have plenty of room to install the Snap Bushing. Once we've got our pilot hole drilled, we'll go ahead and use a step fit process, using larger sizes to get to our final size of 11/16ths. Once we've drilled our final size, we'll go ahead and install the Snap Bushing into the firewall. Once it's in place, we'll then go ahead, mark our gray duplex cable where it will go through the fire wall, split the gray duplex cable, so that the white wire can run inside the cabin of the vehicle and the black wire will route across the top of the fire wall, over to the passenger's side and near the battery. We're going to go ahead and route a power and ground wire for our Brake Controller. For this application, we'll need to add an extra length of wire, so we'll use the ETBCXW Kit for an additional 10' of the jacketed gray duplex cable. We'll go ahead and route it through our Snap Bushing into the cabin of the vehicle. We'll go ahead and move inside the cabin of the vehicle. We'll install the Curt Triflex Brake Controller. Now, with our Curt Brake Controller mounted and secured, we'll go ahead and install the Curt Universal Wiring Adapter, part number C51515. Then we'll go ahead and route the wire underneath the dash, towards the brake switch, so we'll follow the wiring down until it goes into the wiring harness where it's easily accessible. We can remove the black electrical tape and then use our test l