etrailer | Solara Slide Topper Installation - 2022 Forest River Salem FSX

Click for more info and reviews of this Lippert RV Awnings:
https://www.etrailer.com/RVAwnings/L...
Check out some similar RV Awnings options:
https://www.etrailer.com/deptpgRV_A...
Search for other popular Forest River Salem FSX Travel Trailer parts and accessories:
https://www.etrailer.com/vehicle/2022...
https://www.etrailer.com
Don’t forget to subscribe!
/ etrailertv
Full transcript: https://www.etrailer.com/tvinstalls...
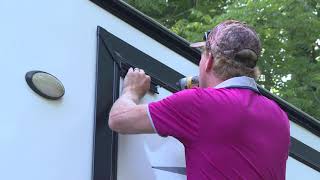
Hi, everyone. Aiden here at etrailer. Today we're gonna be taking a look at and show you how to install this Solera slide topper on our 2022 Forest River Salem FSX travel trailer. So this one is going to be the black color option. You can see everything from the hardware, to the bars, and the slide topper itself is gonna be black. So I think for this camper it blends in pretty well, but I think just as easily, you could go with the white option.
Both are gonna be the exact same install process and give you the same features, just different looks. So depending on your camper and what style you're going for, you can get it to match. With the black one here, it matches our awning on the other side so I think this is gonna be an ideal choice for this camper. The slide topper itself is gonna be seven feet and seven inches wide with up to 48 inches of projection. That's how much it can extend.
Now with our camper and our slide out here, it fits just fine and we're not even using all of its capacity so we're all good there, and it's more than wide enough to cover the entire slide out. The slide topper itself is made of a 13.5 ounce vinyl, and it's a really solid material that should hold up pretty well in the cold, and especially to things like rain and moisture. Now why you might want a slide topper, they're gonna be really helpful for situations where you're maybe leaving your camper parked somewhere for a long time, or maybe you're going camping in the fall where things like twigs, leaves, and just general debris is falling down from trees above you. Things that fall on top of your slide out and then when you bring that slide out back in, all of that stuff gets stuck inside. The slide topper is going to automatically come out and roll back in with the slide out, and keep that whole top area protected.
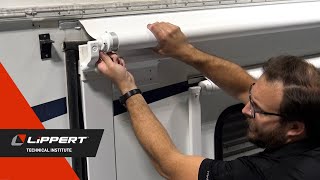
So any leaves or things that collect on top of there is going to just get pushed off whenever you roll your slide out back in, rather than going in through the seams and getting trapped up there. The fact that everything retracts automatically and is under spring tension makes it really convenient to you 'cause you really don't have to think about it once it's installed. And with it all rolled up like this, you can see it's a very clean look. It doesn't stick out super far, all the end caps have covers on them to hide the moving pieces, all of the bolt on brackets here have covers to hide the hardware so it's very straightforward. It's a very clean look, and this camper has the prep package.
So if you have a different year make model it might be a little bit different, but for our camper today it had the brackets preinstalled so it really eases up the installation process. Speaking of that installation process though, let's walk through it with you right now. Starting off the installation, our process today is gonna be a little bit easier just because our camper has the prep kit for the slide topper. The way you can tell that is by going to your slide out and seeing if you have these cover plates in place, and these brackets preinstalled. And above that, right below our rain gutter, we're gonna have another set of tracks. That's another piece that our slide topper will go into. So if you don't have this exact year make model of camper that we have but you're still watching this video to kind of see the process, be sure to check your own camper. This part number and this kit will still work for you, but if you have the prep kit, you just don't need all the pieces that come in the kit, and you don't need to follow all the installation steps. So we're gonna be showing you how to install it with the prep kit today. Back on the ground, we can take the slide topper, find our extension rods and these Phillips head screws. These extension rods are gonna get slid into the end caps over here with the holes on one end matching up with the holes in the end caps, and getting secured down with that Phillips head screw on both sides. Speaker Great, that's great. Now we wanna come back up top and turn our attention back to the preinstalled brackets. Again, your camper might have them installed already if you have the prep package, but even if you do, you do wanna take a closer look at them and make sure that all the hardware is there. Ours are preinstalled but only with t


![RV/Motorhome SlideOut Awning Topper Install [HowTo]](https://i.ytimg.com/vi/rkvDE-aSh6Y/mqdefault.jpg)