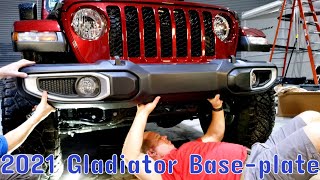
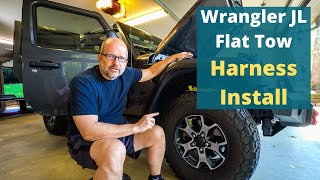
etrailer | Roadmaster Direct-Connect Base Plate Kit Installation - 2021 Jeep Wrangler

Click for more info and reviews of this Roadmaster Base Plates:
https://www.etrailer.com/BasePlates/...
https://www.etrailer.com
Don’t forget to subscribe!
/ etrailertv
Full transcript: https://www.etrailer.com/tvinstallr...
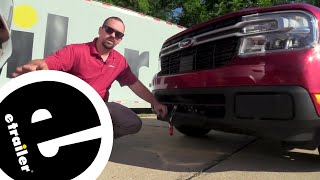
Hello neighbors it's Brad here etrailer. And today we're taking a look and installing the Roadmaster baseplate on a 2021 Jeep Wrangler. So this is what the baseplate's gonna look like installed and actually hooked up in its flat tow set up. So you can see that it's pretty nice and spaced out here, allowing everything to kind of have some space to work around and actually attach our safety chain loops are nice and far enough away, but easy to actually clasp onto. And all of our connections with this included bracket are really nice because it puts it at a nice even spot in the middle using factory hole locations. Now and not in use, you can go ahead, drop this out and then you can actually remove these arms just by pulling this twisting.
And then they come out giving you a more OEM appearance. And that's the great thing about the baseplate on these Wranglers is the fact that it does kind of give it a tough appearance. It hides well under the bumper as well. So when you're not flat towing your vehicle, it's not on sight. At the baseplate is gonna be one of five main components required for flat towing a vehicle.
So the baseplate is actually attached to the frame of the vehicle, allowing you to make that connection point to the tow bar. Well, the tow bar is gonna be the connection point between your baseplate and the hitch of the RV. Moving along we have our safety chains here, and that's just going to make sure that we actually have another connection just in case this was to fail. So this is just an added protection and this just links up to the holes on our safety chain loops on the baseplate to the ones on the hitch of the RV. Now you also will need a supplemental proportional braking system.
And what that's gonna do is when you put the brakes on your RV, it's gonna send a breaking signal to the vehicle, and it's gonna allow this vehicle to slow and stop. Not only making it safer for you while driving, but also it's going to help stop as you like. This is gonna be dragging a little bit behind with those brakes and slowing down the RV . with that there's also a breakaway switch. So in case our safety chains and our baseplate or tow bar fail, this will actually pull this cable, putting the brakes on, and that way you don't have a vehicle rolling down the highway.
Now you have your diode wiring here as well. And that's gonna send signals from our electrical connection on the RV to the vehicle. And it's gonna allow this to actually use the light signals from the RV. So when you put your turn signals on your running lights and brake lights, it's actually gonna show up on the vehicle. So that's gonna let people know when you're actually signaling or stopping, keeping you safe and legal. Now, when you are ready to use your baseplate, it's gonna be pretty simple to attach them. Now these arms are going to be specific to Roadmaster. Now, if you need to change them out, if you have a different brand tow bar, there's actually adapters available to make sure that you're still able to hook up. So pretty easy here it's gonna just kind of slide out. We'll run our pin in. Make sure that we're aligned here. Put our pin in here, clasp that down. Now we can do the other side. So now we just need to hook up our remaining connections. So our safety chain loop's here. Go ahead and take our breakaway cable. And this is just gonna kinda route to where we have attached our safety chain loops on our safety hooks there, and then we can take our diode wiring and get this plugged in. Now we're ready to put our vehicle in flat tow mode and hit the road. We're gonna begin our installation on the passenger side, and we're gonna just disconnect the harness that has the fog lamps. Since we will be removing the bumper that way we're not gonna pull that wire along with us. So it's pretty easy to do as the plug sits right here on the frame rail. So you'll just push on the tab and separate these. So while pushing on this tab, you're gonna see that it's gonna separate here. So you can pull on this end and get this separated out. Next we're gonna go up to our drip tray. That's gonna be on top here in between the bumper and the front of the vehicle, and you you're gonna see two plastic push pins. So you're gonna want to pry those up sometimes it helps you can actually kind of rotate this to where you can get the slot lined up. And then with a small flat head just pry up on that center one, sometimes a twisty motion helps kind of separate it, working around those edges. Once you get that top portion up, it helps to actually have a trim panel tool here, and you can kind of pry these up. And then once y