etrailer | Optronics Submersible Trailer Light Kit Installation

Click for more info and reviews of this Optronics Trailer Lights:
https://www.etrailer.com/TrailerLigh...
Check out some similar Trailer Lights options:
https://www.etrailer.com/deptpgTrai...
https://www.etrailer.com
Don’t forget to subscribe!
/ etrailertv
Full transcript: https://www.etrailer.com/tvreviewop...
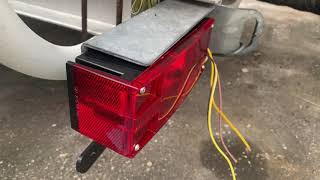
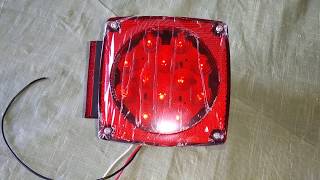
Today we're gonna take a look at, and show you how to install the Optronics Submersible Under 80" Trailer Light Kit with 25foot Wiring Harness. Part number is TL5RK. Now, this trailer rewiring kit is really gonna give you all the lights you need to make sure your trailer's within compliance with all the laws and regulation. This light happens to be on the driver side, has our license plate illumination panel there on the bottom. Got our side lights and our stop, turn, and brake lights here on the back. The passenger side light's gonna be identical to this one, it's just not gonna have that open panel at the bottom, or that clear lens at the bottom to illuminate your license plate.Now, if you're using marine applications, these are gonna be an excellent choice as well.
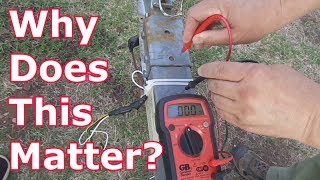
These are submersible lights, that means they are protected inside with a small cover. And there's also a hole here at the bottom to allow any moisture out that might be trapped inside the housing. One thing you definitely wanna do though, it's highly recommended to unplug the lights from the back of your vehicle as you're backing into the water. You don't wanna get water in here in this bulb, if it's really hot you could run risk of damaging it. Here you can see our side maker light has the single stud attachment point, which grounds right through the light.
So you just have one wire that's gonna get connected right to the running light wire from our yharness. You'll notice that the lens is also reflectorized, so as it's sitting out somewhere dark when headlights hit it, it's gonna shine and be visible.Now, this kit features incandescent lights, which are gonna be our standard glassfold kind of lights. They're gonna do a good job of matching what was originally on the trailer. If you are going through a complete rewire on your trailer, if you're trying to update a trailer, a lot of the newer LED lights are also a good choice. So, that's something to consider.
They tend to last longer, you're not gonna have to worry about bulb replacements nearly as much. They don't draw as much power through our vehicle. And they tend to give kind of a clearer, brighter light. So, definitely, something to keep in mind if you're going through the work of changing over an entire trailer, might be a good option to pick as well. Now, you can see the 4pole connector, unlike a lot of the other ones, is encased.
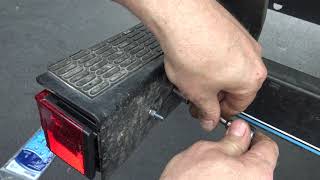
So, as you make your connection with your vehicle it's gonna offer a little bit more protection for us.Now, to begin our install, we wanna choose the appropriate side of the plug. In your kit you're gonna get both the truck side and the trailer side. The trailer side's gonna be the more squared one, where this ones gonna have our threeleads and our bigger ground. Now, most vehicles are gonna be equipped with a 4pole plug on them already. If you're using this trailer or this wiring kit for a trailer that's going to be connected to a car that doesn't already have a wiring kit, check our website and look for something custom fit for your application, so you know it's gonna work. With this lead, you're basically gonna be tapping into, directly to your brake lights, tail lights, and it's just not protected that way. So, it's a good idea to get something custom fit. If you just need a replacement, this is a really good idea. You can just replace the 4pole coming out of your vehicle with this one by matching up the wire color.Now, we've stripped our trailer down, removed all of the old lights. We're gonna be replacing everything all the way back. The only thing we haven't stripped out yet is our old wiring. As long as it's intact, we can use this and pull our new wiring through. So, make a couple loops here on the end. This is the right side of the trailer if we're looking at it from the back. On this side, your green and brown wire is the one you'll wanna run back. The left side of the trailer, looking at it from the back, is going to be your yellow and brown wire. Just gonna bend these over, I'm gonna attach them to the old wires, tape them off and use those to kind of guide it through. Electrical tape's generally what we use here, just to hold these together. Now, you see, kind of what we're gonna do, we'll pull on our old wire and it's gonna bring our new wire through.Now, one thing you wanna keep in mind as you're routing your wires is to leave enough length to easily be able to connect to the back of your vehicle. I'm gonna bring it out just a little bit further than what this ground is gonna allow. So, we'll