How to Troubleshoot Trailer Lights that are not Working

Welcome to my channel, Homes for Beginners where I show you how to do repairs around the house yourself. Please don't forget to hit that LIKE button and SUBSCRIBE for future videos.
#diy
In this video I will be showing you how to troubleshoot #trailer #lights, this included everything right at the vehicle lights, all the way down to the lights on the trailer and everything in between.
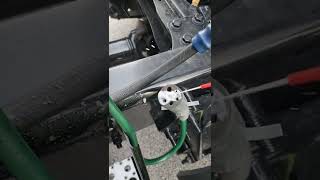
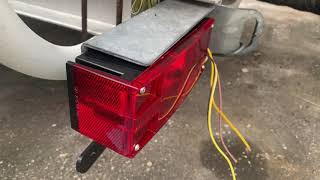
When I bought this trailer, the lights were acting up. These are the original incandescent lights, newer trailers may have LEDs, the same process does apply. As you can see the signal light is acting up. When I move the connection, the light then starts to work.
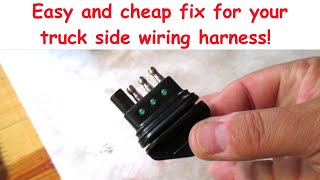
Once I pulled apart the harness on the truck, I found crimp connections were used and typically I’m not a fan of these. If the crimp isn’t tight enough which is what the case was here, there won’t be a good connection and eventually, the wire will pop out. Next is that crimp connections don’t provide a weatherproof seal unless you use the heat shrink style, but they can be expensive to purchase or at least where I live.
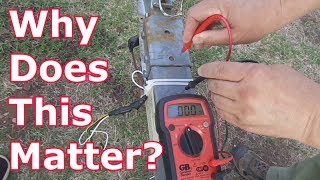
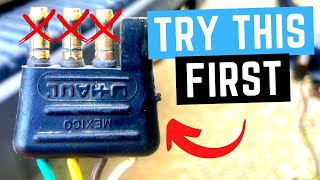
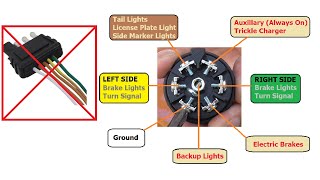
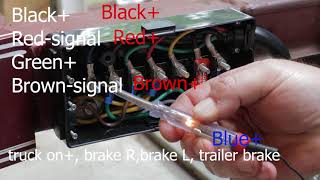
Using a test light, this can determine if there is power at the connection. Turn on your parking and hazard lights, the hazard lights will activate both the left and right turning signals. Connect the test light to the ground terminal, this is the exposed one. Then probe the other three terminals. The test light should illuminate solid for the parking light and flash for the signal lights.
If nothing is lighting up, then there may be a poor ground. Find an alternative ground for this. If it’s still not working, some of these have a module so it may be faulty, or there may be a faulty to where the trailer harness is connected to the vehicle. Inspect the wire’s insulation for any damage as well, this would allow in moisture causing breaks in the conductor.
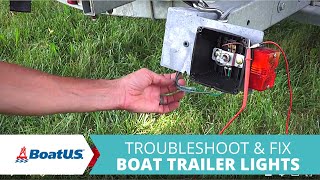
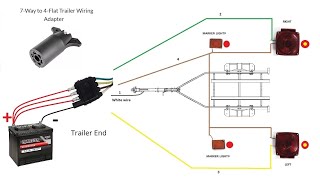
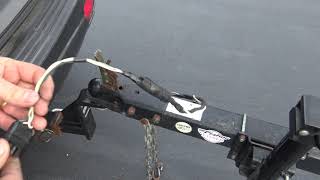
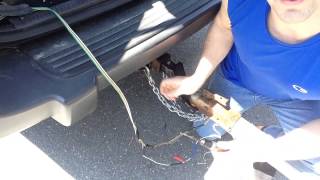
Hooking up the trailer connector, as you can see the wires have already been cut from when the trailer was brought home. Make sure you don’t cross the bare conducts, use electrical if needed. If they cross, they may blow a fuse on the truck. Make sure you do inspect the wires and connect on the trailer end as well.
Clip the test light to the exposed ground wire. Once connected, I can check the exposed conductor past the plug to ensure it’s working as well. Do no pierce the casing as this will cause a spot for moisture to get in, causing the conductor to corrode and cause another failure down the road.
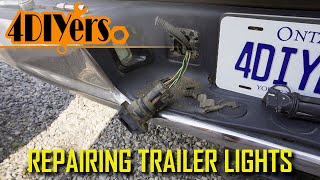
Inside of testing past the plug where I have the wires stripped, you can check at the light instead. This would involve removing the light, either the bulb or in this case the whole assembly. There may sometimes be a plugin the back to disconnect or you may have to remove the bulb. With the lights on in the truck and the connector plugged in, probe the plug or bulb socket. If you are finding an issue between the plug and light, there’s an issue along the wire somewhere, or there may be a ground issue. You can replace the whole wire or there are kits you can purchase which replace all the wiring.
As for fixing the problems I have here. First is cutting the wires to length and removing the spot where the issue was. Try to pick a good area where the copper wiring is shinny, discolored copper will indicate it’s been exposed to moisture won’t give a good connection.
Strip the wires as needed.
If you can’t cut it back any further, clean it with a scuffing pad. Before the wires are twisted together, in order to achieve a waterproof repair, I’m using an adhesive filled shrink tube. I have a kit so I can select the correct size based on the wire used and cut it to length using side cutters. This needs to be installed before the connection is soldered. Another option would be liquid tape, but it doesn’t apply as cleanly.
Twist the wires together on the truck side, I used rosin core solder which does clean the wire to some extent as well. For the connections, I’m using a western splice which is a commonly known type of soldered connection.
Apply the center shrink over the connection, make sure it’s centered on the joint. Using a heat gun, warm the heat shrink. When the casing is heated, it’ll shrink and melt a sealant that adheres to the existing casing, making a waterproof connection.
On the trailer side, twist the wires together and soldering the connections which is what I’ve already done here. Again apply the heat shrink. Make sure that heat shrink is installed before soldering the connection.
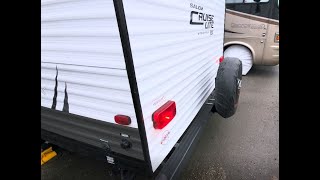
The wires are put back in their split loop casing, this protects the wiring from any road debris. Electrical tape is used to close up the casing so the wires can’t come out. And finally, it’s installed back onto the trailer tongue. Verify that the lights are working and you’re set.
© Homes for Beginners 2019
All Rights Reserved
No part of this video or any of its contents may be reproduced, copied, modified or adapted, without the prior written consent of the author.