etrailer | Curt Class III Trailer Hitch Installation - 2020 Subaru Outback Wagon

Click for more info and reviews of this CURT Trailer Hitch:
https://www.etrailer.com/TrailerHitc...
https://www.etrailer.com
Don’t forget to subscribe!
/ etrailertv
Full transcript: https://www.etrailer.com/tvinstallc...
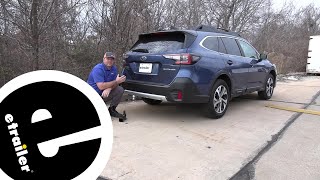
Hey guys, it's Jake here with etrailer. Today we have a 2020 Subaru Outback wagon and we're gonna be taking a look at and I'm gonna show you how to install the CURT Class III two inch hitch receiver. Adding the two inch hitch receiver to the back of your Outback is gonna give you a lot of options to haul accessories, whether it be a bike rack or a cargo carrier. Maybe you wanna pull a small trailer. Now if you decide to use this to pull a trailer, you're also gonna wanna look into getting some four pole wiring, which is really nice on the Outback, it's all prepped so you, all you have to do is just plug the wiring harness in and you're ready to use it. This hitch receiver will feature a two inch by two inch receiver tube opening, which is gonna fit a lot of different accessories.
Given that two inch by two inch is gonna be the most common size, you'll have a standard 5/8 inch hitch pin hole. That'll accept your standard 5/8 pin and clip. The pin and clip do not come with the hitch, so if you need to pick one up, be sure to visit our website. You can find locking, non locking, antirattle, whatever you decide to go with for your particular accessory. These safety chain loops are nice and large so that you can fit different size safety chains, whether it be a clevis style, an S hook style to get those safety chains hooked up so you can tow your trailer.
The hitch is gonna also feature a nice gloss powder coat finish, which is gonna help to resist rust and corrosion and look really good for the years to come on the back of your Subaru. Now as far as your weight capacities go for this hitch, you're gonna get a max tongue weight capacity of 350 pounds of downward pressure on the inside of the hitch and a max gross trailer weight rating of 3,500 pounds. That is the trailer plus a load included. Now you will want to check with your owner's manual of your Outback to make sure that the vehicle's capable of handling those amounts. And if it's not, you want to go with the lowest component between the hitch and the vehicle.
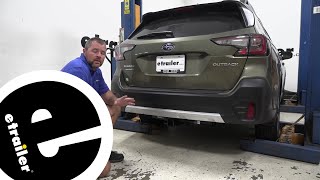
I highly recommend checking your submodel two 'cause a lot of times the submodel is what is gonna give it that rating. Now some measurements so you know what you're getting from the center of our hitch pin hole to the outermost part of our bumper is gonna be about two and a quarter inches. The hitch receiver tube itself is about flush with this gray portion here. So you shouldn't have to worry about hitting your shins or anything like that. You want to use that two and a quarter measurement to compare it to the center of the hitch pin hole on an accessory to the closest part of the accessory to the vehicle.
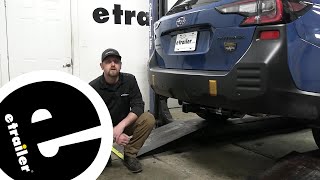
That'll tell you whether or not that accessory's going to fit. From the ground to the top inside of the receiver tube, about 15 and a half inches. That's high enough off the ground to where you can pretty much use any accessory. You shouldn't have to worry about it dragging on the ground if you go up any steep departure angles or anything like that. The one thing I will say is if you have a cargo carrier all loaded down, same within the weight ratings of your hitch and your vehicle, sometimes that can cause the vehicle to sag quite a bit. If you need some suspension, rear suspension enhancements, we have some on our website, but if not, you want to be careful 'cause that fact of that cargo carrier is gonna be at a lot different height than that inside of the receiver tube. Now when it comes to the installation of this hitch, you are going to have to remove the rear fascia of your vehicle, which is the plastic bumper piece here. For the Subaru Outback, it is not very difficult. It's actually makes installing the hitch easier once you get the rear fascia off, a lot of times it's very difficult to get a hitch lifted up underneath the fascia if it mounts from underneath. This one's gonna mount to the ends of our frame rail so flat on the back of the vehicle. But that's also what's gonna give it its nice clean look on the back of the car. So in my personal opinion, if you're doing this at home, I would prefer to go with a rear mounted hitch like this than to do a hitch that just lifts up to the bottom 'cause typically those will have an exposed cross tube that you'll have to see for the rest of your ownership of that hitch. But with that being said, let's go ahead and show you how we did it. To begin our installation, we're going to need to remove some push pin fasteners from underneath our bumper. There's gonna be some that are holding it in place like this one