Air Handler Install 3D (AC / Heat Pump)

This 3D video shows how to do an air handler install for a heat pump system. It is a companion piece to our condenser 3D install video ( • Condenser Install 3D ) and is primarily based on best practices for our Central Florida market.
Before you leave the shop, ensure that you have the proper equipment, tools, and supplies. The model number needs to match the one on the proposal, and you need to make sure that you have all of your duct fabrication materials.
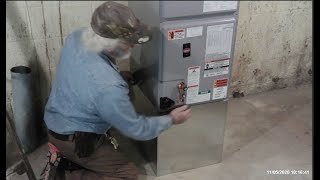
When you arrive at the job site, recover the refrigerant from the old system. Purge hoses and weigh out the charge. Close the refrigerant lines once you’ve finished. Ensure that you have proper eye protection and that you wear a respirator when working in contaminated areas or are cutting duct board. Lay down drop cloths and make sure you have a means of disposing of garbage responsibly.
Before you remove the old equipment, the circuit breaker should be off, and you need to test each leg of power to ground. Clean and cut the copper tubing. Cut the drain with PVC cutters and disconnect all of your lowvoltage control wires. Use a level and mark the duct board where it needs to be cut to get the squarest possible cut. Once everything has been cut and disconnected, you may remove the unit. Since the line set is open, now would be a good time to flush the copper tubing. We often replace the return box, and we replace wooden duct board supports with metal studs.
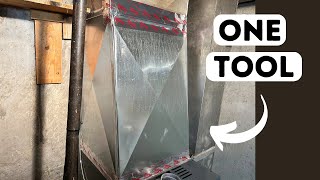
To cut duct board properly, you need to account for the thickness of your duct and understand how the tools work. As such, be sure to measure the inside dimensions when planning and making your cuts. Once you’ve made your cuts, you can assemble the box. Once you’ve got the box assembled, tape it at the edge where it all comes together with silver tape. Use alcohol to clean the duct surface, if necessary, and use a tape squeegee to get the best possible connection. Then, go over the silver tape with fab tape and use an outwardcinching staple gun on the taped surface. With the duct assembled, you can make your endcaps with plenty of overlap. Once the duct and endcaps have been put together, you can apply mastic over the joints.
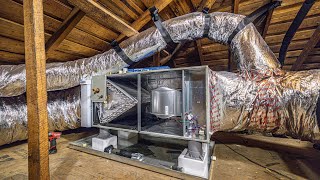
Extend the new copper and PVC through the platform. Then, seal the chase. Once the PVC and copper are in place, you can assemble the plywood platform. The plywood should have openings for the unit and the copper and PVC. To assemble the platform, you would put the return box in its place and add the plywood faces around the platform, ensuring that the plywood is level. Fasten the plywood platform with basic screws.
Using the large hole you just made in the plywood as a guide, cut an opening in the return box. Allow the unit to have a little bit of height over the return opening so that you can access the filter more easily. Apply mastic to the top, and then add the filter base and unit.
Clean the existing supply duct with alcohol and a rag. Then, cut some more duct board and use it to connect the supply duct to the unit. There should be plenty of foil overlap, and we recommend going over that foil overlap with some outwardcinching staples. Apply silver tape, fab tape, and masking tape before applying mastic. Remove the tape before the mastic is allowed to dry. In some cases, the unit will be directly underneath the duct, but it’s more common for it to be offset. You will need to cut the duct board at an angle with precise measurements in the latter case. We also recommend sealing the base of the unit.
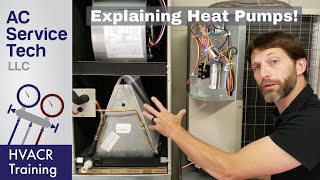
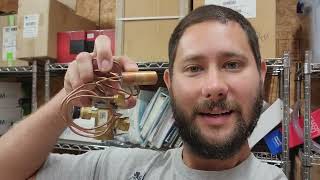
Then, flow nitrogen while brazing in a new filterdrier and the air handler. Protect heatsensitive components with a wet rag or a heatblocking putty. Using a neutral or slightly carburizing flame, heat the base material to a cherry red color and draw the alloy into the joint. Do a pressure test and use a leak reactant to check for leaks. Pull a vacuum and ensure that the system passes the decay test.
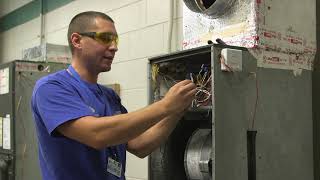
Ensure that you have the correct breaker size. Then, install the highvoltage wiring and auxiliary heat strips; the wires should be appropriately sized for the minimum circuit ampacity (MCA).
Pipe in the PVC drain using a pipe sealant. Then, make sure your drain has a trap, vent, and cleanout. Assemble PVC connections with mediumduty PVC cement.
Wire in the lowvoltage connections at the unit. Set the ECM blower board to match the system tonnage as necessary. Make sure the connections are appropriate at the thermostat and seal the opening with putty. Test in heating and cooling mode, making sure to check your heat strip amperage.
Then, you can set the charge after letting the system equalize by running for at least 20 minutes. Weigh in the charge with a scale.
Check the system delivered capacity, delta T, total external static pressure, system airflow, and other important test measurements.
Read all the tech tips, take the quizzes, and find our handy calculators at https://www.hvacrschool.com/.