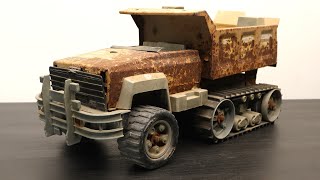
Very Damaged Tonka Volkswagen Beetle Bug Restoration

This was a very interesting, and difficult restoration project. The subject is a really neat Tonka Volkswagen Beetle that was severely damaged, but which I was finally able to restore completely.
In fact, this Tonka Beetle has been in my home for more than a year, but I just hadn't been motivated to restore it. The first reason was that the roof of the beetle and the frames on both sides were seriously damaged, all were bent and terribly deformed. I was really not sure that I could even restore it well. The second reason was that the beetle was missing several parts, the bumpers, the windshield, and the headlights, and I just couldn’t find suitable replacement parts.
At the end of January this year I decided to take on this almost impossible project. The entire restoration process was a challenge, it more difficulty than I anticipated, and the restoration of the roof and the door frames on both sides was not too difficult. The most difficult part was the reproduction of the windshield.
I had an old beetle windshield, but it could not be restored because the surface of the windshield was not only severely worn, but also had cracks I couldn't fix. In fact, even if I had been able to find a new replacement windshield it would be impossible to use it. This poor Beetle was so terribly damaged, especially regarding the roof and frames, and required so much hammering and reshaping, that a new window would no longer even fit inside the body. The new roof was flatter, the sides a little different, it just would not work.
So I decided to make a replacement window from scratch. I bought some plastic sheet stock, some thicker, some thinner, etc., and first tried to vacuum form a new window using the original window as a guide/mold.
I works heat the sheets, set then over the original on the vacuum table, and is use the vacuum to mold the sheet.
The vacuum I used seems like it wasn't strong enough to mold the thicker plastic and left gaps and rounded corners. I then tried the thinner sheets but these deformed and stretched too much and fogged up so that they weren't transparent anymore.
I started over and bought some different clear plastic sheets online. When I received them they seemed to be of good quality and have high transparency, and the plastic sheets were covered with protective films on both sides. I had high hopes! However they became very brittle after heating and forming, and they cracked when I tried to further shake and cut them. Unusable!
It took a lot of trial and error, but I decided to use the thinner plastic sheets, which are actually specially designed to be used for vacuum forming. I cut pieces to size for the top and sides and then just heated them with the heat gun to hand shape them as needed to fit.
I again ran into trouble when I tried to glue these pieces together.
The glues I used would flow away from the joint and damage the plastic, causing it to stain and fog up, or even melt and crack, depending on the glue.
I tried both super glue and JB clear, but both had problems. This process was so meticulous, and I tried so many times, it almost made me crazy lol.
I finally came up with a method that worked.
I ended up again cutting and hand shaping the pieces, but I then carefully wrapped the window panels tightly with tape before gluing to keep the glue from spreading and ruining the surface of the glass. Then, very very carefully, using as little glue as possible, I got all of the pieces together.
The final result was pretty good, it fit well, and the windshield was clean and clear, no scratches or other defects. What a relief!!
I thought this restoration was going to be tough and I was right, but the results look great.
The most rewarding things about this project were not only the successful results of the dilapidated roof and door frames, but also the fact that all of the missing parts were hand made by myself, including the windshield, bumpers, and the pair of headlights.
I hope you enjoyed this restoration. It's a really neat toy with lots of history, and it came out looking great!
As always, thanks so much for watching and feel free to tell me what you think in the comments below.
If you like my videos, I would really appreciate a thumbs up and hitting the subscribe button!