Varavon Motorized Video Camera Slider

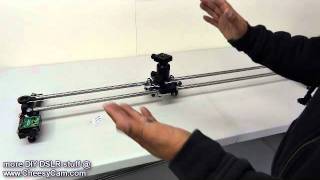
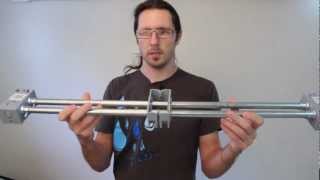
This video demonstrates my implementation of a DIY motorized attachment for your camera slider. Here, I am using a Vanavon Slidecam Lite, but this design is so portable it will easily work with any length and make of slider.
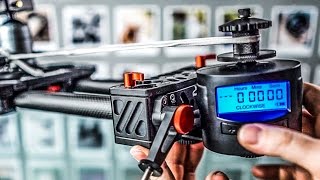
The parts used include 5 volt, continuous rotation servo, with a pulley wheel attached, A Manual Servo Driver to control direction and speed, 4 double A batteries for for the power source. On the free end, I am using an another pulley wheel, attached to a angle bracket. I used a metal framing tie plate metal, cut to fit, to connect to the the slider. And lastly a heavy duty rubber band, is perfect for attaching the motor. Using a rubber band has bonus effect of providing just the right amount of tension between the drive pulley and the nylon line.
The free pulley is attaches to an angle bracket which then mounts to the end of the rail using a 1/4 x 20 bolt. It is then locked in place using with a thumbscrew. On the Slidecam Lite, both pulley s now line up perfectly with the central axis of the rail both horizontally and vertically .
I have used a framing tie start that I got from the hardware store for fifty cents. I cut it to fit the slider plate and then just primed and painted it. The drive line is just nylon cord that I also painted black.
Once the tripod head is screwed on tight, the plate is locked in place.
The free end of the cord is attached to the plate and tensioned using a simple cord cinch off available at most hiking gear to fabric stores.
Since the servo controller is bidirectional, it passes through the stop position before changing directions. As a result, as you start the motor, it is a very smooth transition in speed from stop to full.
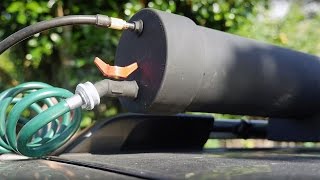
To increase the friction between the drive pulley and the cord, I wrapped a rubber band tight around the groove in the pulley.
As there is no special mounting tools or proprietary fittings involved here, this set up should work on any make or model of slider.
Parts list...
Varavon Slidecam Lite
http://www.varavon.com/product/slid_d...
H0142901T Parallax (Futaba) Continuous Rotation Servo
http://www.hobbyengineering.com/H1429...
Futaba Pulley Wheel, Item #:FUTM2045
http://www.servocity.com/html/pulley_...
AA Battery Tray (4 cell), Item #:57216
http://www.servocity.com/html/battery...
Dual Manual Servo Driver, Item #:902MSD
http://www.servocity.com/html/dual_se...
Simpson StrongTie Tie Plate
http://www.homedepot.com/p/t/10037526...
Nylon Mason Line
http://www.amazon.com/Bon11772350...
Cord Lock
http://www.walmart.com/ip/OutdoorPro...
1/4 in.20 x 1 in. ZincPlated Hex Bolt
1/4 in.20 ZincPlated Steel Wing Nut
11/2 in. Zinc Plated Corner Brace
Rubber band
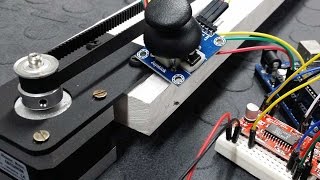
Here is the parts list I used for the version before this one. I was more interested in very slow movement which I need for timelapse photography. The motor I used was 2RPM
12V 2RPM Electric Mini DC Geared Box Motor
http://bit.ly/11WtHzO
DC12V PWM DC Motor Speed Controller
http://bit.ly/15KITH2
DC 12V Rechargeable Lipo Battery
http://bit.ly/11Gl1QO