So Your Photos Aren't Sharp? Here's Why.

Check out our Basic Exposure video series: • Photography Basics (Part 1): The Expo...
Chat with other creators on our community: https://community.rmsp.com
GET MERCH: https://shop.rmsp.com
TAKE A CLASS: https://rmsp.com
OUR GEAR (updated regularly): https://kit.co/rmsp/youtubegear
EQUIPMENT USED IN THIS VIDEO
CAMERA: https://geni.us/rmspytcamera
LENS: https://geni.us/rmspytlens
MONITOR/RECORDER: https://geni.us/rmspytmonitor
MIC: https://geni.us/rmspytmic
AUDIO RECORDER: https://geni.us/rmspytrecorder
LIGHT: https://geni.us/rmspytlight
LIGHT MODIFIER: https://geni.us/rmspytsoftbox
BACKGROUND LIGHTS: https://geni.us/rmspytbacklight
ND FILTER: https://geni.us/rmspytndfilter
GIMBAL: https://geni.us/rmspytgimbal
CONNECT WITH US
Instagram: / rockymountainschoolofphoto
Facebook: / rmsp.photography
TikTok: / rmsphoto
CONTACT INFORMATION
Email (business inquiries only): [email protected]
Mailing Address (for product reviews):
Attn: Forest Chaput de Saintonge
Rocky Mountain School of Photography
301 Expressway
Missoula, MT 59808
USA
#howto #photography #tutorial
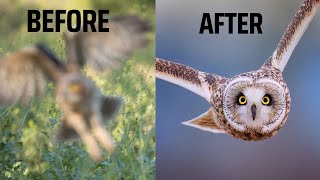
Do you feel like your images should/could be sharper? How many images from each shoot would you classify as blurry? Are you struggling to get that tack sharpness in your portrait, landscape, or product images?
In this video, we explore the main reason beginner and intermediate photographers struggle to get tack sharp images in all situations. Hint: it all has to do with shutter speed.
If your shutter speed is too slow, your camera will capture your movement as the photographer as well as the movement of your subject. This movement leads to images looking blurry and lowering your consistency of capturing crisp, sharp images.
Both learning how to control your shutter speed and learning some good benchmarks for the different subject matter you photograph is key to maximizing the percentage of sharp images that you shoot.
Watch the video for more!