Sharpening with a whetstone | How to get started
Thanks to Squarespace for sponsoring this video! Go to Squarespace.com for a free trial, and when you’re ready to launch, go to http://squarespace.com/ragusea and add code “RAGUSEA" at checkout to save 10% off your first purchase of a website or domain.
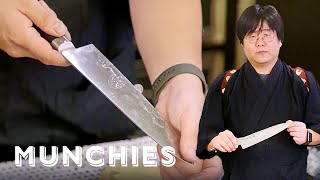
Thanks to Chef Davis Wells, @wellsharpened on Instagram: / wellsharpened
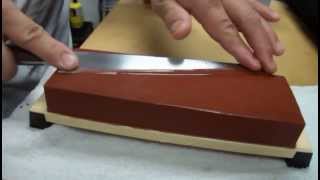
To get started sharpening chef's knives with stones using the methods demonstrated by Davis here, you will need a mediumgrit whetstone (about 1000) for making a new edge, a finegrit stone (40006000) for finishing the edge, and a coarse leveling stone/plate for keeping your other stones flat.
The harder the steel of your knife, the finer the grit you want to use for finishing. Davis recommends soaking stones, not splashngo stones. He also recommends buying a sink bridge to hold your stones, so you can work over your sink.
Here are example products Davis picked. They're just examples, not endorsements.
Medium stone: https://amzn.to/3xAUPvA
Fine stone: https://amzn.to/3tSsmyU
Diamond plate for leveling: https://amzn.to/3aJbLpE
Sink bridge: https://amzn.to/3dPTOrE
Basic 10step instructions:
1) Soak your stones until they've stopped bubbling.
2) Position your coarse stone on a stable surface (like a damp towel), wet it, and use the leveling plate to relevel the stone and work up some "mud" with which to sharpen.
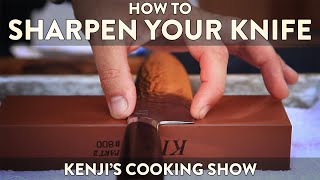
3) Hold the knife in your dominant hand with the blade facing toward you. The face of the blade should be at a 1520º angle relative to the surface of the stone, and the length of the blade should be at a 45º angle relative to the length of the stone. Put the fingers of your other hand on the face of the blade and use them to push the edge down into the stone.
4) Work the blade back and forth at an angle that feels like you're shaving little bits of sand off the stone surface. As you push the knife back and forth, slowly draw it perpendicularly across the stone to make sure the whole length of the edge gets sharpened. Rewet the stone as needed to keep the edge moving smoothly, and wipe the blade clean occasionally.
5) When you can feel a consistent burr across the the whole edge, it's time to sharpen the opposite side. Rotate the handle of the knife in your hand so the edge is now facing away from you, and this time hold the length of the blade at a 90º angle perpendicular to the length of the stone. Do what you did to the first side.
6) Once you feel a burr on the second side, go back to the first side and repeat the process a few times with progressively fewer passes and lighter pressure. Be sure to work both sides of the knife equally, to keep the edge geometry symmetrical.
7) Switch to your fine stone for finishing. Wet it and level it with your leveling plate.
8) Do the basic motions all over again on the finer stone, but use lighter pressure. You're done when you can't feel the burr.
9) Strop both sides of the blade by doing the same motion onewayonly, moving the knife away from the direction of the edge.
10) Clean the knife and test it by cutting a hanging sheet of paper. If the cuts are clean and don't have any tears, that means the whole length of the blade is well sharpened. If you get some tears, that's an indication you have some dull spots or chips.