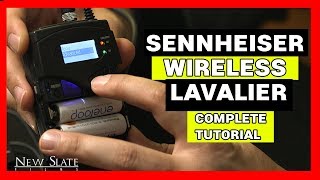
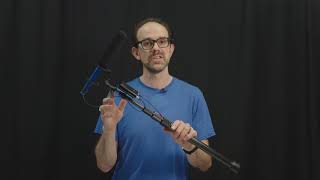
Sennheiser EW100 Wireless to RODE Boom Pole Adaptor

In this video I want to demonstrate my doityourself wireless transmitter to boom pole adapter.
On most projects I work on I'm working alone and have little time for running and managing XLR cables back to the camera where I am recording and monitoring the audio. Having a wireless boom is the ideal solution.
Sennheiser makes a plug on transmitter for this purpose but it would cost $300. I already have the G3 wireless system which includes the body pack. I spoke to some reps from TREW audio and they advised that that really was the standard way of doing it. But rather than attach the plug on transmitter to the mic directly they suggest using a mounting bracket to attach the transmitter to the pole top… This gave me an idea.
Already having a Sennheiser G3 EW 100 wireless system that I use for lav mic, I decided that attaching the wireless bodypack directly to the top of the boom pole would solve the cable issue completely.
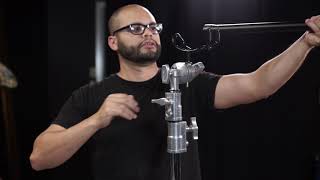
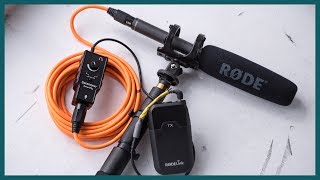
My solution is a bracket that will slip right onto the belt clip of the body pack and once clipped in, it can then be secured to the top of the pole by screwing the shock mount onto it, locking it in place.
I had some leftover scrap aluminum U channel from a previous project and looked for a way to repurpose this into a mounting bracket. The bodypack already has a very secure wire belt clip and I did not want to alter, or remove it, in order to attach a mounting bracket. The solution was to cut a piece of aluminum U channel the size of a belt and snap the clip over it.
I started cutting one piece down to 1 inch width so that once it passes over the belt clip it is trapped inside.
My RODE boom pole has a 3/8 inch standard screw mount which is at the end of a 5/8 inch diameter shaft on the last section of pole. I wanted to have my bracket to easily fit over the threads and rest flush against the pole shaft.
I started by drilling out the 3/8 inch diameter hole centered in the 3/4 inch flange of the U channel. Then drilled the five eights inch diameter hole in opposite end, then cut the holes through to the edge of the flange and then finished it off using a Dremel.
Once cut, sized, and drilled, I needed to attach the two pieces of channel aluminum together. To do this I drilled out both pieces on the drill press and then attached them together using 1 / 8 inch aluminum pop rivets.
To mount the bracket to the body pack slip the top end and under the base of the belt clip and then slide the bracket up until it clicks in place.
Now slip the bracket and the transmitter over the 3/8 thread and lock it in place.
I added a 3/8 diameter rubber washer then screw on the microphone thus trapping the bracket between the top of the pole and the base of the shock mount.
A coat of primer and a couple of coats of black paint and we're done.
All told, for under five bucks and afternoon at work, I have a quick, easy and simple mounting solution this is good or better than the offtheshelf solutions I looked at. This saved me from buying a separate transmitter and allowed me to use equipment that I already have.
I hope you found this video and DIY project helpful and maybe it will encourage you and others come up with some more innovative photography and filmmaking solution.