Polymeric Sand Installation | Guide to No Failures

Installing polymeric sand is the final step in your paver project and should be installed according to the manufacturer’s guidelines to ensure the longevity of the project.
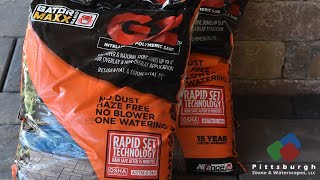
Polymeric sand is a formula of sand, polymers, and other additives depending on the manufacturer that prevents weed growth, insects, and works to stabilize your paver surface. When activated with water and left to cure, the sand becomes hard yet flexible to be able to move with the paving stones without cracking over time. It is just one of several options for a jointing compound to be installed in the joints of your project.
Learn more about polymeric sand installation, as well as problems and solutions with polymeric sand with this article:
https://howtohardscape.com/polymeric...
Compactor Pad:
https://amzn.to/3j7zFyK
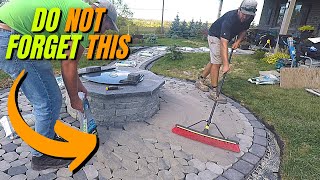
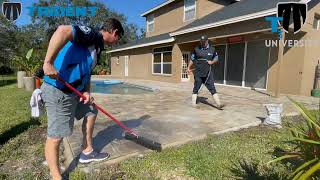
Step one is to sweep the sand. Every polymeric sand requires the surface and the joints of the pavers to be dry when installing, and most sands require approximately 24 hours of no rain for the sand to set. Additionally, polymeric sand typically takes up to 30 days to cure, so there should be no sealing of the pavers happening before this time. Prior to installation, the surface of the pavers should be clean whether sweeping or power washing to remove any debris. Most paver manufacturers have approximate rates of sand required to fill a certain square footage area that you can use to calculate the number of bags you will need to purchase. With the bags, you will spread the sand around the project pushing it no further than 10 feet to prevent the formula from separating. The area should be swept clean of any sand from the surface to prevent scuffing the pavers in the next step of the process. We use a push broom with a combination of fine and stiff bristles to move the sand around. Some projects you will need to tape the sides of the pavers when they meet a soft area to prevent the sand from spilling out before you are able to activate it.
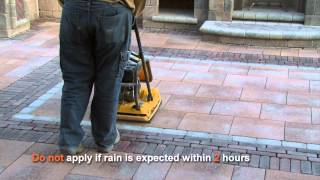
Step two is the consolidation of the sand. This often skipped step will allow for the polymeric sand to reach the bottom of the paver and helps to seat the pavers into the bedding course. If this step is skipped, air pockets will remain as the sand gets choked out on its way to the bottom of the joint causing eventual failure in the polymeric sand. At least two passes should be made on your surface, perpendicular to each other. ICPI calls for a compactor of at least 5,000 pounds of force to be used in this step. In order to not damage or scuff the pavers during this step, there needs to be some sort of protection below the compactor or on top of the pavers.
Once your passes are completed, you will need to inspect the area and replace any chipped or cracked product. These first two steps will need to be completed until you have achieved the proper level of sand in the joint which may take many more times for joints that are small. The sand should be ⅛” below the top of the paver or the top of the chamfer. If it is any higher than this, the traffic above will eventually erode the sand from the surface causing failure of the polymeric sand. A leaf blower should be used to remove any dust and sand from the surface of the stones and to help to achieve the proper joint height.
The final step in this process is the activation of the polymeric sand. For proper watering instructions you will need to consult with the manufacturer as each of them have a different process of activation and this has changed over time. It is also an extremely crucial part of the process to get right. These instructions are typically listed on the bag.
In this case we use a shower setting on our hose nozzle starting at the bottom of our project slope so as to not prematurely activate any polymeric sand causing them to not accept any further water when we get to activating them. We soak the joints until we see a white foam and that the joints have stopped accepting any more water as it has built up on the surface of the stone. We move our way in small sections to the top of the slope and move our hose nozzle back and forth so that we do not overwhelm an area with too much water causing the erosion of the joints. In other installations, we follow similar steps but complete a quick wetting of the surface before repeating with a second more thorough wetting of the joints. Again, it is extremely important to follow the manufacturer’s directions when it comes to activating the sand.
How to Hardscape Articles on Hardscaping
https://howtohardscape.com/category/h...
How to Hardscape Membership for Hardscape Courses:
https://members.howtohardscape.com/pl...
Website: www.howtohardscape.com/
Podcast: www.howtohardscape.com/podcast/
Instagram: www.instagram.com/howtohardscape/
Facebook: www.facebook.com/howtohardscape/