Planning routes using Google Maps with demonstration ride - 2023 *Updated video*

NEW UPDATED VIDEO with details missing from the previous video and demo ride.
Ultimate guide to using Google Maps for navigation BIKE or CAR
This is Great British Biking Adventures. If you’re new here, we are all about exploring the UK by motorcycle. You might want to check out our Coast Adventure series in which we are travelling around the British Coastline.
In this video I am going to show you how we use Google Maps to plan our routes.
This isn’t a review, rather it’s a ‘How To’ use Google Maps to plan routes. We’re doing it for motorcycle trips but it equally applies to other drivers who want to explore off the beaten track, see specific places, take particular roads and ultimately have control over your route plan.
There are plenty of other products in this market such as
Waze
Bing Maps
HERE WeGo
TomTom MyDrive
Via Michelin
AA Route Planner
RAC Route Planner
Maptive
Apple Maps
Komoot
Roadtrippers
GasBuddy
Maps Me
Rever
Calimoto
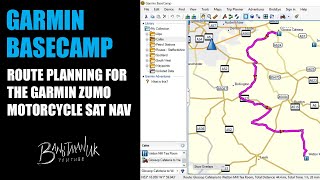
Garmin Basecamp
Myrouteapp
Let us know in the comments which ones I’ve missed and, if you have experience tell us what they are like to use.
Google maps doesn’t have a specific route planner. Normally, you select a start point and end point and, like any other satnav, it calculates the quickest route often giving one or two alternatives.
Once you set off, so long as you’re connected to the internet, Google maps will reroute if you take a wrong turn or if it thinks there’s a better route than the one you were on.
The answer ‘waypoints’ (Google calls these ‘destinations’). Waypoints are just multiple destinations along the same route. By adding waypoints you can force Google to take the route you want.
It is possible to do this on the phone app but it’s a lot easier to use a PC or mac, save the route and access it on your phone or tablet later, let me explain how.
How to save this route to view later or send to a phone or tablet.
Google has a specific send to phone, text or email option but I tend not to use any of these. Instead, I copy the shareable link.
Click on the 3 lines and then ‘share or embed map’ then copy the link to your clipboard.
Paste this into a text document or email where you can add further notes and instructions to remind you when you’re on the trip.
From the email I simply click on the shareable link I had copied and Google maps loads the directions. These links can be copied, saved and sent as many times as you want.
The links never seem to expire and have always been very reliable. In fact, I am going back through the Coast Adventure episodes and adding them to the video description so you can use the link to view the route we took and maybe use it yourself.
This is how you make sure these directions will work if you’re offline. My tablet doesn’t have a SIM card but I can still use Google maps.
When you click the shareable link, Google often identifies if there’s a poor signal for where you are headed and a message pops up ‘download maps for spotty connection’. It will download the maps you need for the directions you have loaded. If this doesn’t pop up and you want to make sure you have offline capability, you can download offline maps by going into the Google maps app on your phone or tablet clicking on your icon picture and selecting offline maps.
By default, Google will store these on the device memory but memory is limited and you have an SD card inserted you can go into the settings by clicking on the cog icon and changing the storage location to SD card.
Unless I’ve missed something, typical of Google, there’s no simple and definitive option to download the entire UK or regions. Instead, a map pops up and you select the area you want to download.
Finally, when you click the link and open the routes there’s no option to start the navigation, it just says ‘preview’. In order to get going you need to enter your current location to give it a point to navigate from. For this reason, you have to be careful to use only 9 waypoints so you still have a slot you can enter your location. Otherwise, you will have to replace the starting point with your location.
To do this, click the 3 dots here then edit stops, click the vacant slot at the bottom, then click ‘Your Location’. You will then have to drag it to the top of the list.
Is it perfect No. Although a lot of our frustrations have disappeared as we’ve become used to how it works.
I hope this video has been interesting as an insight to how we plan our trips but also to inspire you to have ago yourself.
Please like, leave a comment and if you’d like to keep up with our adventures subscribe.
See you next time.

![Google My Maps route planner [stepbystep tutorial]](https://i.ytimg.com/vi/IMmNkQu-4ZA/mqdefault.jpg)