Mind Blowing Houndstooth Cutting Board Pattern! | Step by Step Guide

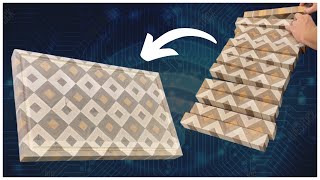
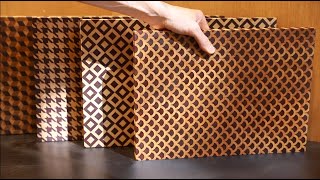
I’ve always wanted to make a houndstooth end grain cutting board. Houndstooth is a timeless pattern and I think it would be a unique look for a cutting board. In order to create the pieces, I had to figure out what goes into the pattern. I broke it apart and ultimately it comes down to three square pieces: a light colored wood square, a dark colored wood square, and a square with four stripes of light and dark wood. Knowing that, I made the stripes first because they are the hardest.
PLANS FOR THIS PROJECT ARE AVAILABLE AT: https://newtonmakes.com/shop/p/hounds...
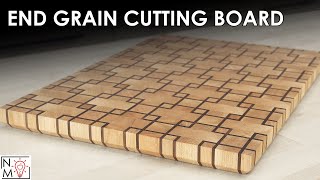
I made my cutting board from oak and walnut. Maple would have looked really cool too, but I have a ton of white oak scraps that I need to use up. I made strips of oak and walnut and glued them together. Then, I cut them at an angle on the table saw, which made the direction of the stripes run at a 45 degree angle.
I cut oak and walnut pieces to match the width and height of the striped pieces. I glued the cutting board up in three stages. The first was to glue alternating oak and striped pieces. I glued a second panel of alternating walnut and striped pieces. Then I cross cut those panels about 1.5” wide and turned them on their edge. I got the houndstooth look by mixing the two panel pieces. The walnut/striped pieces need to be turned 180 degrees when assembling the cutting board. I glued everything together and flattened it using my CNC.
I cut bevels on the bottom so it’s easy to pick up, and after a healthy dose of sanding I was ready to apply finish. I went with my favorite finish for end grain cutting boards, which is a two step process of salad bowl finish and oil/wax. I thin out the salad bowl finish so that it easily soaks into the board. I want the finish inside the wood, but I don’t puddle it on top. After the finish is dry, the top area which makes contact with knives gets an oil/wax finish.
This turned out really cool and it may be my favorite cutting board project.
Here’s a list of tools and materials that I used to make this project. As an Amazon Associate I earn from qualifying purchases.
•• Tools & Materials ••
My Amazon Store: https://www.amazon.com/shop/genealogi...
Dewalt planer: https://amzn.to/38LarPW
Jet 8” Jointer: https://amzn.to/310uabK
Random Orbit Sander: https://amzn.to/2RxjkXo
Jet Table Saw: https://amzn.to/2RwQTJa
Diablo Ripping Saw Blade: https://amzn.to/30ZOJEV
Forrest Woodworker II Saw Blade: https://amzn.to/3kezMHf
Titebond III Ultimate Wood Glue: https://amzn.to/2tU6B8d
Microjig Grrripper: https://amzn.to/38J7Buz
Starrett 6” combination square: https://amzn.to/3aPMN6n
Axiom CNC: https://amzn.to/32ChpXm
Bosch Jig Saw: https://amzn.to/2RzXZg9
Pin Nailer: https://amzn.to/2Ru30qr
Salad Bowl Finish: https://amzn.to/3jz2V0F
Butcher Block Oil: https://amzn.to/3mEy4jE
Bessey Pipe Clamp: https://amzn.to/2RY4ubm
Jorgensen Clamps: https://amzn.to/3fAxz7o
•• My Links ••
My Amazon Store: https://www.amazon.com/shop/newtonmakes
Website: https://newtonmakes.com
Instagram: / newtonmakes
Facebook: / newtonmakes
Esty: https://www.etsy.com/shop/GenWoodworker