Master the Art of Drawing: Unleash Your Creativity with the Loomis Method for Drawing a Girl's Face
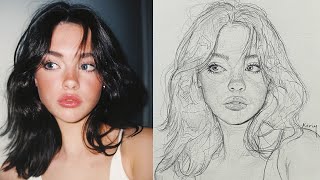
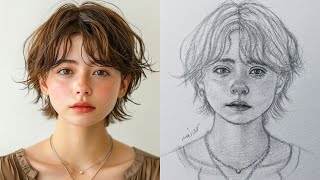
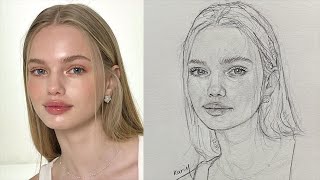
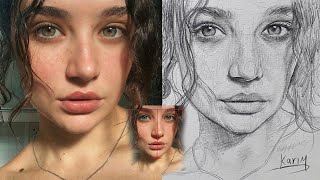
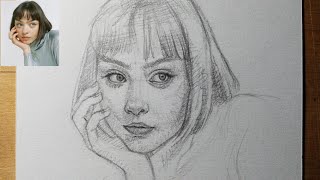
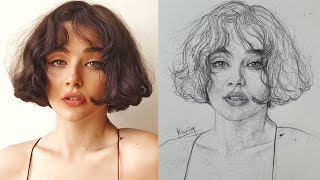
Drawing a girl's face using the Loomis method can be a great way to achieve accurate proportions and structure in your artwork. The Loomis method, developed by Andrew Loomis, involves constructing a geometric grid and placing facial features within it. Here are some tips and techniques to help you draw a girl's face using the Loomis method .
#portraitdrawing #loomismethod #drawingtutorial
#facedrawing #arttips #andrewloomismethod #tutorial
#drawing #arttutorial #howtodraw #drawinglessons
The Loomis method involves constructing a geometric grid to represent the head and face.
The grid consists of horizontal and vertical lines that intersect at specific points to mark the placement of facial features.
By following this method, artists can achieve more accurate proportions and symmetry in their drawings.
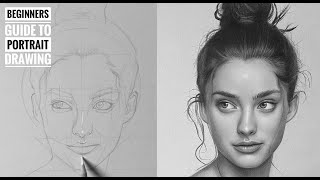
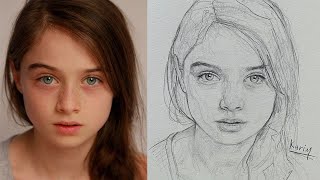
2. *Drawing the Basic Construction Lines*
Start by drawing a circle to represent the overall shape of the head.
Add a vertical line (middle line) and a horizontal line (brow line) that intersect at the center of the circle.
Divide the vertical line into six equal spaces to determine the width of the head.
Draw a square within the circle using the intersections of the horizontal lines with the circle.
3. *Placing Facial Features
Extend the middle line downwards to mark the placement of the eyebrows, nose, and chin.
The hairline and nose line are already determined by the construction lines.
For an average female face, the features are spaced evenly apart along the horizontal lines.
Draw the jawline by extending the sides of the head down and tapering towards the chin.
4. *Drawing the Facial Features*
Use the construction lines as guidelines to draw the facial features.
Draw the eyebrows along the brow line, slanting them upwards at the ends.
Position the eyes above the eye line, with the width of each eye approximately the same as the nose.
Draw the nose on the nose line, using the middle line as a guide for balance.
Place the lips between the nose and chin, with the top lip resembling an M shape and the bottom lip a wide U shape.
Add the ears on the sides of the head, between the brow and nose.
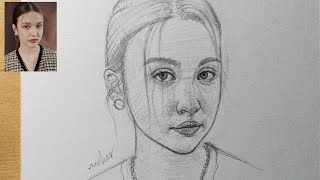
5. *Refining the Drawing*
Use references such as the human skull and planar head to understand the underlying structure of the face.
Practice drawing the skull and planar head from different angles to improve your understanding of facial anatomy.
Adjust the construction lines and proportions as needed to create different facial expressions and angles.