Making a coffee table from hornbeam Diy Woodworking

Making a coffee table from hornbeam Diy Woodworking
Bu videoda gürgen ve köknardan doğal kenarlı bir orta sehpa yaptım. Bu kütük sehpanın ahşap işçiliği çok keyifli oldu.
Videonun tabla yüzeyini el frezesi ile düzleştirdim. Sonra boşluk olan kısımları epoksi reçine ile doldurdum. Epoksi kuruduktan sonra zımpara yaptım. Sırasıyla 80/150/220/400 kum zımpara uyguladım. Bu işlemden sonra tablayı boyadım. Pinotex açık ceviz rengi kullandım. İlk önce boyayı sürdüm. Daha sonra kuru bir bezle boyanın fazlalığını sildim. Boyadan sonra poliüretan dolgu verniği uyguladım. Bu dolgu astarını üç dört kat uyguladım. Kuruduktan sonra önce 280 kum zımpara sonra 400 kum zımpara uyguladım. Son olarak iki kat akrilik yarı mat vernik uyguladım. Bu şekilde sehpanın tabla işlemlerini bitirdim.
Sehpanın ayakları için köknar kullandım. Ayakların konik olmasını istedim. Bunun için daha önce yaptığım tezgah testere kızağını kullandım. Video linki paragrafın altında. Ayaklar bitince akrilik astar kullandım. Astarı iki kat uyguladım. Sonra 400 kum zımpara uyguladım. Astar işleminden sonra sehpanın ayaklarına akrilik siyah boya uyguladım. Siyah boya işlemini de iki kat uyguladım. Sehpanın ayaklarının işlemini de bu şekilde bitirdim. Sehpanın ayaklarının kesim açısı 15 derece. Bu dereceyi isteğinize göre değiştirebilirsiniz. Ayakları sehpaya sabitlediğim kısımda 1 cm kalınlığında kontraplak kullandım. Sabitleme işlemi için metrik 6 minifix ahşap dübel kullandım. 2 cm uzunluğunda metrik 6 civata kullandım. Bu ahşap çalışmasında bazen hızlı yapıştırıcı ve aktivatör sprey kullandım. Sehpanın ölçüleri videonun sonunda. Bu video ve bilgiler umarım size faydalı olur. Bir sonraki videoda görüşmek üzere. Sağlıklı kalın.
Making a coffee table from hornbeam Diy Woodworking
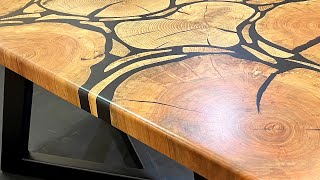
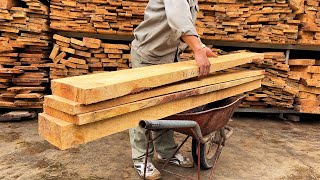
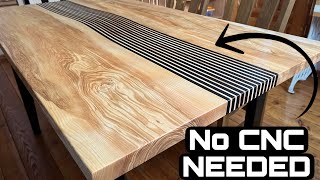
In this video, I made a coffee table with natural edges from hornbeam and fir. The woodworking of this log coffee table was very enjoyable.
I smoothed the table surface of the video with a hand mill. Then I filled the gaps with epoxy resin. After the epoxy dried, I sanded it. I applied 80/150/220/400 grit sandpaper respectively. After this process, I painted the table. I used Pinotex light walnut color. First I applied the paint. Then I wiped off the excess paint with a dry cloth. After painting, I applied polyurethane filler varnish. I applied three or four coats of this filler primer. After it dried, I first applied 280 grit sandpaper and then 400 grit sandpaper. Finally, I applied two coats of acrylic semimatte varnish. In this way, I finished the work of the coffee table.
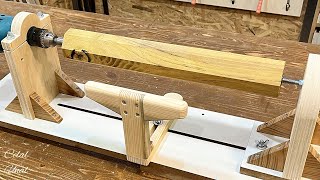
I used fir for the legs of the coffee table. I wanted the feet to be tapered. For this I used the table saw sled I made before. Video link is below the paragraph. When the feet were finished, I used acrylic primer. I applied the primer in two coats. Then I applied 400 grit sandpaper. After priming, I applied acrylic black paint to the legs of the coffee table. I applied two coats of black paint. This is how I finished the legs of the coffee table. The cutting angle of the legs of the coffee table is 15 degrees. You can change this degree according to your desire. I used 1 cm thick plywood on the part where I fixed the legs to the table. I used metric 6 minifix wooden dowels for fixing. I used metric 6 bolts, 2 cm long. In this woodwork, I sometimes used instant glue and activator spray. The dimensions of the coffee table are at the end of the video. I hope this video and information will be useful to you. See you in the next video. Stay healthy.
Tezgah testere kızağı / Table saw sled
• Table saw sled and Large dowel maker ...
Making a small coffee table
Making coffee table at home
Diy coffee table
How to make coffee table
Coffee table designs
Coffee table build
Woodworking coffee table build
Coffee table epoxy
Live edge coffee table
Coffee table painting
Acrylic paint work
#woodworking #coffeetable #diyfurniture