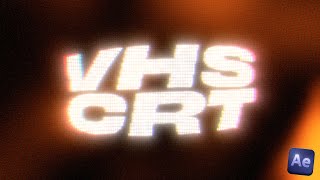
make a realistic vhs / vintage look – after effects vhs tutorial
☕ if you're up to it, you can send me a tip to help support my coffee addiction on kofi
☕ https://kofi.com/academyofedits
When it comes to the VHS / Vintage style I found that a lot of tutorials I've watched seem to mostly be the same steps — colour grade, chromatic aberration, and then some sort of overlay to finish it off. And while that's probably more than enough for most people, I wanted to figure out what it was that made VHS footage look the way it did so that I could recreate the style more authentically.
So after watching some playlists of VHS footage on YouTube and taking notes on what stood out, I read some wiki pages, opened up After Effects and played around until I got a decent looking attempt that I felt held up decently next to real VHS footage.
The 3 main things I noticed and then tried to recreate were:
A dark edge around many of the higher contrast shapes
VHS footage that's been imperfectly deinterlaced that gives it a ghosting
Chromatic aberration mostly on the edges of higher contrast shapes
The dark edge around many of the higher contrast shapes was something that I tried to recreate many ways but in the end it was really as simple as a cranked up blur and a cranked up sharpen. My guess is it's just a product of VHS footage not being particularly clear and either incamera itself or in post production, the footage is sharpened to bring back more clarity. Specifically, the fast box blur and the Unsharp Mask together gave me the best results.
The imperfectly deinterlaced ghosting/aliasing was something I wasn't super clear on so I had to read some wiki pages on interlacing and ended up learning a lot about it (although I'm still clearly no expert) I read enough to feel somewhat confident in faking some interlacing in After Effects. All you really have to do is apply Venetian Blinds to a duplicated version of your footage at 50% transition completion and then offset your footage one frame to the left in the timeline. That doesn't sound too complicated but this only really gives you a somewhat authentic look if you shot at 60fps (technically 50). If your footage was 30fps like mine, you'll have to use some cheeky frame blending to fudge 60fps so that your interlacing doesn't create huge obvious ghosting.
Lastly was the Chromatic Aberration. I feel that most times I see tutorials people apply this a liiittle too much and after noticing it only appearing on higher contrast edges in a few videos in a row I got to work trying to figure out how to make that happen. My solution might not be the best (due to the limited properties that the Find Edges effect exposes to you) so if you know of better way to create Edge Mattes please let me know! Ultimately it's just a duplicated version of your footage with the Find Edges Effect applied being used as a Luma Matte for the Chromatic Aberration to only be shown on the edges it picks up! Much more subtle and much closer to real footage in my opinion!
my microphone
https://amzn.to/3BllGfV (affiliate link)
socials
/ academyofedits
/ theacademyofedits
timestamps
0:00 intro
0:59 blur & sharpen
2:14 chromatic aberration
4:02 fake interlacing
6:18 chromatic interlacing
7:09 colour grading
9:20 final touches
tags
after effects vhs, after effects, vhs, after effects vhs tutorial, after effects vintage, vintage, after effects vintage look, after effects vintage film look, ae,vhs after effects, retro after effects, after effects tutorial, adobe after effects, after effects retro tutorial, after effects retro, after effects retro style, after effects old look, vhs effect, no overlay, vhs overlay, no plugins, advanced vhs, old vhs video