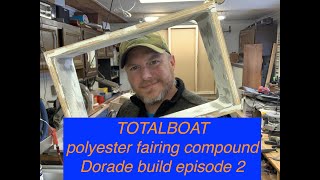
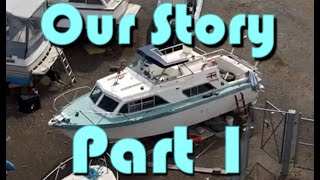
Love A Fair ✨ Project Fury Boat Restoration Project Episode 27 - DIY Fairing Compound

Or, "How to make your own highgloss gelcoat fairing compound in one easy(ish) lesson"!
0:00 Last time out...
0:13 Hello Folks!
1:03 An Afairing Compound To Remember
1:44 Mixing our own fairing compound step by step
7:34 Slapping it on
9:39 Step Off
13:06 Knock Back and a second serving
13:48 Step Off 2 Return Of The Drill Bit
18:57 The Perils Of Polish
20:39 Closing Montage (Why Can't You Write Nice Music?)
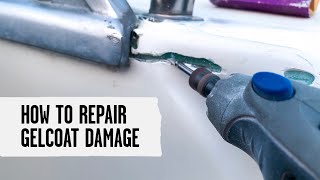
It's been a long, physical week on the boat this week it's always tough work getting anything to a good finish, and that goes double for large fibreglassed panels. Since the aft bulkhead is one of the real headline features of the boat, we wanted to work out a way we could get a real eyepopping finish to it, and this week has really been a long experiment to see how far we can go with offtheshelf ingredients and runofthemill tools.
What we're arrived at is a homemade gelcoat fairing compound. It's really easy to sand, can be formulated to almost any thickness, and can be polished as bright as you want it to be!
It's comprised of standard gelcoat (we used white, but any colour will also work), wax in styrene, MEK and 3M Glass Bubbles such as these : https://www.ecfibreglasssupplies.co.u...
We've found that mixing 2 parts glass bubbles to 1 part gelcoat has no impact on shine or finish, but pushing the mix to 3:1 is noticeably duller. If you're gong to do large areas, especially on vertical surfaces, you will need to mix it 3:1 and recoat with gelcoat, or primer and the paint of your choice.
Sanding the result when it's cured is made easier by adding max in styrene to the mix before adding the glass bubbles. That way the gelcoat cures hard and tackfree, and once it has cured we had no clogging of sandpaper, from 80 grit all the way to 10,000 grit polishing paper. It adheres really well to both existing gelcoat, glass in resin, and wood. At 2:1 it cures rock hard only slightly more brittle than normal gelcoat and at 3:1 it's an ideal filler for areas below 5mm deep. For patching gouges in gelcoat, 2:1 is perfect and the feathering properties when polishing in are just perfect.
This week Mike also started on mocking up some steps leading into the cabin from the cockpit, but they still need some thought and some work. Next week, we're planning to finish the steps, do the last levelling and polishing on the aft bulkhead, install the cockpit/saloon window, resin the forward cabin sole in place and start on glassing and installing the forward cabin bulkheads. From there, we'll be in the perfect position to remove and replace the midships bulkhead along with the final section of old wooden sole below it, which in turn leads on to rebuilding the boat interior. So as we speed toward autumn, we'll be able to work the boat exterior on dry days and the interior on wet days, so we're really starting to get to the point where the project will accelerate dramatically and it's great to have you along with us for the adventure!
You can join us at
Patreon : / boatprojectfury
Facebook : / boatprojectfury
Mike's music as used in this episode is available at https://michaelcoombs.bandcamp.com
Our regular UKbased supplier, East Coast Fibreglass, from whom we buy all our fibreglassing supplies (including our 3M glass bubbles), can be found at https://www.ecfibreglasssupplies.co.uk/