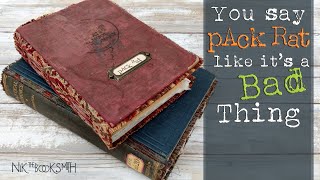
LET'S MAKE A PACKRAT BOOK | Simple Bookmaking Tutorial - Part One

You don't need fancy equipment or expensive materials to make a great looking book. Join me in this 2 part video series and learn how to make a PackRat Book with items you probably have around the house! #howtomakeabook #nikthebooksmith #packratbook #easybooktutorial
1:00 Paper choices
2:15 Book board ideas
2:55 Textile for spine
3:45 Signatures
4:25 Measuring for page size
5:35 My nine signatures
6:00 Deciding your spine width
8:40 Choosing what part of the fabric will show
10:35 Calculating where the covers need to go
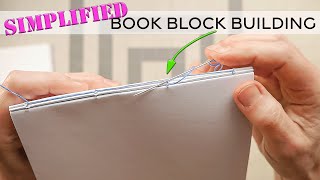
11:20 Binding stitch
11:45 Signature hole placement
12:45 Punching holes in signatures
13:05 Signatures, how many?
Measuring summary:
My measurements will be mostly irrelevant for everyone else, since its doubtful you will have the same book covers. The important thing to remember is 'how' to get the measurements. There are 2 measurements to use with your own while making the book.
1.) Measure the book cover's board, subtract about 3mm for the fore edge and 3mm each for the head and the tail (the 3mm for fore edge and 6mm total for head/tail are a measurement everyone can use no matter the size of their book boards unless they prefer the square to be smaller or larger). The height remains constant, but the width of that measurement is doubled so that the papers can be folded in half.
(the "square" is the overhang of the book covers past your pages)
2.) As far as measuring for your spine...once the signatures are all collated and folded, grab them all lined up together and place them foldsides down on a ruler (etc.) and see how much room they take up if you hold those folds snugly together. If you like that, then that can be your spine measurement, just make sure to add a 1/4" or 6mm to each side (for a total of 1/2" or 12mm this is the other measurement that will generally hold true for any size book) for your hinge gaps. If you think you might need some space between your signatures so that you can add things to the book or use it as an art journal, loosen your grip on the folds until you feel comfortable with the spacing and take note of the measurement of the space the signatures take up and add your hinge gaps like I referenced above. =)
*Favorite Supplies List: https://www.amazon.com/shop/niktheboo...
Online Booksmith courses:
Teachable: https://nikthebooksmith.teachable.c...
Course FAQ: https://nikthebooksmith.teachable.c...
(feel free to message me at my Etsy shop if you have questions about Teachable or my courses)
Spoonflower: https://www.spoonflower.com/profiles/...
Etsy: https://www.etsy.com/shop/TheBooksmit...
*DISCLAIMER: This description contains affiliate links, which means that if you click on one of the product links, I’ll receive a tiny commission at no extra cost to you. Thank you for the support!
FAIR USE COPYRIGHT NOTICE:
The Copyright Laws of the United States recognizes a “fair use” of copyrighted content. This video and Youtube channel in general may contain certain copyrighted works that were not specifically authorized to be used by the copyright holder(s), but which we believe in good faith are protected by federal law and the fair use doctrine for purposes such as criticism, comment, news reporting, teaching, parody, or research, and is not an infringement of copyright. This video is for educational purposes only. We believe this constitutes a fair use of any such copyrighted material as provided for in section 107 of the US Copyright Law.
This presentation is protected by U.S. and International copyright laws. Reproduction and distribution in any form without the written permission of Nik the Booksmith© is prohibited.
Copyright © 20142020 Nik the Booksmith All rights reserved.