Learn from my STUPID mistakes before you build a Flip Top Tool Cart

I encountered multiple mistakes while building this flip top tool cart with builtin power for my fatherinlaw as a retirement gift. After overcoming each mistake, I was really happy with the end product, and I think he was too!
SUMMARY:
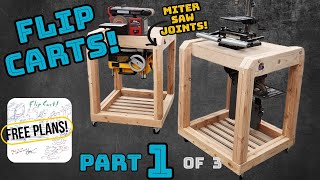
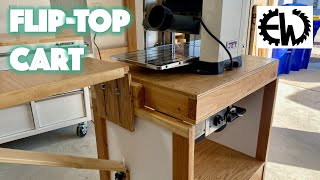
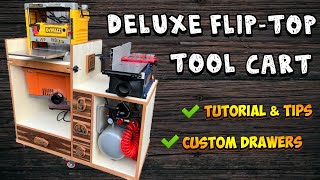
The frame of the tool cart was constructed out of 2x4's with buttjoint and pocket hole construction.
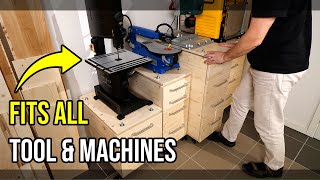
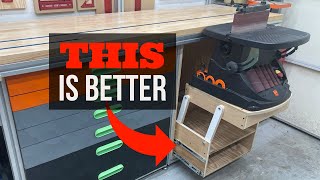
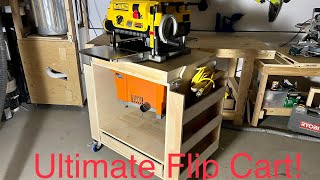
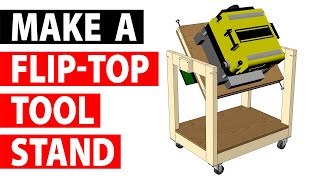
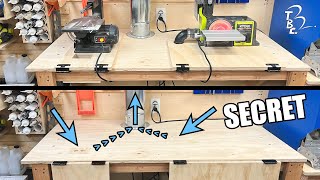
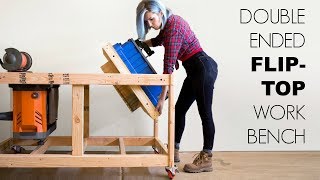
The flip top was constructed using 3/4" plywood for the sides and 1/2" plywood for the mounting surfaces and would rotate around a piece of pipe.
The power for the flip top would enter the flip top through the pipe and then be split into two circuits inside the flip top box. Each circuit would consist of a switch and an outlet to allow the tools that are mounted to the flip top surfaces to be conveniently plugged in and switched on/off from a switch on the front sides of the box.
A heavy duty 20 ft power cable is used so that it can reach any outlet even at quite a distance away as well as allowing the user to only plug in the cart rather than each tool installed on it.
Barrel bolt latches are used to lock the flip top in place and make it easy to unlatch and flip over.
The sides of the frame have peg board installed to hide the frame and the ends of the pipe and allow pegs and hooks to be installed to hang tools.
The bottom of the tool cart has a large drawer installed to allow larger items or accessories to the tools on the cart to be stowed away.
Locking casters are installed to allow the cart to easily be moved around and locked in place to prevent it from rolling while in use.
COST:
• 2x4's (8ft long) x4 $14
• 1/2 sheet of 3/4" plywood $32
• 1/2 sheet of 1/2" plywood $21
• Pegboard $25
• Barrel bolt latches (x4) $6 each https://low.es/3ub9rVC
• 4 locking casters $14 https://amzn.to/49dBRx7
• Drawer handle $9 https://low.es/3OgGCxy
• Metal pipe (conduit) $9 https://low.es/3UdvW6M
• Power cable $24 https://low.es/3OfGmPu
• Romex 12/2 $25 (less than 10ft needed) https://amzn.to/3UffxPm (NOTE: Stores like Lowes and Home Depot have incredibly high prices on Romex. I've been buying Romex on Amazon for a few years now because it's like half the price of the big box stores.)
• Duplex outlet (x2) $4 each https://low.es/3Oecx1B (NOTE: if you only need 15A outlets, they're less than a $1 each)
• Single pole switches (x2) $4 each https://low.es/49b5Fu0 (NOTE: if you only need 15A switches, they're less than a $1 each)
• Outlet covers (x2) $4 each https://low.es/3vRdNl5
• Switch covers (x2) $6 each https://low.es/3HvYml0
• Plug end $6 https://low.es/3Uhw99c (NOTE: I installed 20A outlets, switches, and 20A rated wire so the cart is ready for 20A if desired. However, I installed a 15A plug end because that's more common in most homes. IF desired to make the cart 20A capable, all that has to be done is take off the 15A plug end and install a 20A plug end.)
• Consumables (glue, screws, etc.) $5
TOTAL COST: $244 (I used a lot of scrap wood, plywood, and Romex that I already had which considerably cut down the cost.)
VIDEO CHAPTERS:
00:00 Background
0:40 Making the Flip Cart Frame
0:58 How to Determine Dimensions of Flip Top
2:43 Building the Flip Top Box
3:37 Mistake 1
4:29 Mistake 2
5:22 Installing the Flip Top
6:22 Wiring the Flip Top Cart
9:18 Closing up the Flip Top
9:34 Mistake 3
10:05 Making Electrical Components Dust Proof
10:25 Installing the Flip Top Latches
11:19 Installing a Drawer Box
11:35 Mistake 4...
11:54 Finishing Touches
12:04 The Great Reveal!