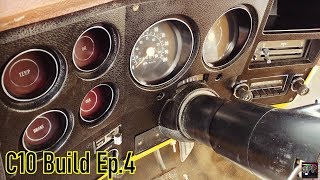
Installation | GlowShift Replacement 6 Gauge Cluster Dash Panel for 1973-1987 Chevy C10

Learn how to install GlowShift’s Replacement 6 Gauge Cluster Dashboard Panel for the 19731987 Chevrolet C10.
Get this C10 Gauge Pod here: https://www.glowshiftdirect.com/repla...
Replacement 6 Gauge Cluster Dash Panel for 7387 Chevrolet C10
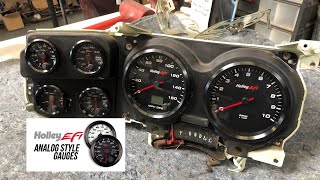
GlowShift’s Replacement 6 Gauge Cluster Dashboard Pod for the 19731987 Chevrolet C10 is specifically designed to replace the factory cluster trim. These Chevy gauge pods hold (2) 33/4” (95mm) gauges and (4) 21/16” (52mm) gauges, making them perfect for anyone looking to build a custom dash cluster or replace stock gauges. Each C10 gauge pod can be installed to virtually any 3rd Generation C/K box body and square body full size pickup, including C10, C20, C30, and KSeries models in this year range:
1. Start by removing the screws securing the factory cluster with a Phillips head screwdriver.
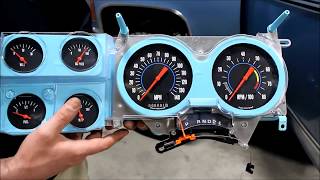
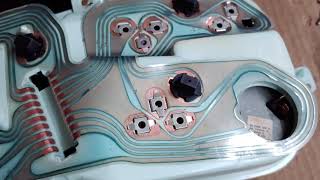
2. Once the screws have been removed, remove the factory cluster.
3. You will need to cut a hole in the new cluster for the 19731980 headlight and wiper switches, or the 19811987 headlight switch. As another option, you can measure and mark the location. Start by measuring the distance to the center of the hole in the factory cluster. Then, using tape and a marker, mark out the same distance on the new cluster. Once the location has been marked, drill a hole using a 13/8” hole saw.
4. If your particular truck does not come with a/c vents, install the included a/c vent blockoff plate and secure it with the included screws.
5. If your truck does come with a/c vents, remove the a/c duct from the factory cluster and install it into the new cluster using the included screws.
6. Then, install the lower blockoff plate and secure it using the included screws.
7. Install each gauge into the pod using the mounting brackets, washers, and nuts. Be sure not to overtighten the nuts as it will damage the gauges.
8. Once all of the gauges have been installed, insert the wiring harnesses into each designated gauge.
9. Remove the factory gauges from the dash.
10. Feed the opposite end of the wiring harness down through the dash and insert the new cluster into the dash. Secure it using the factory screws.
View our entire product lineup at https://www.glowshiftdirect.com/
Find us on social:
Facebook / glowshift
Instagram / glowshift
Twitter / glowshift
#GlowShift
WARNING: This demonstration is meant to be a guideline. All vehicles are different and professional assistance is highly recommended for installing any gauge. As with all of our products, we recommend testing the gauge before beginning the installation process.