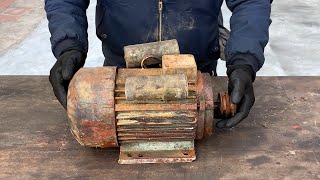
Industrial Maintenance 101: Electric Motor Disassembly/Reassembly

Let's tear down an electric motor!
This video is a walkthrough of a handson lab activity for a summer skilled trades exploration course at Laney College in Oakland, CA. It is intended to demonstrate some of the daytoday job tasks which would be performed by an Industrial Maintenance Mechanic. Students with no prior knowledge should be able to disassemble and reassemble an identical electric motor as shown in the video during a three hour session. I hope this video will be useful for students and apprentices, as well as for training coordinators and instructors looking for curriculum. Grab a motor and some hand tools and follow along!
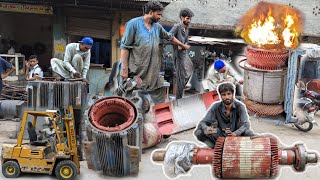
The demonstration covers the construction of electric motors, names of various components, some common hand tools used in assembly work, procedures for disassembling and reassembling a typical industrial electric motor, removing and installing ball bearings (with a hydraulic press), tips for successful disassembly and reassembly.
You can find the written instructions here: http://laney.edu/machine_technology/w...
Timestamps:
0:09 Introduction and “What is an electric motor?”
0:49 Tools we’ll be using: 1/4” and 5/16” sockets and driver (or similar), softfaced mallet or “dead blow” hammer, 4 pieces of wood (2x2). In addition to those mentioned during this section, we’ll need drive pin punches or another similar device.
2:49 Electric motor construction and strategy for disassembly
3:33 Removing the electrical wiring cover
4:22 Three tips for successful disassembly and reassembly: 1) organize components as you remove them, 2) take lots of pictures, and 3) match mark all components which can be installed in multiple orientations.
6:29 Removing the long screws which clamp the end bells together these are sometimes called “tie rods”
7:57 Backing off the bearing clips in the front end bell
8:32 Removing the rotor shaft and rear end bell
8:56 Removing the rear end bell from the shaft
9:17 Removing plastic electrical enclosure
10:37 Removing wavy washer/disc spring for rear bearing
11:35 Removing the front end bell from the stator frame
13:19 Summary of components
14:23 Removing the rear bearing from the shaft with a hydraulic press
16:59 Removing the front bearing
18:32 Reinstalling the bearings *NOTE: I forgot to turn on the camera when reinstalling the rear bearing. So only the front bearing is shown being reinstalled. The methods are substantially the same. Just make sure to use the short section of pipe to push on the inner ring of the bearing.
20:11 Strategy for reassembly
20:28 Assembling shaft in front end bell
20:59 Assembling stator frame
21:28 Assembling rear end bell with plastic electrical enclosure and wavy washer/disc spring
22:56 Assembling the long screws/tie rods which clamp the end bells together
24:40 Assembling the electrical wiring cover
25:08 Tightening the bearing clips in the front end bell
25:34 Marveling at our accomplishments
For more about Laney College, check out the website: http://laney.edu/machine_technology/
Follow us on Instagram (laneymachinetech) and Twitter (laneymachtech)!
AND BE SURE TO SMASH THAT "LIKE" BUTTON!