How to Replace Driveshaft U Joints 07-14 Chevy Suburban

For More Info visit us at: http://1aau.to/h/hb/'>http://1aau.to/h/hb/
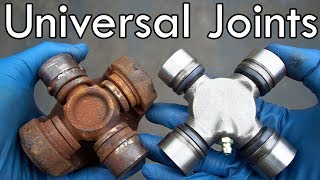
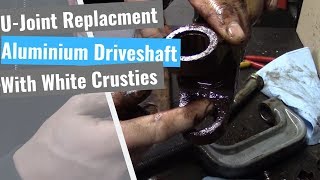
In the video, 1A Auto shows how to replace a broken or worn driveshaft ujoint. The video is applicable to the 07, 08, 09, 10, 11, 12, 13, 14 Chevy Suburban.
This process should be similar on the following vehicles:
2007 Chevrolet Suburban 1500
2008 Chevrolet Suburban 1500
2009 Chevrolet Suburban 1500
2010 Chevrolet Suburban 1500
2011 Chevrolet Suburban 1500
2012 Chevrolet Suburban 1500
2013 Chevrolet Suburban 1500
2014 Chevrolet Suburban 1500
List of tools used:
• Pry Bar http://1aau.to/obc/1AXAA00020
• 11mm Wrench http://1aau.to/obc/1AXAA00010
• 11mm Socket http://1aau.to/oe5/1AXAA00015'>http://1aau.to/oe5/1AXAA00015
• Ratchet http://1aau.to/ofG/1AXAA00016
• Socket Extensions http://1aau.to/oe5/1AXAA00015'>http://1aau.to/oe5/1AXAA00015
• Torque Wrench http://1aau.to/ocV/1AXAA00044
• Rust Penetrant
• Center Punch http://1aau.to/oI/1AXAA00055
• File
• Hammer http://1aau.to/oaW/1AXAA00091
• Vise
• Wire Brush http://1aau.to/o4/1AXAA00079
Subscribe: / @1aauto
Check out our playlist:
Chevy Suburban 20072014 10th Gen: • Chevy Suburban 20072014 10th Gen
Chevy Auto Repair Videos: • Chevy Auto Repair Videos
For More Info visit us at http://1aau.to/h/hb/'>http://1aau.to/h/hb/
⚠ DISCLAIMER:
While 1A Auto strives to make the information provided in this video as accurate as possible, it makes no claims, promises, or guarantees about the accuracy, completeness or applicability of the content. No information contained in this video shall create any expressed or implied warranty or guarantee of any particular result. All doityourself projects entail some risk. It is the sole responsibility of the viewer to assume this risk. 1A Auto is not responsible or liable for any loss damage (including, but not limited to, actual, consequential, or punitive), liability, claim, or any other injury or cause related to or resulting from any information posted in this video.