How to oversew piping on foamed panels - Car upholstery basics

✅Get our courses at: https://www.cechaflo.com
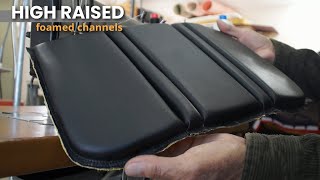
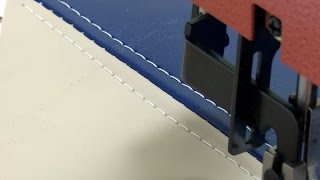
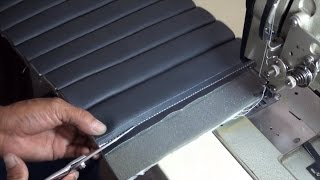
This is another video demonstration on how to sew down piping to a lateral surrounding panel which is then attached to a 1 cm thick foamed vinyl panel.
This panel has foamed 5 cm wide channels made by blind stitching on the reverse side of vinyl material.
As shown in previous videos to ease the sewing over and along the edges it is advisable to flatten the foamed edges. It helps a lot with the attaching of vinyl layers including the piping strip.
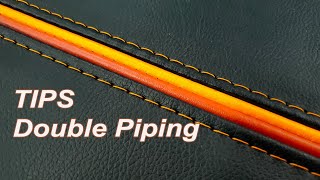
Perhaps, the most important tip in the video is the making of the piping strip gluing the reverse sides of the vinyl strip.
The piping strip looks more perfect and easier to make. After having it ready it is attached to the lateral panel the same way we did on previous videos.
The secret to get a nice piping is that our piping foot hollow part that houses the cord is slightly wider. Consequently, the first sewing is not close to the enclosed piping cord. It leaves 2 mm approx. for the final closing sewing.
The hollow part of the piping foot is the measure for the final closing sewing which is bulky due to the several layers of vinyl including the plastic cord.
At the end the cover was oversewn with decorative orange stitches. The spring loaded guide presser foot is useful to get a straight and easier sewing. As seated in front of the sewing machine we realize the presser foot spring loaded guide is on the right side. It makes our cover remain under the sewing machine head. As we can see there is not much room for our cover. As mentioned before in a former video the best would be to use a left spring loaded guide presser foot. This way if we are sewing a big cover it would remain on the left side of the sewing machine table.
I hope you find this video useful!
Cesar