How to Install a Vinyl Floor - Do It Yourself

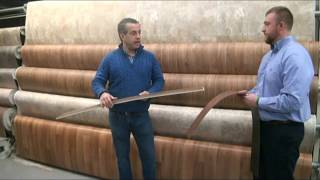
If the vinyl floor in your kitchen is old and scarred up, replace it! Armstrong Flooring has a wide range of color and styles to choose from to brighten up your kitchen. And best of all, it’s not expensive and you can do it yourself!
MATERIALS
Armstrong vinyl flooring
Armstrong flooring installation kit
notched trowel
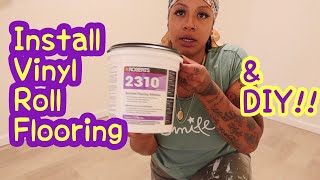
vinyl flooring adhesive
utility knife (comes with flooring kit)
pry bar
hammer
masking tape
putty knife
GETTING STARTED
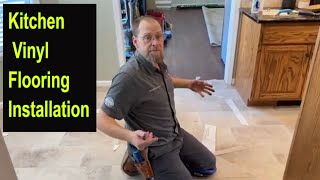
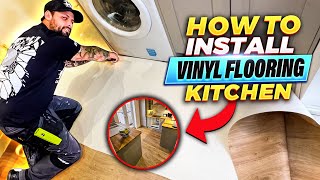
First remove all appliances from the kitchen area i.e. stove, refrigerator etc.
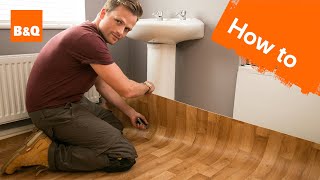
Next remove the quarter round from the baseboard. To do this, take a pry bar and a hammer. Put the pry bar on top of the quarter round and gently tap it with a hammer to get the pry bar between the quarter round and the wall. Once that’s done, gently pry the quarter round away from the wall. Repeat this process up the wall to remove the quarter round.
Once that’s done, you’re ready to use the flooring kit to measure and mark the dimensions of your new vinyl floor.
INSTALLING THE FLOOR
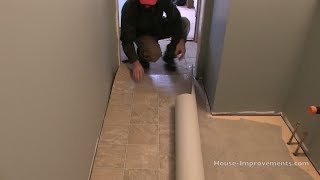
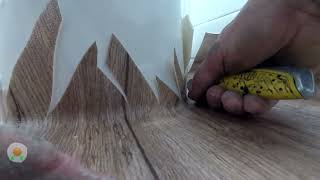
The Armstrong flooring kit makes this job much easier than it used to be. The kit comes with a utility knife and several large sheets of paper. Take the first piece of paper, and lay it up against the wall and into a corner. Then use masking tape to keep it in place, taping it to the baseboard in this case. Take the next piece of paper and put it next to the first piece with a slight overlap. Then use masking tape and tape one piece of paper to the next. Do this all the way around the kitchen until your floor is covered. Once you’ve done that, cut away any excess paper. The effect is that you are creating a template from which you’ll cut your new vinyl floor.
TIP: In each kitchen there are corners, so you will more than likely have excess paper here. To cut it correctly so your new floor will fit, smooth the paper down in the corner to where you create a crease in the excess paper. Then take a putty knife, put it in the crease, and take a utility knife to cut away the excess paper. The putty knife acts as a straight edge for you to cut along so that the utility knife blade doesn’t slip and make an incorrect cut.
Once you’ve got your paper template laid out, use more masking tape to reinforce the entire area. Then roll it up, and you’re ready to lay it out over your new vinyl flooring material.
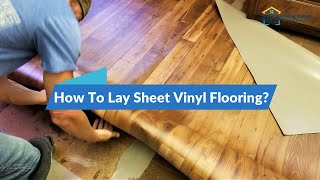
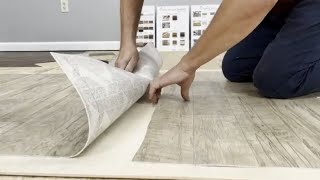
Lay the template down over the flooring material, tape it in place and you’re ready to cut. Use the utility knife that comes with the flooring kit and cut along the template. The vinyl flooring cuts very easily.
TIP: When you make your cut, skip over the tape you used to secure the template to the new flooring. This will prevent the template from shifting and causing an incorrect cut. Once you’ve cut the flooring out all the way around, then go back and cut the flooring under the tape.
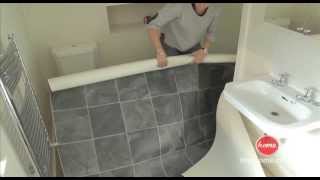
Once your flooring is cut, simply take it to the kitchen and unroll it to make sure it fits.
Once it’s in place, use a notched trowel to apply vinyl flooring adhesive to keep your floor in place.
Then wait 24 hours before reinstalling your quarter round and appliances and your kitchen will look great!
MORE FROM YOUR NEW HOUSE
Featured videos:
• YNH Featured Videos
Great DIY Projects from Your New House:
• DIY Do It Yourself with Your New House
Quick Tips:
• Quick Tips Great, yet simple ideas ...
Gardening and Landscaping:
• Gardening and Landscaping
Adventures in Homebuilding:
• Adventures in Homebuilding
Choosing and Using Tools with Carmen Ciricillo:
• Choosing and Using Tools with Carmen
Factory Tours and Product Testing:
• Did You Know?