Hand soldering surface mount components to IPC class 3

Hand soldering surface mount components to IPC Class 3 standards, which represent the highest level of quality and reliability for electronic assemblies, requires a high degree of skill, precision, and adherence to specific guidelines. Here's a stepbystep guide on how to hand solder surface mount components to IPC Class 3:
Materials and Tools Needed:
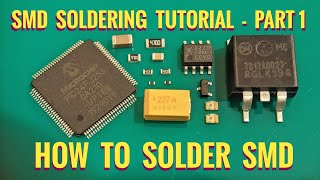
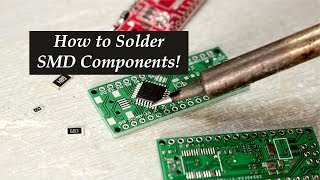
PCB with surface mount components
Surface mount components
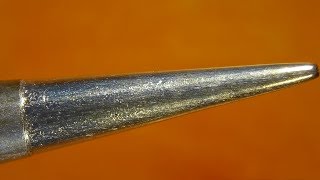
Soldering iron with a fine tip (temperaturecontrolled)
Soldering station with adjustable temperature control
Highquality solder wire (leadfree or leaded, depending on your requirements)
Flux (preferably noclean or watersoluble)
Tweezers or vacuum pickup tool
Magnification equipment (microscope or magnifying glass)
ESD (Electrostatic Discharge) precautions (ESD wrist strap, ESDsafe work surface)
Procedure:
Preparation:
Ensure your work area is clean, welllit, and free from distractions.
Verify that your soldering equipment is calibrated and functioning correctly.
Put on an ESD wrist strap to prevent electrostatic discharge damage to sensitive components.
Component Placement:
Use tweezers or a vacuum pickup tool to carefully place the surface mount components on the PCB in their designated locations.
Ensure proper orientation and alignment of each component.
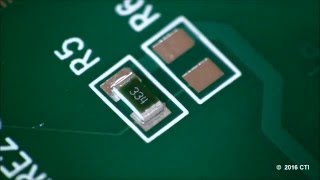
Flux Application:
Apply a small amount of flux to the solder pads on the PCB where the surface mount components will be soldered.
The flux helps in solder wetting, removes oxidation, and improves solder joint quality.
Soldering Iron Temperature:
Set your soldering iron to the appropriate temperature based on the solder alloy used and the specific soldering requirements. For leadfree solder, temperatures are generally higher than for leaded solder.
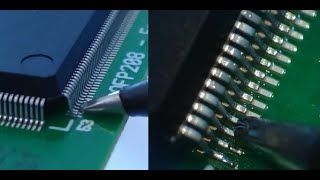
Soldering Technique:
Tack solder one corner or one pad of the component using a minimal amount of solder.
Use the soldering iron to heat the solder pad and the component lead simultaneously.
Once the solder melts and flows, remove the soldering iron, allowing the joint to cool naturally. Do not disturb the joint during cooling.
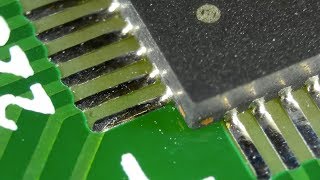
Ensure that the solder joint has a shiny appearance, indicating good wetting and proper solder flow.
Use magnification equipment to inspect the solder joint for any defects, such as bridges, cold solder joints, or insufficient solder.
Repeat and Inspect:
Continue soldering each pad of the surface mount components one at a time, ensuring highquality solder joints for each connection.
Periodically inspect each solder joint using magnification equipment to maintain IPC Class 3 quality standards.
Cleaning (if required):
If a noclean or lowresidue flux is used, cleaning may not be necessary. However, if cleaning is required, use an appropriate cleaning agent or isopropyl alcohol to remove any flux residues.
Final Inspection:
Conduct a final inspection using magnification equipment to ensure that all solder joints meet IPC Class 3 standards for quality, appearance, and reliability.
Documentation:
Maintain records of the soldering process, including temperature settings, component placement, and inspection results, for traceability and quality control purposes.
Hand soldering surface mount components to IPC Class 3 standards requires patience, attention to detail, and rigorous quality control. It is essential to ensure that each solder joint meets the stringent requirements of Class 3 for highreliability applications.
https://www.surfacemountprocess.com/
#smt #soldering #solderingiron #ipc #class3
Video credit to Mr SolderFix / @mrsolderfix3996