Fridge Temp Sensor Replacement u0026 Testing

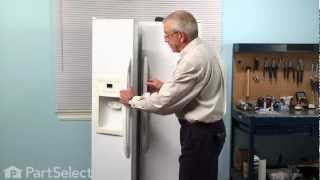
Fridge temp sensor replacement is one of the easiest & least costly repairs many DIY home owners can successfully perform themselves. I'll show you the simple steps to diagnose, locate, test and replace a faulty refrigerator temperature sensor (correctly called the thermistor), then confirm the new sensor fixed the problem.
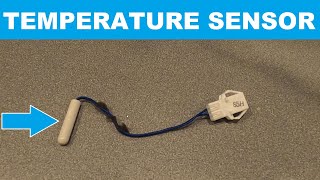
The temp sensor is also one of the most common parts to fail in today's microprocessor controlled fridges and are often misdiagnosed for much more costly components such as the main control board, defrost circuit, even the compressor.
Common symptoms of a failed fridge thermistor/s include the fridge or freezer section running too hot or too cold. On our fridge example here fridge too warm freezer works fine. If your fridge/freezer has a temperature readout, and its reading is substantially (5 degrees or so) different from what a thermometer placed in the fridge is reading; that too is a good indicator of a faulty fridge temperature sensor/s.
If this fridge temp sensor repair looks too difficult to perform yourself, then please call in a repair tech. You'll at least be informed to the scope of the repair and cost of the part.
Low cost repair part used in this repair (WR55X10025 Refrigerator Temperature Sensor):
https://amzn.to/2WV5L7j
Adhesive Marine Grade Heat Shrink Tube:
Clear: https://amzn.to/3QFpaVF
Black: https://amzn.to/3QCfcUY
TS100 Direct Drive portable soldering iron used in this video:
https://amzn.to/3rlreV4
My TS100 Soldering Iron Review:
• TS100 Soldering Iron Unboxing & Review
Fluke 17B+ DMM used in this video:
https://amzn.to/3dSh4b8
Video Chapter Time Index:
Intro 0:00
Diagnosing the problem 0:52
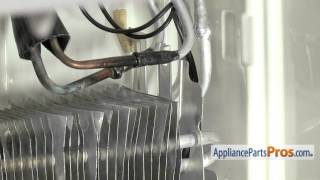
Locating and removing the fridge evaporator temperature sensor 3:16
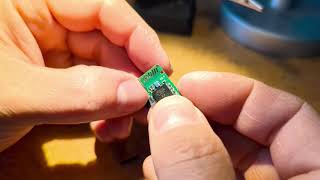
Bench testing the old & new WR55X10025 temperature sensors 4:16
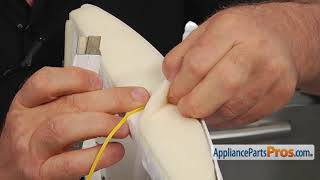
Replacing the evaporator temperature sensor 7:15
Confirming repair & conclusion 11:08
A Few More Tips...
One item I never mentioned in the video is the very first thing to try whenever your fridge is acting up. Always unplug or turn off the circuit breaker to the fridge, wait a minute or so, and turn it back on/plug it back in. This might reset the logic board and if you're lucky (I never am), it "may" fix this or other weird problems.
As I mentioned at the end of the video, this is also a great time to vacuum out under the fridge and vacuum/clean all the dust, hair, and other shmoo from the condenser coils.
If your fridge has a water line for ice &/or water, while it's pulled out, check the water line for leaks or damage. The cheap plastic 1/4" line that comes with many low cost fridge water connection kits degrades over time and becomes brittle and cracks; especially if you have chlorinated water. Much better to get stainless braided fridge hose or solid copper 1/4" tubing kits. They may cost a little bit more, but having a water line burst will cost much more in water damage to your home.
Stainless Fridge Water/Ice Maker Hose:
https://amzn.to/39ysOHu
DISCLAIMER: Links included in this description might be affiliate links. If you purchase a product or service with the links that I provide I may receive a small commission. There is no additional charge to you! Thank you for supporting RCHelicopterFun.com & my channel which helps me keep creating content.
Please consider giving a thumbs up & subscribe if you enjoy my content thank you.