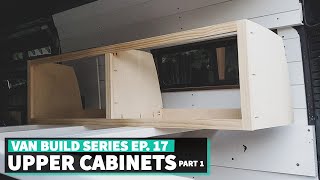
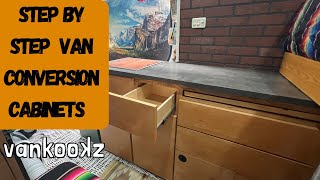
Ford Transit DIY Upper Cabinets in a Van Conversion | Step By Step Van Conversion Cabinets

How to Build DIY Upper Cabinets in a Van Conversion | Step By Step Van Conversion Cabinets
The Vankookz Van Conversion Masterclass is Finally Here! https://vankookzvanconversionmaste...
FREE stepbystep instructional video guide https://www.vankookz.com/diyfordtra...
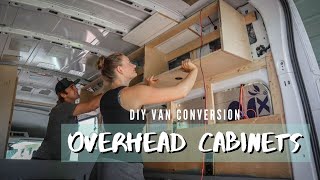
Today we are working on Upper Cabinets in a Ford Transit van conversion. The Ford has much more curves and contours than a Sprinter or a Promaster. The main difficulty is the downward curve of the roof after the first roof crossbeam.
The first step in this project is to Draw and measure your layout. From here we make a cut list. Getting all your cut measurements on paper makes for a great reference when you are ripping and cutting all your boards to length.
Once you have cut all the vertical pieces of your face frames (Stiles) and the horizontal pieces of your face frames (Rails) it’s now time to assemble your frames. Remember all your stiles will go long and your rails will sandwich in between your stiles. You will assemble everything with a kreg pocket hole jig. You will kreg all your rails on the top and bottom.
Now that you have your face frames built its now time to hang them in the van. We used small LBrackets on every roof stud. This is just to hold the frames in place so we can scribe our sides and cabinet dividers. We made a kicker with a clamp and some scrap wood to hold the frames in place at the proper distance on each side. This allowed us to get in with our cardboard and start working on templates. We always start with cardboard templates than to templates on harder pieces of wood like ram board. Once the templates are perfect we then transfer them onto our hardwood.
It’s now time to install all your dividers and end caps. We use a brad nail gun and wood glue and attach all dividers to the face frames. We nail the frames into the dividers vertically down each stile. We also nail in a small nailer on the bottom of each section so we can connect the bottom of the cabinet to the face frames. Then we cut and attach the bottom. For added support, we ran a quarter round along the bottom back edge of the cabinet and nailed that into the van framing as well as the bottom of the cabinet.
To attach it all to the wall we cut headers for each cabinet compartment and used LBrackets to attach the header to each divider. We also nailed the headers to the dividers at a diagonal angle with the nails. We attached the header with a positive connection to the van framing with 1(1/4)” “Quick Screws”.
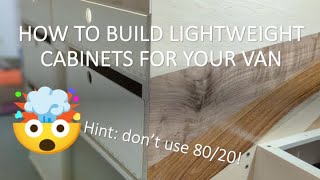
The next step is to cut the doors. We used a 3/4” sheet of birch plywood. We used the table saw and the miter saw to cut all our door panels out. Next, we tapped all the edges of our doors with veneer wood banding. This really cleans up your doors and gets rid of the plywood edging. Now it’s time for hinges you can use any hinge you want here it does make it's easier to install the hinges on the doors now, instead of in the van. Once all your hinges are on it’s time to hang your doors on and match the grain.
..::CHAPTERS::..
00:00 How to Build Upper Cabinets in a Ford Transit Van Conversion
00:25 STEP 1 Face Frames
00:26 Draw Out and Measure Your Layout
00:42 Make a Cut List and Cut All Your Boards Vertically
01:25 Plane Your Vertical Cuts
02:08 Cut Your Face Frame Stiles and Rails
02:43 Kreg Jig Your Stiles and Rails
03:28 Assembling the Face Frames
04:50 How to Build Upper Cabinet with the Ford Transit Roof Curve
05:18 Installing the Face Frames in the Van
05:33 STEP 2 Scribing Templates for Your Cabinets
05:36 How to Make Templates for Your Upper Cabinets
06:42 Making Cardboard Templates for Your Upper Cabinets
07:25 Installing Cabinet Dividers
07:45 STEP 3 Attaching Your Cabinets to the Van Framing
07:46 How to Attach Your Upper Cabinets to Your Van
09:12 Cutting the Bottom of the Cabinets
10:26 How to Make a DIY Quarter Round
11:17 Attaching the Bottom to the Upper Cabinet
11:45 STEP 4 Cutting Cabinet Doors
11:50 How to Cut Doors for Your Upper Cabinets
12:29 Draw Your Layout for Your Doors so the Grain Matches
12:42 Cutting Your Doors
12:56 Cleaning Your Door edges with Veneer Wood Banding
13;13 Installing Hinges on Door Fronts
13:33 STEP 5 Install Door Fronts
..::Parts & Tools We Used::..
Liquid Nail https://amzn.to/3pCUwwS
Table Saw https://amzn.to/3pxbUTL
Battery Powered Brad Nailer https://amzn.to/3GnrLuZ
Chop Saw https://amzn.to/31fOWZ3
T Square https://amzn.to/2xnD7hg
Measuring Tape https://amzn.to/2xoT2eY
Kreg Jig https://amzn.to/3xB0qSN
Kreg Jig Screws https://amzn.to/3zFUpHI
Clamps https://amzn.to/3mYm8M5
Jig Saw https://amzn.to/3tK0jDH
Circular Sander https://amzn.to/3aYqFLK
Sandpaper https://amzn.to/3tKzGP0
Router + Bits https://amzn.to/3HCDvf8
Wood Banding for Door Fronts https://amzn.to/3mUScAC