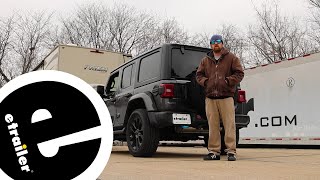
etrailer | Roadmaster Tow Bar Wiring Kit Installation - 2020 Jeep Wrangler Unlimited

Click for more info and reviews of this Roadmaster Tow Bar Wiring:
https://www.etrailer.com/TowBarWiri...
https://www.etrailer.com
Don’t forget to subscribe!
/ etrailertv
Full transcript: https://www.etrailer.com/tvinstallr...
I'm sharing with etrailer.com. Today I'm going to walk through how to install Roadmaster Diode Wiring Kit on your 2020 Jeep Wrangler Unlimited. Adding a diode wiring kit to your vehicle is going to allow the vehicle to receive light functions from the motorhome while it's being flattowed so that you're legal and safe. It's going to be one of the five main components in a flat tow setup. The other four are going to be your base plate, your safety cables, your braking system, and your tow bar. You can find each one of those components here at etrailer.com.
As you can see here where the Jeep hooked up to our motorhome. We're getting our signal from our motorhome back to our Jeep, so that we're legal and we're safe. Everybody around us is going to know what we're doing, whether we're turning, braking or driving at night. Last thing about the diode kit is it's going to connect directly into factory wiring behind each taillight through the diodes.And what the diodes do is they protect the factory wiring on the Jeep from any backfeed from motor home if there's a wiring issue and vice versa. Nice thing about them is once they're installed and there's no maintenance with them.
They allow you to utilize the factory tail lights and light bulbs while the vehicle is being flat towed. And when you're not flat towing the vehicle, you're using your lights as you normally would. So it doesn't affect them in any way. Start our installation, you're going to have fourpole wiring like this. It's going to be rolled up, on the end of it actually on each end you're going to have a 4pole plug.
If your RV does not have a wiring on it already, what you're going to do is you're going to take and you're going to cut about three foot of it off. That's going to be end that you're going to wire to the RV.The other end with the other plug on it is going to come out the front here. You're going to have a tether that's going to tie between the two to give you that connection. If not, you can cut both ends off. You're going to take your wire, on the new Rubicons, this is a metal pan.
Drill a hole in it. Run your wire back. We're going to run it to the back of the vehicle where the tail lights are. You are going to make sure you're staying away from anything hot or moving. What I like to do with the Jeep, because it's more of an offroad vehicle is run it right through the frame. It's very easy to do because the frame has got holes in it from front to back. We come right over here. There's a hole. I ran it through here. And if we follow our frame rail down, you'll see some large holes.What I use is an airline tube. If you have a wire hanger, you can do that and you just feed it through the holes, pass it down to the next one all the way back until you get to this large hole right here. Pull your wires out, separate your green from your yellow, brown and white. Now your white one, you can ground it here. If you want, somewhere underneath. You just want to make sure it's all metal. What I'm going to do is I'm actually going to take all three of these. I'm going to feed them up behind my tail light. I'm going to see if I can ground it up there somewhere. If I can't, then I can always pass my white wire down and ground it underneath here.Once we get to the back of the vehicle, we need to remove our tail lights. If we come inside, right up here, there's going to be a little panel like this. You're just going to pop it off. You can use a plastic trim panel tool or screwdriver. Right inside you're going to have a spring loaded bolt that holds our light in. Use a 10 millimeter socket to remove it. We're going to do the same thing on both sides of the vehicle.Our light out and then we need to disconnect our wiring. Pull up the red tab, we're going to push this black tab here and pull the end up. And then set your lights aside. Next, we need to pull some back. Pull some of the coding back to test our wiring, to see which ones we're going to need. I'm actually going to test them here, but I'm going to need to pull this back anyway because this is we're going to retain our diodes into it. Get our wires up. I actually ran it right through the corner down here, instead of back there by the fuel tank fill tube. Running it here keeps the wires nice and tight up underneath here. We tested our wires and we determined that our yellow wire is going to be our brake and turn signal. Our white wire with the gray Stripe is going to be our running light signal on our driver's side. Now we'll take our three wires and I'm going to cut them to size. It should give me plenty of length. Cut them like th