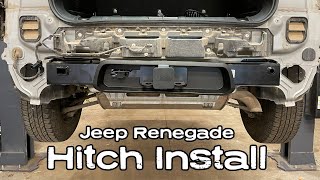
etrailer | Roadmaster Reflex Steering Stabilizer Installation - 2016 Ford E-Series Cutaway

Click for more info and reviews of this Roadmaster AntiSway Bars:
https://www.etrailer.com/AntiSwayBa...
https://www.etrailer.com
Don’t forget to subscribe!
/ etrailertv
Full transcript: https://www.etrailer.com/tvinstallr...
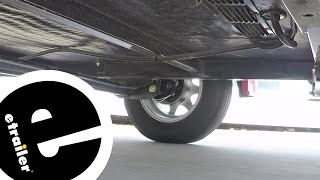
Speaker 1: Today on our 2016 Ford E450 Chassis Class C Motorhome, we're gonna be taking a look at, and showing you how to install, the Roadmaster Reflex Steering Stabilizer with Mounting Brackets for Class C Motorhomes, part number:RMRBK24RSSC.Here's what our steering stabilizer looks like fully installed. It's gonna replace our factory stabilizer, and it's gonna help maintain the vehicle tracking down center, and help correct over steering. Now, there is a variety of things that can make your vehicle veer; whether it be cross winds, uneven pavement, or even a tire blowout, the key to a pleasant and safe driving experience is learning how to deal with these situations. Our steering stabilizer is gonna work to return the vehicle to center when something happens that causes it to swerve or jolt. The steel spring is gonna be working constantly to help maintain the vehicle going in a forward, neutral position. When it's compressed, the spring is gonna push back out, and when the spring is extended, it's gonna be pulling back in.Whether you're upgrading from your factory one, or replacing it, it's definitely gonna have a lot more tension than our factory stabilizer here.
Now, our stabilizer is gonna mount directly to the frame, and on the other end it's gonna connect to our tie rod. A tight connection between the two means it's gonna keep our suspension and steering components right where they should be, and it's gonna try to keep the vehicle going straight.So, we took our vehicle down to our test course, and I could immediately notice a difference. With the steering stabilizer on, as soon as I came out of a turn it wanted to return to center and keep tracking straight. And through our slalom course, I felt that I had much better control of the vehicle, and it generally wanted to come back and return going straight, opposed to just keep veering off to the side.Each one of these kits is gonna come with our steering stabilizer and custom brackets for your application. Now that we've gone over some of the features and benefits, let's show you how we get it installed.
To begin our installation, we're gonna need to remove our factory steering dampener, and we're gonna have a couple different connection points. Now, on the rod end of our steering dampener, it's gonna attach to a bracket and go around our steering linkage. We're gonna need to remove these four bolts because we're gonna be removing the bracket, as well. I'm gonna be using a 13mm socket to remove these nuts. Once we have those removed we can pull the Ubolt out, and repeat the same process for the other one.
Now, if we come to the cylinder end of our steering dampener, we're gonna have two bolts on the inside of our frame here, as well as one going into the bottom of our frame, right here. Again, we'll be using a 13mm socket to remove those. I just do want to mention, when you get ready to take out the last bolt, you want to make sure you have a firm hold on your steering stabilizer and the bracket because there won't be anything, and it will come falling down.Now we're gonna need to come to our frame bracket that they provide in our kit, and it's gonna be the one with the two holes vertically, and it's gonna have a small tab with another slotted hole. We're gonna line these up with our factory holes in our frame here, and you want to make sure that the circular hole is on the bottom, and that this lip right here is gonna go up against the frame, so it lines up like this. Now we're gonna take the supplied hardware in our kit.
We're gonna take our M10 bolts, followed by a lock washer and then a flat washer, to secure it to the weld nuts in the frame. So, right now I'm just gonna get one of them in place so it can support itself, then I'll get the rest of my hardware in. Now that it's all in place, I'm gonna be coming back with a 17mm socket and snug up all of my hardware.Next we're gonna need to attach our tie rod bracket. The four holes are gonna be going against our bar here, and you want to make sure the tab with the circular hole is going towards the other bracket we just installed. Now, the way we're gonna attach these is, we're gonna take the supplied Ubolts in our kit, and we're gonna go around the bar and line up the holes, and then we're gonna come back and put the rest of our hardware in place. We're gonna take a flat washer, put it over our Ubolt. Then we're gonna come back with a nylon locking nut, and put it on there handtight for now. Now we're gonna repeat this of the other Ubolt and all the other remaining hardware that we have. The end result should