etrailer | Ramp Springs Review

Click for more info and reviews of this Redline Trailer Ramp Springs:
https://www.etrailer.com/TrailerRamp...
Check out some similar Trailer Ramp Springs options:
https://www.etrailer.com/deptpgTrai...
Click for more info and reviews of this Redline Trailer Ramp Springs:
https://www.etrailer.com/TrailerRamp...
Check out some similar Trailer Ramp Springs options:
https://www.etrailer.com/deptpgTrai...
https://www.etrailer.com
Don’t forget to subscribe!
/ etrailertv
Full transcript: https://www.etrailer.com/tvreviewre...
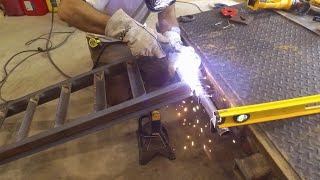
Speaker 1: Today, we're going to be taking a look at, and showing you how to install ramp springs for the 2000 pound torque rate for inch and a half shafts. The left hand side is part number RS16933LH, and for the right, you'll need part number RS16933RH.Now, these springs are designed to aid you in lowering and lifting these heavy ramps. If you don't have any springs installed, you know it can be quite a bit of a pain. As you're lowering your ramp down, you kind of have to be under it. You don't want to just let it drop .. Well, I guess you can, but you might cause damage to it, and vice versa.When you're trying to lift it up, you're going to lift up the entire weight.
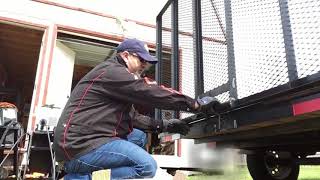
With the springs installed, they've got a 2000 pound tension rating, so as we lower the gate, as we raise the gate, it's going to be much, much easier.Now, this is what I would call a medium/heavy duty utility type trailer. We'll also show you on a very heavy duty utility type trailer, the use of two of them for those much larger ramps, the triangulated style ramps. Those tend to be a lot heavier, so we'll show you that, as well.Just to give you an idea, however your ramp's held in place, you'll want to, of course, unsecure that, and then you'll see our ramp's going to come down much easier. It actually kind of floats there. We'll push that down.
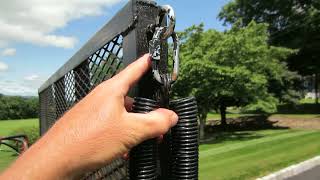
That'll keep it closer to the ground. We can get our equipment on and off, then when it's time to shut them back up, much easier process than what you're probably used to, especially if you don't have springs, or if your current springs aren't in good working order.You can see our old spring. It's become worn, and it's not near as effective as it was. You see how that's pointing off, kind of in that rearward direction It just means it's been fatigued over time, so we're going to be able to replace it with a new spring. It's going to give us much more effect.Now, the left hand and right hand is going to determine which side of the pin you're going to be putting it on.
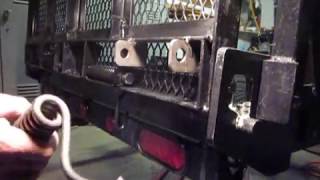
If you want it on the right side, you want a right hand spring, and if it's going on the left side, you're going to want your left hand spring.To ensure we get years of great service out of the ramp springs, they're made of a high quality alloy spring steel, so they're going to return to their original position for years and years.To ensure you have plenty of room, we're going to go over the specifications of the spring, just to give you an idea about the size. From outside of our spring to outside of our spring, we've got 2 1/2 inches. Inside and inside's going to be about and inch and a half. From the spring itself, to the end of each arm that sticks out, is going to be 4 inches, so you definitely want to keep that in mind, and make sure that you've got clearance for that, and also that, that spring will make contact with something within that 4 inch range.To begin your installation, you'll need to remove whatever's holding in your hinge pin. It's going to be the large inch and a half diameter pin that runs through here.
In our case, we've got a bolt and a nylon lock washer. We're going to use a 9/16 to get that removed.You also want to hang on to your hardware, because you're going to need this to put it back in. It keeps this pin from sliding in and out. You can see our old spring mounted here. We'll move our pin out, and the idea is to free that up. Now, this ramp's going to be very heavy, and when you pull that pin, it's going to want to fall down. You need somebody to give you a hand, or if you can handle it yourself, however you want to do it, just make sure, as you pull this pin, that, that doesn't fall down and hurt you.Now, we can remove that old spring, set it aside, and replace it with our new one. Now, we're going to be putting our spring on the other side. We've got an accommodation for one here or here, so it doesn't matter how you want to do it. Make sure you get it where you need it, though. Then, our gate hinge is going to go right in between there. As we install it, we can place that pin through.Now, as we replace our ramp onto the trailer, and install our pin, of course, we want to ensure that the pin passes through the middle of our spring, and we also want to make