etrailer | MORryde Hitch Mounted Stabilizer Review

Click for more info and reviews of this MORryde Trailer Jack:
https://www.etrailer.com/TrailerJack...
Check out some similar Trailer Jack options:
https://www.etrailer.com/deptpgTrai...
https://www.etrailer.com
Don’t forget to subscribe!
/ etrailertv
Full transcript: https://www.etrailer.com/tvreviewmo...
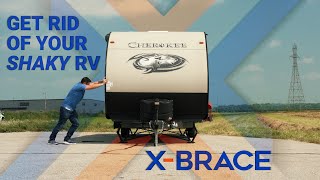
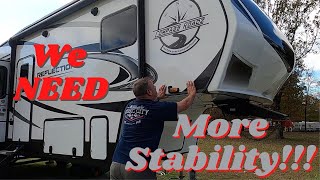
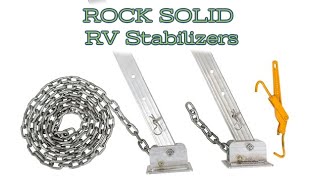
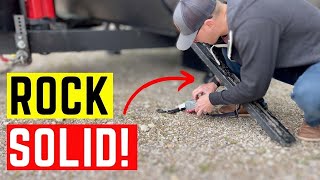
What's up everybody, it's AJ with etrailer.com. Today, we're gonna be checking out this MORryde hitch stabilizer, for your motor homes or your fifth wheels; whatever you have a hitch on the back, you can put this, it's gonna help stabilize the back end of your rig. Let's check it out. Looking at the stabilizer, how it works is, we got the ratchstrap here at the bottom. We got the legs that are sitting with the feet flush on the ground. I ratchet the ratch strap, which pulls in the legs, which pushes up on the hitch.
Which is gonna help stabilize the back end here because it's gonna be pushing up and lifting it off the ground, just a little bit. So with that upward tension, that's gonna lift up here on the back end, and it's gonna eliminate the bounce, as you're walking around towards the rear of your rig. Now it's been slightly updated. And what has changed is the strap is no longer green. It's a normal black strap.
The ratch strap works great. I like it. The other thing is that the eyelets. So it did have hardware that you'd put in and you'd mount it here for it to pull in. And that pulled in pretty well, but what would happen was the feet wouldn't get as flat on the ground.
Now the eyelets are on the foot pad. It's connected here at the end. So that's gonna have a way better pull in and keep them flat on the ground at the same time. Let me go inside and let's see how much movement there is without it installed. All right, with our level set up, I'm gonna kind of walk around and see how kind of movement we get here.
Kind of go back and forth. Try and move as much as I can. You see, you got a little bit of movement there; on the level, back and forth. There we go. Now we've seen it before. Let's check out the after. Just say, maybe somebody's sleeping and I got up early to make some coffee or something. I'd be back here. How much is it gonna transfer up to the front So the same thing, same quick movements back and forth. Looks like it's not moving as much from here. You have a better side of it than I do, but I can try the more aggressive movements here. Then try and get it. So that definitely helps that side to side, that bubble's still moving just a little bit, but not as much as it was before. I was rocking the whole rig back and forth. And now it doesn't look like it's moving all that much, at all. Now let's get into some measurements. So overall your hitch is gonna have to have a clearance of 19 inches to 39 3/4 of an inch of space, from the center of the hitchpin to the ground, for this to be usable. And then talking about the individual legs. The minimum is gonna be 28 inches and the maximum is gonna be 40 inches of length than adjustability. Besides figuring out how it worked, the second thing I thought of was how is it gonna store Basement storage in the rig is kind of limited. So I don't really have a whole lot of space to spare to hold and store this thing. So luckily it actually folds up and stores on itself here in the hitch. Lemme show you how to do that. First, I'll undo the ratchet strap. Release that tension there. Then I can lift up, remove the hooks from both sides. And then fold this up like this. There's gonna be a bracket. Here in the center is what you can run this pin through. And that'll hold it in place. Now you can see it's gonna stay like that. Can't go too far this way or this way. One thing I wanna point out is that you can actually clear the ladder. We did that there in that last portion, but I wanted to point out that it is possible. It does flare out a little bit here at the foot. So what I did was measure from the center of the hitch pin to that point, and that's gonna be about 6 1/2 inches. So that's what you're working with. If you're looking to clear the ladder on the back of your rig. Now let's go ahead and drop this down and get the stabilizer set up. Now it's gonna be the reverse order in what you saw me do earlier. You're gonna pull this pin out. It's gonna release that bracket. Now it is gonna drop that one foot. So I'm gonna set this one down and outta the way and show you that you can adjust these feet individually. There's four points of adjustment and 16 inches in total, of adjustability for each foot. We've got ours right there on that first hole. So we'll put that pin through there. And that clip, and we'll bring this back down to the ground. Hold that foot plate and that way it sits nice and flat. Now we'll take our ratch strap and run our hooks through the eyelets that are now on the feet themselves. And then pull this tig