etrailer Class III Trailer Hitch Installation - 2023 Subaru Outback Wagon

Click for more info and reviews of this etrailer Trailer Hitch:
https://www.etrailer.com/TrailerHitc...
https://www.etrailer.com
Don’t forget to subscribe!
/ etrailertv
Full transcript: https://www.etrailer.com/tvinstalle...
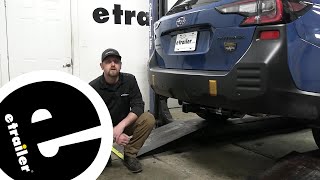
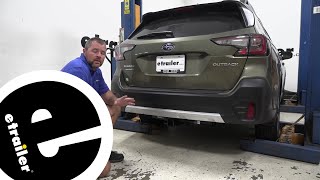
Hey guys, this is Jake here with etrailer. Today we've got a 2023 Subaru Outback wagon and we're gonna be going over some details and showing you how to install the etrailer class three, two inch hitch receiver. Adding a hitch receiver to your Subaru Outback is gonna make it that much more usable. The Outback itself is already a very versatile vehicle. It has a roof rack preinstalled. It has a big cargo area in the back, but having more space on the hitch itself to be able to haul bikes on a bike rack, extra cargo on a cargo carrier or any other hitch accessory, maybe you wanna pull a small trailer, this is gonna help you to be able to do all those things.
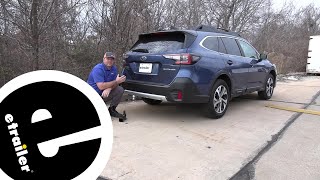
The etrailer hitch on the Outback is gonna have a really nice factory look. The only thing you're gonna be able to see is the receiver tube itself and the safety chain loops. A lot of other hitch receivers you may see out on the road will have the big cross beam here on either side and that's the integrity of the hitch itself. But with this option, you don't have to look at all that other stuff. You just have this receiver tube coming out at the bottom.
Now this is gonna be a twoinch by twoinch hitch receiver, which is gonna open up your options for accessories and accept a lot of the accessories if you've had twoinch hitch accessories. It'll have a nice tough black powder coat finish. A standard 5/8 inch hitch pin hole and nice large safety chain loops to be able to connect any hooks of various sizes. The weight ratings for this hitch is that it'll have 350 pounds of max tongue weight and 3,500 pounds of gross trailer weight towing. Now something to keep in mind is that you cannot use weight distribution with this hitch because it's not rated for it.
Now a couple measurements for you guys. From the center of the hitch pin hole to the outside of our bumper is about three inches, but it will be behind the fascia here so you don't have to worry about hitting your shin on it if you walk close behind your car in your garage or what have you. From the ground to the top inside of the receiver tube it's about 16 inches. So that's more than enough ground clearance if you get any accessories like a bike crack or a cargo carrier that doesn't have a rise. We do recommend if you could find one with a twoinch rise, which most of them have.
That will help to get you a little bit more ground clearance for those departure angles. But you don't have to get one with an extreme rise as if you had a hitch that was 12 inches off the ground. Now that we've gone over some of the details about this hitch, let's go ahead and take the car into the shop and show you how to get it installed. To begin our installation, we're gonna start by removing seven push pin fasteners and you can see them along the edge here. We have one here, here. We will not be removing this one or the one on the opposing side, but we do need to take this one, this one, this one, and then the two over there out. You can use a trim panel tool or a flathead screwdriver works too. We'll just get in there on the side, pop the center out, and then the base should come out too. With those seven push pin fasteners removed we're gonna move up to the wheel well to get another fastener out. Now just keep in mind, whatever we do to one side we're gonna repeat on the other. For this style of fastener you'll just wanna take a screwdriver and push in on the inside and then you should be able to pop it out. Now what we like to do before we take this fascia off is you like to tape the joint on piece of tape on one on each side of this line. Just so when you're pulling the fascia off, you don't risk the fasteners on the inside scratching the paint. Now all we need to do is pull back on the fascia. Now this part can be intimidating, but I just pulled the other side off and the fasteners that are in here are a lot looser than a lot of other vehicles. So just get your fingers in behind there and pop them out one at a time as you go up. Now with the rear hatch open, because this section is gonna have to come out and an extra set of hands we can pop it off the rest of the way. There we go. Just look for any electrical connectors. We've got one over here so we'll have to disconnect that. Pushing a little gray tab and we can take this and set it aside in a safe place. Before we remove our bumper beam we need to remove this sensor or unplug it and then we can use a 14 millimeter socket to remove the two bolts on either side and then there's gonna be a nut through this hole and you'll have to use an extension in order to get to them. (tools rattling)