etrailer | Air Lift LoadLifter Air Helper Springs Installation - 2008 Toyota Tundra

Click for more info and reviews of this Air Lift Vehicle Suspension:
https://www.etrailer.com/VehicleSusp...
https://www.etrailer.com
Don’t forget to subscribe!
/ etrailertv
Full transcript: https://www.etrailer.com/tvinstalla...
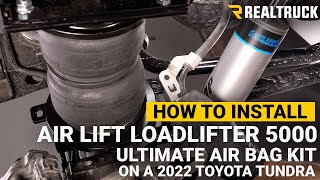
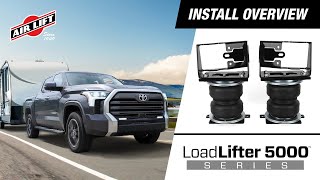
Today on our 2008 Toyota Tundra, we're going to take a look at then install the Air Lift LoadLifter 5000 ULTIMATE Air Springs with the Internal Jounce Bumpers. These are going on the rear axle. The part number is AL88299. Now, before we load some weight in our vehicle, let's get a measurement to see what our factory ride height is. It looks like we're going to have about 39 and a half inches to the inside edge of our rear fender and we'll have about 36 and five eighths of an inch to the inside edge of our front fender. Now, we're going to load up our water tank. It's got about 250 gallons in it and we've added about a thousand pound water tank to the back of the truck here.
Let's get another measurement. It's like now we're down to about 37 and a quarter inches so it's dropped our truck nearly two and a quarter inches. Here on the front, our truck has actually risen about three eighths of an inch. We're now at 37 inches to the inside of that fender wall. We've got the load installed on the bed of the truck again after we've completed the airbag installation. Now with the included jounce stops, we've only come down to 38 inches now, so we've already gained back three quarters of an inch, but let's put some air in to see if we can get it right back to our factory ride height. As you can see, now, we're right back at the 39 and a half inches that we originally had for our original factory height.
This is going to give us great level on the truck and maintain all of those factory ride characteristics that we enjoy. As you can see here, we're back at the front tire and if you remember, initially, when we measured this, we had 36 and five eighths of an inch from the ground to the level of our fender. After we added our weight, that lifted our front end, so that took some of the pressure off of our front tires and changed some of the ride characteristics of the truck. We've got our airbags installed now, we've got them aired up. We're going to take another measurement and as you can see there, it's exactly at the 36 and the five eighths, right back to that original factory ride characteristics. We're going to have equal weight distribution front and rear, the side to side movement is going to be help limited by our airbags. It's really going to help the performance and the ride quality. By adding just 45 pounds of air, we're right back to our factory specifications.
The airbag's going to have a maximum psi rating of a hundred pounds, so you can really get these adjusted to fit your load perfectly. As you can see as we go through the course, the airbags are going to help to reduce any kind of strain on the rear suspension, can compensate for uneven loads. It's going to help to level out our vehicle right back to the factory ride height to help improve our steering and braking performance. Here, you'll see us doing the Inaudible 00:03:02 before the airbags are installed. You got a lot of roll side to side and a lot of shifting. As we go around the corner, we're going to start the alternating speed bump.
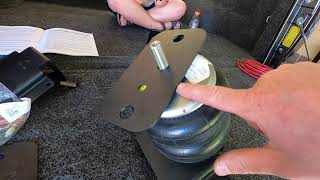
You should see how the truck's shifting and moving and watch the bounce once we get on to these solid speed bumps. They're really going to be moving up and down quite a bit. With the springs installed, we're going to take the same course with about the same speed and the same load in the rear. As you can see now as we do the swallow, we have a lot better control. These helper springs are really helping out the handling characteristics of the truck and we don't have near as much body roll as we did before. Now check it out as we go through the bumps, really helping out that rear suspension, making sure we're not putting undue stress on it. It's really eliminating a lot of that up and down movement that we saw before without the springs installed. Let's start by getting our airbag assembled for you. We're going to take our upper mounting plate and the oblong hole will be positioned over the larger hole that we have and then as you see there, just kind of maneuvering it around a little bit will get our appropriate holes lined up. This one's going in the driver side of the vehicle. The passenger side of the vehicle, we'll use the other two holes that you see there. These are just a flat top screw or a flat top bolt, take an Allen Key and we're going to torque these down to the specified foot pounds. It's in the manual. We've done that before we added our 90 degree swivel. I found that if we do that after, our Allen Key, as we turn it wants to hit the swivel each time. We can now take our 90 degree fitting; we're going to thread that in. It's got thread locking ta