etrailer | Air Lift LoadLifter 5000 Air Helper Springs Installation - 2014 Ford F-150

Click for more info and reviews of this Air Lift Vehicle Suspension:
https://www.etrailer.com/VehicleSusp...
https://www.etrailer.com
Don’t forget to subscribe!
/ etrailertv
Full transcript: https://www.etrailer.com/tvinstalla...
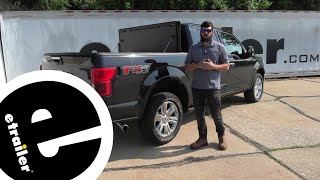
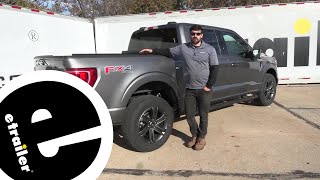
Today on our 2014 Ford F150 we'll be installing the Air Lift LoadLifter 5000 Air Helper Springs, part number AL57200. The Air Lift LoadLifter 5000 Springs will help you maintain the factory ride height when you have up to 5000 pounds of weight in the bed of your truck. You do not want to exceed the manufacturer's recommended weight limit on your vehicle. When you have the airbags installed, they will help reduce tire wear on your vehicle and help maintain braking ability. When your vehicle is sitting level, your brakes work properly. They will also help maintain stability of your truck while you're driving down the road and help maintain your headlight aiming so you don't blind the vehicles coming to you. They have adjustable air pressures that range from five to 100 psi. All right, so here's what our air bag kit looks like installed on one side of our vehicle. We're on the passenger side here, for reference.
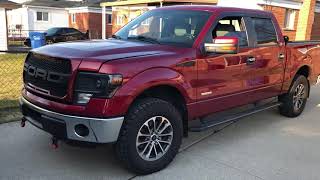
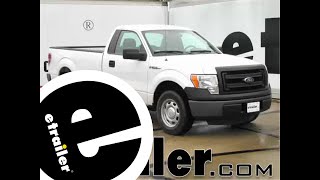
We are missing our heat shield. We have yet to install that, but we just wanted to give you an idea of what our airbag looks like once we have it all put together and bolted on to the vehicle. One nice thing about this Air Lift kit that we have here today is the fact that it will work with some versions of gooseneck hitches. As you can see, we have our brackets right here for our gooseneck hitch, and there's plenty of clearance between our upper frame bracket for our airbag that does not interfere with the gooseneck at all. Okay, we're gonna start off our installation by getting a couple measurements here of our truck at factory ride height with factory suspension and no weight in the bed just so we have a reference point to compare it to once we have weight in it and once we have the springs installed. So, through the center line of our rear wheel to our fender, we're right at 39.5", so we'll keep that in mind. We'll compare the front too.
We're right at 37.5" in the front. So we'll write these numbers down and we'll have them as a comparison. Now we're gonna put some weight in the bed of the truck and see what the numbers change to. Okay, now we have a fair amount of weight in the bed of our truck. We'll retake our measurements. So we've dropped down 3.5".
In the front we rose about an inch. Okay, with our airbags inflated up to about 65 psi, and our weight replaced back in the bed of our truck, we'll double check our measurements and see if we're at factory ride height again. We're sitting right at 39.5" in the rear, so we regained the distance that we'd lost when the weight was added, so our truck is now sitting like a factory suspension truck with no weight in the bed. Now our front is about 37.75", so it's very close to where it was before on a factory suspension with no weight added. Now we'll show you what it looks like on our test course. On the left side of your screen you will see what it's like going down the test course with a load with the factory suspension. As you notice, when we go over bumps how unstable it is and when we're going around corners, you can see how much body roll there is and how unstable it is as well.
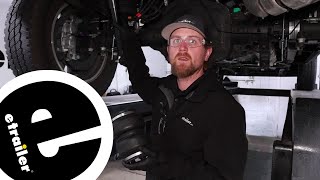
On the right side of the screen you'll see what it looks like with the airbags installed. As you'll notice, there is much more stability around corners, less body roll, less jostling when we're going over bumps, and it provides a much smoother ride, also while maintaining our heavy load in the bed of our truck, giving us a factorylike ride, not knowing that the weight is back there. Okay, here's what our kit consists of. Right here is our heat shield, which will go for the passenger side. We have two clamps to attach it and the heat shield itself. Here's all of our frame bracketry that attaches our spring, our spring itself, our two cups that the springs sits into, our hardware to attach it all. We have our hose, which already has our fittings onto it to connect with, our attachment hardware for the hose, these will thread onto our fill fittings and we can use these to attach them on any flat surface on the vehicle we like. Most of the time we go by the license plate and the back bumper. We have a couple zip ties to help secure our air line tubing, and we have some heat sheeting here to go over our air line to help protect it by any place where it comes close to the exhaust. Now that we've gone over what's included, we'll show you how to install the driver side in our vehicle. Okay, we'll take our one bracket here, this is the lower bracket that wraps around our axle, we'll take this plate, stick it over the studs. We'll take two flat washers, install them and two nylon locknuts, tighten these down a little