Ep. 101 GROUTING u0026 FRAMING 'GLORY' and Cutting Feather Cuts for the Commissioned Sunflowers!

Ep. 101 GROUTING & FRAMING "GLORY" and Cutting Feather Cuts for the Commissioned Sunflowers!
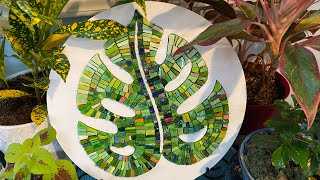
Let's talk about grouting and grouting decisions! Why use color? Why use black? Why use more than one color? Using Polyblend Plus in Bright White grout and Colorants brand grout colorant, I mix a custom blend, then split it and make one darker and one more yellow. I like to mix the colorant in a soupy blend because it is easier to stir. Then I add more grout and adjust the color as needed. Using the NO TAPE method, I blend the colors and start grouting the petals! I move out from the beada and in from the edges of the petals to limit the spread of the grout. Then I carefully wipe off excess and use my vacuum to keep everything tidy.
A big old bead was knocked out and I do a quick repair job with E6000. A few drawbacks to the nontape method includes a bit of orange getting where I don't want it, so I scrape some of that out. Then Mapai Sanded Kericolor in Black. I mix it on the thick side so it is easier to manage with the NO TAPE method. Now as I apply it, I move away from the petals. The trickiest areas are those surrounded by petals! I grout right up to the frame, then wipe off excess and wait for it to haze over before buffing it off and using the vacuum again!
9:33 minute mark CONFESSION TIME: I procrastinated and have to tackle the frame in the wrong order! Do NOT recommend! Fix the frame first then grout!
First I tape off the edge. Then using Rub N' Buff in black, I start applying it and then buffing it....OH NO! Things don't seem to be working out. I go back and sand the stupid frame (at this point I feel like it's more work than I bargained for.) This time, I wait a bit before buffing and it looks GORGEOUS!!! I do a test of my three gold Rub N' Buff options and end up choosing a rich, deep gold called Grecian Gold to tie into the yellow of the sunflowers. I tape off the next area, sand it down and apply the Grecian Gold. Then I wait and give it a good buff! It looks great so far! Last step is to tape the bottom off and apply the black, wait and buff. FYI: This process took an entire day, with all the taping, sanding, applying, waiting and buffing! Highly recommend Rub N' Buff to refresh and old frame! WHEW!
Then I show how I put the mosaic into the frame using metal tie plates and metal strap ties on the corners to hold it in place. This will allow the frame to be swapped out if needed! I use 5/8" screws to screw down the metal ties. After eight weeks of working on this mosaic, I hang it up and admire it for a bit! Then I talk about why I entitled the mosaic "Glory."
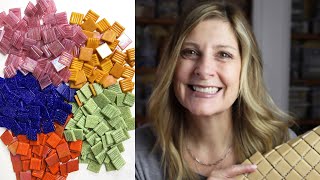
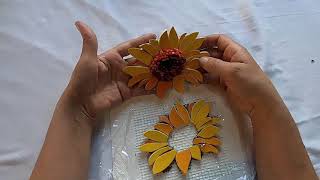
Finally I tackle the sunflower commission. I test the colors I've used before and then I add a deeper brown glass to the palette for more contrast and depth. I show how to cut feather cuts for mosaic out of stained glass and start building an inventory of pieces to pull from. Then I start in on the petals, making a bit of progress on the dark areas and laying in a few yellow petals.
WATCH NEXT:
Ep. 81 THE MOSAIC DRAGONFLY GETS HIS WINGS & lots of mosaic animals! • Ep. 81 THE MOSAIC DRAGONFLY GETS HIS ...
COME SAY HI:
Instagram: / mazzonimosaics
Facebook: https://www.facebook.com/profile.php?...
Pinterest: / _created
Website: https://mazzonimosaics.webs.com/
ONLINE SHOPS:
Etsy: https://www.etsy.com/shop/MazzoniMosaics
Fine Art America: https://fineartamerica.com/profiles/j...