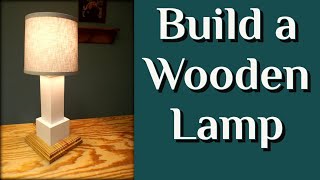
DIY Wooden Tripod Table Lamp ~ DIY Woodworking

How I made a pair of wooden tripod table lamps using some Oak offcuts and a DIY lamp wiring kit from eBay. Really elegant and perfect design for you bedroom or living space. Links to tools/materials below
TOOLS/EQUIPMENT
If you are interested in the tools and equipment I use in this video you can find all the information you need here: https://kit.co/mikeparsonscc
You might also like my video on making DIY Wood Coasters to go along with these! Check it out here: • How to Make Easy DIY Coasters ~ DIY W...
You can find the lamp wiring kit I used on eBay here: https://ebay.us/hpKmzO
Enjoy this build? Let me know in the comments below and subscribe if you want to see more!
SOCIAL MEDIA/BEHIND THE SCENES
If you want to see more of what I do check out my content here: https://linktr.ee/mikeparsonscc
BUILD PROCESS
This build started with cutting out a hand drawn sketch of the leg design and making an MDF template on the bandsaw. This was refined with a hand plane and sanding.
Then using some Oak offcuts I traced the template and cut out the rough shapes of the six legs on the bandsaw. I attached each leg to the template, using the masking tape and CA glue method, and using my homemade router table (and a hand plane when things got a little scary) trimmed everything back to its final shape.
I made a quick temporary jig on my table saw cross cut sled to ensure each leg was cut at the same matching position and angle, and ran all six through.
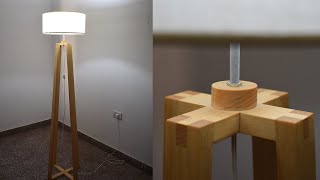
I created the center triangle pieces for each lamp out of a left over piece of Oak using the table saw and MicroJig push block to make this awkward cut as safe as possible.
All the legs were glued onto the center pieces one at a time using masking tape as a clamp because the shapes were very difficult to get clamps on.
Once everything was dry I created some DIY wood filler using Titebond II wood glue and some leftover Oak sanding dust and filled any gaps I could, before using a chisel and sandpaper to flush things up.
I then took the lamp bases over to the drill press and used the longest drill bit I could, that still fit between the base and the drill chuck, to drill a hole through for the wiring. This hole was then made slightly wider at the top to accommodate a slightly larger diameter brass tube.
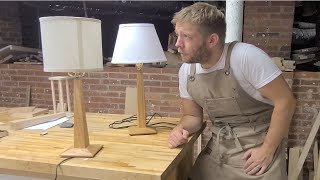
The bases were then finished with 3 coats of OSMO Polyx Satin Clear.
In order to keep the brass tubes as straight and vertical as possible I used a bit in the drill press to keep it all aligned while I screwed it into the Oak using some pliers. This actually worked really well and I will use the technique again!
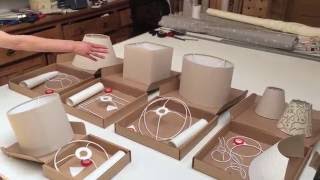
Then it was just a case of adding the bulb holder and wiring the lamps up. A couple of nice small drum lampshades later, and the build was done!
#diylamp #modernlamp #tablelamp