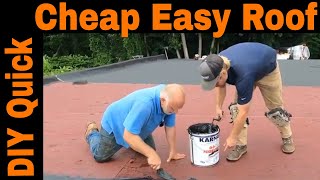
Cheap Flat Roof Install DIY - Last 30 year - Self Stick Rubber Roof Installation - Flashing Detail
How To install a Cheap Rubber Flat Roof that will last over 30 years. This video is handy when you have a slightly slanted roof, garden shed, car garage, portico, front entrance, and pet house that needs a roof. My wife and I teach you how to install roll roofing in a few easy steps. Links to followup videos are below This is for anyone, male or female, to learn.
With new products on the market for flat roofs, it has become easy for any handyman or homeowner to install a flat roof himself.
Part 2 How to Install Door Pan and Skylight Flashing • Cheap Easy Flat Roof Install Part 2: ...
Part 3: How to install Post, Vent, Shingle, and Wall flashing • Cheap Easy Flat Roof Install Part 3: ...
To repair leaks on an EPDM Rubber Roof, watch this • Why EPDM Rubber Roofs Leak and How to...
1. Easy cheap, but a quality roof that lasts over 30 years
2. Anyone, young or old, can do it with no experience ( Best if 2 people do it)
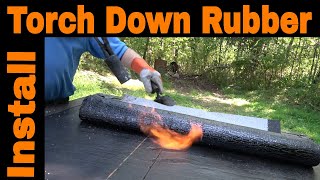
3. Tools Under a $100 Utility knife, trowel, measuring tape, and propane torch ($30)
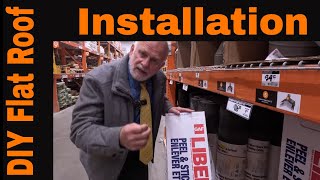
4. Materials: Peel and Stick Cap Sheet + Base ( Liberty, MuleHide) Spray Primer, Turbo Poly Seal + Fleece
5. Suppliers: ABC Building Supply, Beacon Building Supply, Home Depot(sometimes)
5. Temperature: above 40 degrees ( not critical)
FTC Affiliate Disclaimer I get commissions for purchases made through links in this post.
Links to Suppliers:
A. Turbo Poly Seal and Fleece Bergstrom Industries
B. 1. Liberty Peel And Stick Home Depot
2. TRIBUILT SA SBS Cap Sheet
3. MuleHide ABC Supply
C. Torch
D. Utility Knife Home Depot
Easy and cheap Install a Flat Roof with flashing on a door, railing post, wall, shingle roof, and bathroom vent. This detailed video shows everything there is to learn about installing your own flat roof.
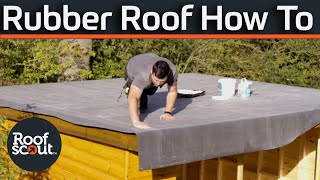
Steps on how to install a Peel and Stick Rubber Roof:
The peelandstick method for installing a rubber roof involves using preadhesive backing on the rubber roofing material, eliminating the need to apply adhesive separately. Here are the general steps for installing a peelandstick rubber roof:
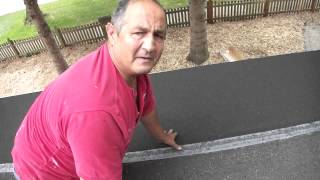
Clean the roof surface: Ensure that the roof surface is clean, dry, and free of debris. This will ensure that the rubber roof adhesive adheres appropriately.
Measure the roof: Measure the roof surface to determine the amount of peelandstick rubber roofing material you need. It's essential to order enough material to cover the entire roof surface, including any overhangs or edges.
Cut the rubber roofing material: Use a utility knife to cut the rubber roofing material to the appropriate size and shape for your roof. Be sure to leave an extra inch or two of material around the edges for trimming and final adjustments.
Remove the backing: Starting at one corner of the roof, peel off the backing from the rubber roofing material. Be sure to peel off only a tiny section of the backing at a time, and work in small sections to ensure the material is aligned correctly.
Lay the rubber roofing material: Carefully lay it onto the roof surface, ensuring it's centered and straight. Press firmly on the material to ensure it adheres to the roof surface.
Trim and adjust the edges: Use a utility knife to trim any excess material from the roof's edges. Be sure to leave a slight overhang of material around the edges, which you can trim later for a more precise fit.
Repeat for remaining sections: Continue working in small sections, peeling off the backing and laying the rubber roofing material until you've covered the entire roof surface.
Finish the edges: Once the entire roof is covered with rubber roofing material, trim any excess material from the edges and use a sealant to seal the edges and gaps around the roof penetrations, such as vents or chimneys.
With these steps, you can successfully install a peelandstick rubber roof. However, if you're not confident in your DIY skills or your roof is particularly complex, it may be best to hire a professional roofing contractor to handle the installation.
Chapters:
0:00 Flat Roof install Part 1
1:34 Requirement
1:56 Materials needed
3:48 Installing the Base
9:00 Disaster Struck
12:20 Installing a Drip edge
16:46 Installing the Cap Sheet
29:38 Securing Flashing on wall
#flatroof #flatroofinstall #selfstick #rollroofing